
 Accounting
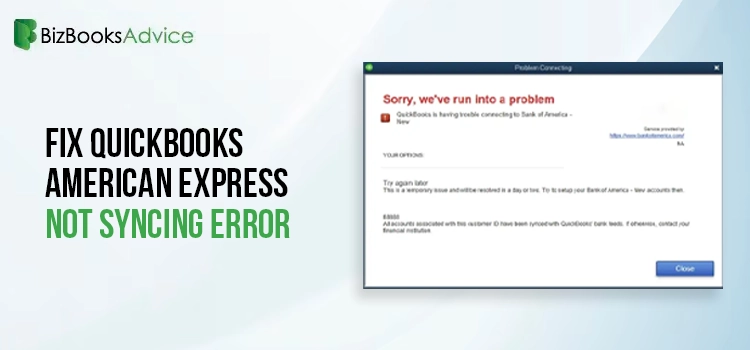
Synchronizing the American Express bank account with QuickBooks, enables the automatic recording of the transactions. As a result, it might reduces the workload of manual data entry. Moreover, it also saves time and keeps the financial records accurately. However, at times, users strike with QuickBooks American Express not syncing issues during the reconciliation of the transactions.
Unfortunately, American Express’s Issue with not syncing with QuickBooks prevents users from downloading the latest bank transactions. In this guide, we have mentioned all the possible causes along with simple troubleshooting solutions to fix the issue.
What is QuickBooks American Express Not Syncing Error?
At times, the users might get stuck with the QuickBooks American Express Not Syncing error because of the latest changes to the security and data connections between Amex and QuickBooks. Due to this, it imposes strict limitations on data access for security reasons. Whenever this issue comes up, it gives the error message that states
“We’re working with American Express Business Credit Card (US) to fix your connection.”
Top Reasons QuickBooks Not Syncing with American Express
For numerous reasons, users might come across QuickBooks not syncing with American Express issues. Below, we have discussed all the possible causes for both the QuickBooks Online and Desktop versions.
For the QuickBooks Desktop
- Automatic bank feed updates might disrupt QuickBooks and American Express’ connection.
- Internet Connectivity issues may also prevent the users from manually updating the bank feed.
- Another reason may be an outdated financial institution directory.
- The financial institution you are trying to link with QuickBooks Desktop is incorrect.
For QuickBooks Online
- Storage of unnecessary cookies and browsing history might stop you from downloading the latest bank transactions.
- The web browser you are presently using isn’t compatible with QuickBooks.
- In other cases, the issue may arise due to the interruption of third-party security applications.
- Sometimes, interruptions occur due to notifications, alerts, warning messages, or security updates from the bank website obstructing transaction downloads.
Fix American Express Not Syncing with QuickBooks Issue
In this blog post, we describe the troubleshooting solutions to fix American Express not syncing with QuickBooks on both Desktop and Online versions. Let’s go through the solutions closely and resolve the issue quickly.
Case 1: Fixing QuickBooks Desktop American Express, not syncing issue
Herein, we have discussed the solutions for the QuickBooks Desktop American Express, not syncing issue.
Solution 1: Updating the Connection Between QB Desktop & American Express
Before moving forward with the steps, it is essential to reconnect the accounts with Online banking services and then check the affected AMEX accounts, as given below.
Steps to implement while using American Express version older than 03/30/2023
- Pick the American Express Card QBDT In Bank Feed setup for your credit cards Charge Card, or Checking accounts.
- Opt for the American Express Delegate from the Bank Feed Setup option under the cases given below.
- Herein, you can link your account with Intuit’s products only if you are a delegate user and non-account holder with proper authorization.
- You can also link an account other than a credit card, charge card, or checking account.
- Herein, you can link your account with Intuit’s products only if you are a delegate user and non-account holder with proper authorization.
After successfully reconnecting the account, you must follow the instructions below. Later, you can switch to Express Web Connect.
First Step: Get Ready to Move QBDT to Express Web Connect
Herein, we have provided step-by-step instructions on transferring to Express Web Connect.
- Initially, launch the QuickBooks Desktop application and move to the File menu.
- Afterwards, choose the Utilities option and then hit the Switch to Single-User Mode.
- In the next step, select the Company tab, pick the My Company tab, and click “Sign In to Intuit” if you haven’t already.
- Now, you must remove if there is any pending online payments and checks.
- Finally, mention and then tally the previously downloaded bank transactions.
Second Step: Disable All Bank Feeds For Your Account
It is necessary to turn off all the related accounts to verify that there are no further discrepancies. To disable it, verify that you link or remove all the downloaded transactions for all the accounts.
QuickBooks Desktop for Windows
- First, select the Lists menu and hit the Charts of Accounts option. Then, right-click the account you need to turn off.
- After that, you must opt for the Edit Account tab and move to the Bank Settings.
- Thereon, pick the Deactivate all online services option and then the OK tab.
- Finally, you must choose the Save & Close tab to confirm the changes made.
QuickBooks Desktop for Mac
- Initially, choose the Charts of Accounts option from the Lists menu.
- Afterwards, you must highlight the account and click on the Pencil icon to make the changes.
- Soon after this, select the Online Settings tab and then pick the Download Transactions.
- Now, switch to the Not Enabled option and then click OK to save the necessary changes. Later, click on the OK tab again to complete the entire process.
Third Step: Setting Up an Account in QB For Bank Feeds
The following are the proper stepwise instructions for setting up an account in QuickBooks Desktop to download bank transactions.
- First of all, choose the Bank Feeds option available beneath the Banking menu. Then, tap on the Set Up Bank Feed for an Account option.
- After this, mention the name of your financial institution and then move further.
- When the Login page open up, mention the correct Intuit ID and password.
- On that screen, tap on the Connect option, and the QB will instantly link it to the bank’s server. You may also be prompted to mention the OTP here.
- Now, you have to pick the account that you wish to link with the QuickBooks. Later on, opt for the Connect and then the Close option.
Read More- Fix QuickBooks Bank Error 105
Fourth Step: Opt For the Express Web Connect & then Download Transactions
Now, you can download the transactions through Express Web Connect. This means that whenever you access the bank feeds option, you can easily download the latest transactions automatically.
- Primarily, choose the Bank Feeds tab from the Banking menu.
- After this, you must select the Bank Feeds Center tab and select the account you wish to download. Later, simply select the Download Transactions option.
- When you are done completing the process, opt for the Transaction List option to process the transactions.
- Finally, try running QuickBooks once again. Then sync American Express with QuickBooks.
Solution 2: Review The Main Website of Your Financial Website
In certain instances, users may observe a QuickBooks American Express not syncing error when the server is down. Therefore, to fix the issue, it is necessary to verify that the financial institution is correct. For that, carry on with the following procedure.
First Step: Linking Of the American Express Bank Account
- Initially, verify that you use the correct QuickBooks URL to link to American Express. Then, you must open up the QuickBooks Desktop application.
- After that, shift to the Bookkeeping section and opt for the Transactions option.
- Next, go with the Bank Transactions tab and click the Link Account tab for linking with the bank. Herein, you only require an account, so you have to mention an account with your bank to link them.
- Now, move to the American Express option and copy the URL from your bank’s website. Later, log in again using the same URL.
Second Step: Look For the Pending Alert Messages & Security Requirements
Once your account is successfully linked with QuickBooks, you can review if there are any pending notifications or alert messages.
- Primarily, visit your bank website and verify there are no unread alert messages or notifications.
- After that, look for any display issues. If you notice any, QuickBooks might stop downloading the transaction from the bank website.
- Now, you also have to look for messages regarding the latest launch of security requirements. If you find any, have a look at these announcements and alert messages and start downloading the transactions.
Learn More – Best Way to Migrate From QuickBooks Desktop To Online
Third Step: Updating Of the Bank Feeds In QuickBooks
The last step in the process is to refresh the bank feeds in QuickBooks Desktop. Use the steps written below to successfully update the bank feeds.
- The first step is to switch to the Bookkeeping section and then click the Transactions option.
- Afterwards, opt for the Bank Transactions menu and tap Refresh.
- After completing the above steps, you can easily sync your American Express account with QuickBooks.
Solution 3: Begin Updating Your Financial Institution Directory
To verify that you have the most up-to-date information regarding your bank, it is essential to update the Financial Institution Directory (FiDir).
First Step: Start Setting Up Automatic Updates For FiDir in QuickBooks
- Initially, move to the QuickBooks Banking menu and click the Bank Feeds option.
- After that, select the Bank Feeds Center and hit the Refresh Accounts tab. Alternatively, you can choose to Sync for all this bank by clicking the drop-down menu.
- As a result, it will automatically set up updates for your Financial Institution Directory.
Second Step: Updating File Location For Each QB Version Manually
- Start searching for the fidir.txt file from your system using the path below.
- QB Enterprise- C: >> ProgramData >> Intuit >> QuickBooks Enterprise Solutions XXXX >> Components >> OLB >> Branding >> filist.
- QB Pro/ Premier – C: >> ProgramData >> Intuit >> QuickBooks Enterprise Solutions XXXX >> Components >> OLB >> Branding >> filist.
- Afterwards, you must right-click on the fidir.txt file, hit the Rename option and switch .txt to .old.
- Now, click outside the field to save the changes and pick the QuickBooks version to obtain the file.
- You must save the file on your desktop and right-click the file name as fidir.txt.
- From there, switch to the Copy option and launch the files folder. Later, right-click anywhere in your folder and hit the Paste tab.
- Finally, shut down and try to open the QuickBooks Desktop once again.
Case 2: Solutions to Fix American Express Syncing Issues in QuickBooks Online
Go through the solutions given below to troubleshoot American Express Syncing issues in QuickBooks Online.
Solution 1: Reconnect Your Amex Business Account in QBO
Follow the steps below to reconnect your Amex Business account in QBO.
First Step: Disconnect Your American Express Account
To disconnect the American Express Account, you must follow the steps below.
- Initially, move to the Transactions menu and click the Bank Transactions option.
- After this, mark the blue square for each American Express account.
- Thereon, hit the Edit icon and opt for the Edit Account Info tab to access the Account window.
- Furthermore, make sure that the checkbox “Disconnect this account on save” is marked. Then, click Save and click the Close option for confirmation.
Second Step: Try Connecting Your American Express Account Again
To connect the American Express Account again in the QBO application, you must continue with the steps below.
- In the first place, move to the Transactions menu and opt for the Bank Transactions option.
- Now that you have previously linked with the bank account hit the Link Account tab. Later on, you must start searching for the accounts depending on the American Express account user type:
- For instance, if you are a primary account holder, go with the American Express Business Credit Card & Checking option.
- On the other hand, if you are a delegate user on a card account, simply select the American Express (Delegate) option.
- Initially, opt for the Continue tab and sign in with the accurate American Express User ID and password. Then, follow the on-screen guidelines to complete the process.
- After that, pick any one of the accounts that you wish to link with the QuickBooks Online application.
- Now, select the account type by clicking the drop-down menu next to each selected account. Later, choose the Date Range option for the download.
- Finally, choose the Connect tab and allow the account that you wish to connect again with QuickBooks Online.
Solution 2: Start Looking for the Latest Notifications & Security Requirements
At times, the problems at the end of your bank might give rise to the syncing issues in QuickBooks Online. For that, your financial institution needs you to complete the entire registration. Later on, you can refresh the connection between American Express and QuickBooks. Read the steps below to check the notifications.
- In the initial step, move to the QuickBooks Banking section and then opt for the Edit menu.
- Afterwards, choose the Edit Sign-In tab and then update the info to apply the necessary changes.
- Once you have updated the information correctly and checked the notifications, try running the QuickBooks Online application again.
Solution 3: Upload the Transactions in QuickBooks Online Manually
If the above solution doesn’t work, try uploading the transactions in QuickBooks Online manually by performing the instructions given below.
First Step: Start Seeking For the Oldest Transaction Date
Initially, you have to pick the start date from where you wish to download the transactions in QBO.
- Initially, choose the Charts of Accounts option from the Settings tab and start looking for the account to which you wish to upload the transactions.
- Afterwards, select the View Register tab and look for the oldest transaction. Then, start writing the date in the Word Document.
Second Step: Begin Downloading the CSV Files To Download Transactions From Your Bank
- Initially, you must login to your bank or credit card website with the correct login details.
- After this, follow the instructions on the screen to download the transactions, as guided by your bank.
- Now, you must look for the date range to download, which must be one day before the date of your oldest transaction.
- Thereon, download the transactions and save the file to a location from where you can access them easily.
Related Blog- Import Credit Card Transactions Into QuickBooks
Third Step: Start Checking For the File Size & Format
Verifying that the downloaded files are in the proper format before uploading them is necessary.
- Before starting the process, verify that the file size isn’t more than 350 KB. If the file size exceeds, shorten the date range and then try downloading the transactions in smaller batches for large file sizes.
- After that, erase zeroes from the file and ensure that you leave the cells blank.
- Thereon, fix the transactions which are present within the Description column.
- Now, delete the “amount” from the Credit or Debit column header.
- Also, it is necessary to verify that all dates follow the same format as suggested.
- If you are a Mac user, then be sure to save the file as a Windows CSV file.
- On the other end, if your bank mentions the day of the week in the Date column, you must split the date and day of the week into two separate columns.
Fourth Step: Uploading of the Bank Transactions Manually
To upload the bank transactions manually, follow the instructions below.
- Initially, move to the Transactions menu and click the Bank Transactions tab.
- After that, tap on the Link Account drop-down menu and hit the Upload from file option.
- Thereon, you must opt for the Drag and Drop or select files.
- Now, pick the file that you wish to download from your bank and opt for the Continue.
- Follow the on-screen instructions to tally the columns on the file to the appropriate fields. Later, click the Continue option and choose the transactions that you wish to import.
- Finally, select the Continue tab, click the Yes option, and then click the Done tab to complete the process.
Fifth Step: Categorize & Reconcile the Accounts
After entering all the transactions in QuickBooks, it’s high time to match and categorize them. After checking the transactions, they will appear in the books of accounts.
Solution 4: Try Linking QuickBooks American Express Using Private Browser
In other instances, you can also log in to the QuickBooks Online application using the Incognito window. As a result, it will not store any cache or browsing history, which may prevent you from syncing American Express with QB. The following are the shortcut keys you can use to access the Incognito window.
Google Chrome –
Windows- Ctrl + Shit + N
Mac- Command + Shift + N
Mozilla Firefox-
Windows- Ctrl + Shift + P
Mac- Command + Shift + P
Apple Safari-
Ctrl + Option + P
Microsoft Edge-
Windows- Ctrl + Shift + P
Mac- Command + Shift + P
Solution 5: Remove the Browsing History or Cache Files
You can also eliminate the QuickBooks American Express not syncing issue by deleting the browsing history. This will clear the storage space and allow you to sync American Express with QuickBooks easily.
Also Read- Sync Outlook Contacts with QuickBooks Desktop
Here’s How to Connect AMEX Account to QuickBooks Online
Below, we have provided the complete process for connecting the AMEX account to QuickBooks Online.
First Step: Establish an American Express Account in QuickBooks
- Primarily, click on the Settings menu and hit the Charts of Accounts option.
- After that, choose the New option to generate an account.
- Now, tap on the Account Type drop-down arrow and pick the Credit Card or Deposit Account.
- Thereon, you must provide a new name for your account.
- When you are done making all the essential changes to the account, pick the Save and Close tab.
Second Step: Connect Your American Express Business Card or Checking Account
- Primarily, move to the Transactions menu and click the Bank Transactions option.
- After that, if you are linking an account for the first time, hit the Connect tab. Otherwise, if you have already linked online banking accounts, hit the Link Account tab.
- Now, start looking for any of the following accounts per the American Express user type.
- Primary Account Holder– You must opt for the American Express Business Credit Card & Checking (US) option.
- Delegate User on a Card Account– The users must go with the American Express (Delegate) option.
- Primary Account Holder– You must opt for the American Express Business Credit Card & Checking (US) option.
- When all the changes are done, hit the Continue tab.
- Use the correct login details to access the American Express account. When asked to complete the additional security steps, follow the on-screen guidelines carefully.
- For every account, pick the account type from the drop-down menu. Make sure you pick the same account that you created in Charts of Accounts.
- After this, pick the date range that you want to download and hit the Connect option.
- Once you connect your American Express account with QBO, you can easily download the transactions, which removes the stress of entering data manually.
Here’s How to Connect AMEX credit card to QuickBooks Desktop
In this blog section, we have given the complete instructions on connecting the AMEX credit card to QuickBooks Desktop.
- Open the QuickBooks Desktop and look for the option to link your bank or credit card account.
- After this, opt for “American Express’ option from the list of available financial institutions.
- Thereon, mention the login credentials to enter the AMEX account.
- Now, complete the verification process to proof your identity.
- Next, follow the instructions on the screen to link the AMEX account to QuickBooks.
- Finally, start downloading the transactions once the bank account is linked.
Conclusion
We hope that you have read this post and have enough information to resolve the QuickBooks American Express not syncing issue. If you are still having any doubts, connect with our QB professionals and find the right assistance. The professionals will listen to your issue patiently and guide you in the best possible manner to rectify the issue.
