![How to Resolve QuickBooks Error Code195? [Expert’s Tips]](https://www.bizbooksadvice.com/wp-content/uploads/2023/05/QuickBooks-Error-Code-195-672x372.webp)
Isn’t it frustrating when you try to create a backup of your QuickBooks company file but fail to do so? Are you wondering why are you getting this error continuously? Well, the reason is QuickBooks Error Code 195. The users might end up with this issue due to the incorrect settings of operating system files.
However, damage in the Windows Registry or the program files can also be responsible for QuickBooks Error Number 195. Therefore, it is crucial to overcome this issue immediately to continue your ongoing task hassle-free. Furthermore, read this post thoroughly and grab simple hacks to rectify the error swiftly.
QuickBooks Error Code 195 is indeed a complicated error to tackle. Worry Not!! Please consult with our professionals anytime at +1-866-408-0444 and receive exceptional advice to deal with the same.
Reasons Why Users Experience QuickBooks Company File Error 195
It is important to know about the root causes that instigate QuickBooks Company File Error 195 to avoid it in the future. So, we have listed some of the possible root causes below to keep you informed. Read all of them carefully.
- You might receive QuickBooks Pro Error 195 while using the obsolete and corrupt Windows Registry Entries.
- Having a bank feed connection with an incorrect account or routing number listed might be one of the reasons.
- Sometimes, the error may trigger when some important QuickBooks components and files are damaged due to malicious infection.
- Another reason may be using an inadequate internet network connection.
Signs and Symptoms Observed on the Arrival Of QuickBooks Error 195
The following signs and symptoms will help you identify QuickBooks Error 195. Go through the pointers carefully to get a better understanding.
- The users may face issues while creating their QuickBooks company file backup.
- Your Windows Operating System starts performing badly and begins to freeze frequently.
- The QuickBooks Error Code 195 will be displayed with the description of an error message.
- You might observe that your QuickBooks application starts freezing or crashing.
Pre-Measures to Overcome Error 195, 0 in QuickBooks
Here are the following tips that you must know before fixing Error 195, 0 in QuickBooks.
- The QuickBooks Desktop version you are operating is up-to-date.
- Scheduling a backup of the QuickBooks company file is necessary to protect your data before it gets lost or damaged.
- Your system is well connected with a good internet connection.
- Verify that your system meets the system specifications to run QuickBooks seamlessly.
Read More- QuickBooks Unrecoverable Error: How To Get Rid Of The Issue?
Effective Measures to Eliminate QuickBooks Error Number 195 Smoothly
Getting expert-recommended tips at the correct time could be beneficial in dealing with these complicated issues. Considering this, we have listed some expert tips to help you instantly overcome QuickBooks Error Number 195. Let’s go through all the methods and fix the issue within least time possible.
Measure 1: Move Back to The Preceding Restore Point
The users might result in QuickBooks Error Code 195 due to the damage or corruption in the Windows components. So, to overcome the issue, the users must return to the earlier restore point before the error occurs. For this, you must apply the steps in the same manner as listed below.
- Primarily, open your computer and access the accurate admin details to enter your device.
- Afterwards, press the Windows key and navigate to the Programs option, followed by Accessories.
- Go to the System Tools option and then pick the System Restore Point.
- Consequently, you will see a Replacement window on your screen. Click “Restore my laptop to an earlier time” in this window and press the Enter key.
- Select the “Restore system to an earlier time” option from the “On the list” option.
- Afterwards, tap the Restore Point List option and hit the Next button.
- Now, within the Confirmation window, you must give your confirmation and restart your device after completing the restoration.
Measure 2: Get the Latest Updates of QuickBooks Desktop Manually
Using the updated QuickBooks Desktop version might resolve half of the issues in QuickBooks. So, to fix the QuickBooks Error Code 195, you must verify that you are using the updated version of the application. Furthermore, perform the steps described below to install the latest QuickBooks updates.
- Initially, tap the QuickBooks Help menu and select the Update QuickBooks Desktop option.
- Move to the Options tab and click the Mark All tab, followed by the Save button.
- In the next step, mark the “Reset Update“ checkbox.
- Once everything is set, tap the Get Updates Option and relaunch the system to install the updates.
Measure 3: Configure The Damage in Your QuickBooks Program Files
Review the steps below to repair the damage in your QuickBooks Program files.
- To Commence with, open the Control Panel by typing the same in the search column of the Start menu.
- After this, navigate to the Uninstall a Program option and click the QuickBooks Desktop.
- Now, you must hit the Repair option to open up the Repair Utility on your device.
- Furthermore, relaunch your system and then try opening the QuickBooks application again.
- If the QuickBooks Error Code 195 still occurs, apply the next troubleshooting method to resolve the issue.
Measure 4: Novice System User Resolution (Fully Automatic)
- Begin the process by installing the updated QuickBooks Repair Utility tool on your device.
- In the next step, install the tool properly by performing the steps instructed on the screen.
- Thereon, hit the Scan button to scan for errors while operating QuickBooks.
- Once the scanning process ends, click the Fix Errors option and let the tool fix the issue. The users have to wait until the tool completes repairing the issue.
- End the process by restarting your system to apply all the Changes and Repairs.
Measure 5: Take Help of the Verify and Rebuild Data Tool
The users must perform the below steps to repair the damaged company file data via the Verify and Rebuild Data Tool. Thus, it would help in resolving the QuickBooks Error Code 195.
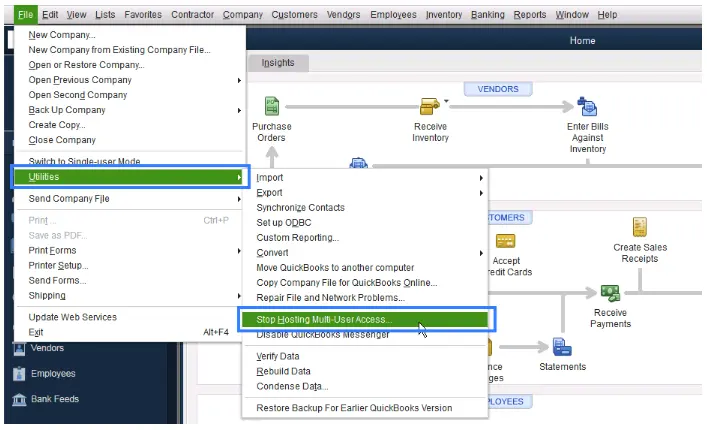
- Commence the process by opening the QuickBooks Desktop application and then go to the File menu.
- Choose the Utilities option and then click the Verify Data option to proceed further.
- Thereon, hit the OK button to commence the scanning process.
- For instance, if the tool finds any issue, you will see the message stating: “The data failed the integrity check.” However, if you receive the error message on the screen, hit the Rebuild the File option.
- Once again, click the Utilities option and then the Verify Data option.
- If you find any problem with the data verification, use the Rebuild Data option to fix the issue.
To Summarize The Above!!
Through this post’s help, we hope you can easily deal with QuickBooks Error Code 195 without making much effort. If you don’t find the above solutions helpful, consult with our experts at +1-866-408-0444 or via live chat for quick resolution. They will help you resolve the error so you can regain the smooth functioning of the QuickBooks software.
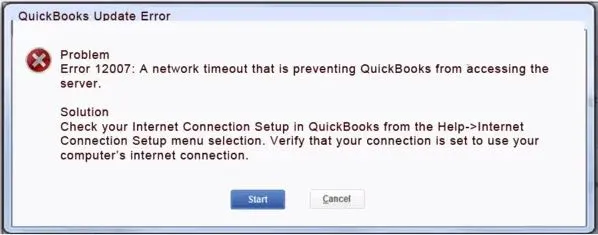
![How to Rectify QuickBooks Error 12007? [Easy Methods]](https://www.bizbooksadvice.com/wp-content/uploads/2023/06/Proven-Steps-to-Fix-QuickBooks-desktop-error-12007-672x372.webp)