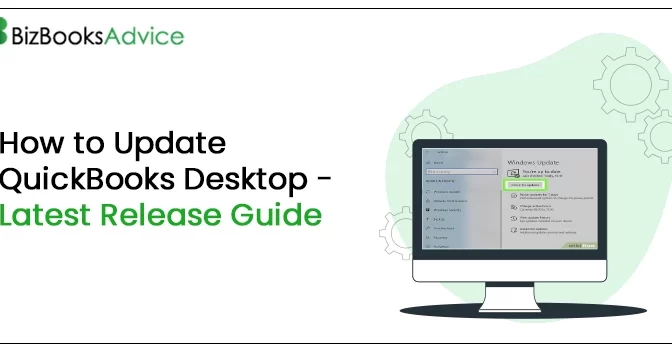
Updating your QuickBooks Desktop to the latest release is essential to ensure that your software runs smoothly and efficiently. Regular updates provide users access to new features, and bring performance improvements, security patches, and bug fixes, enhancing your overall user experience. This comprehensive guide will walk you through the steps to update QuickBooks Desktop to the latest release and ensure that your accounting software remains up-to-date.
Contact our QuickBooks support team at +1-866-408-0444, and ask our professionals for help with queries regarding QuickBooks Desktop updates.
Points to Consider Before Updating QuickBooks Desktop to 2024
Before you begin the QuickBooks Desktop update 2024 process, it’s essential to prepare both your QuickBooks Desktop and computer system to prevent any potential issues. For this, you must consider the following points:
Backup your company data file:
- To back up your company data, you must go to File> Backup Company > Create Local Backup.
- Afterward, follow the prompts to save a backup of your company file on your local system or an external drive.
Check your system requirements:
- Make sure that your computer system meets the minimum requirements for downloading the latest QuickBooks Desktop release.
- You can check this information on the QuickBooks website.
Ensure a stable Internet connection:
Undoubtedly, a stable and fast internet connection is crucial for downloading the QuickBooks Desktop software update files without interruption.
Make sure no other application is running:
- Before you start updating your QuickBooks Desktop software, you must close all other programs and their related tabs running on your computer.
- It will free up your system resources and avoid conflicts during the update process.
How to Update QuickBooks Desktop to 2024 Software Version?
Basically, there are three primary methods to update QuickBooks Desktop to 2024 latest release including, Manual, Automatic, and Release Download. In this section, we will specifically discuss them all.
1st Method – Manual QuickBooks Desktop Update
The manual update method involves downloading the update file from the QuickBooks website and installing it on your computer. Let’s quickly look at the following steps:
- Firstly, go to the QuickBooks Update Page and select your QuickBooks product and version.
- Now, click on the Download button to get the latest updated File. Once downloaded, save it in your computer’s local folder.
- Afterward, close QuickBooks Desktop, and locate the downloaded update file on your computer, and double-click it.
- At this point, start following the on-screen instructions to complete the installation.
- Finally, once the installation is over, you must restart your QuickBooks Desktop to begin using the updated QuickBooks program.
2nd Method – Automatically Update QuickBooks Desktop
The next method to update QuickBooks Desktop to 2024 is the automatic method. This update method allows QuickBooks Desktop to download and install updates automatically when they are available.
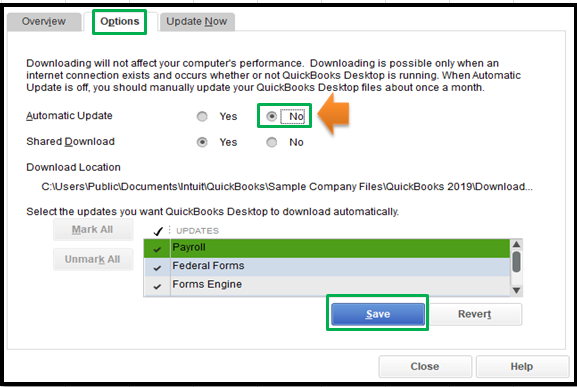
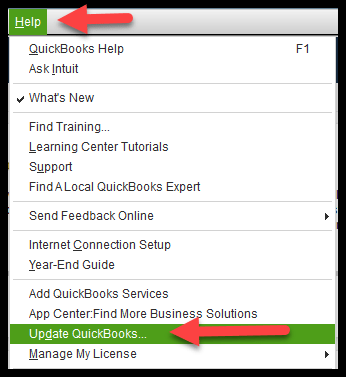
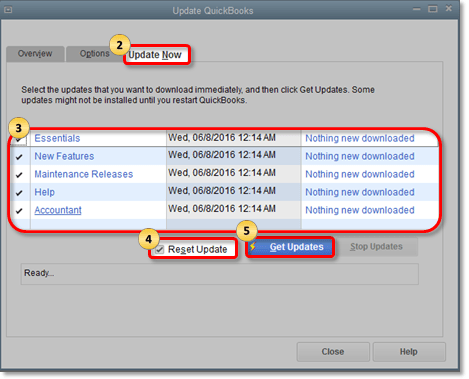
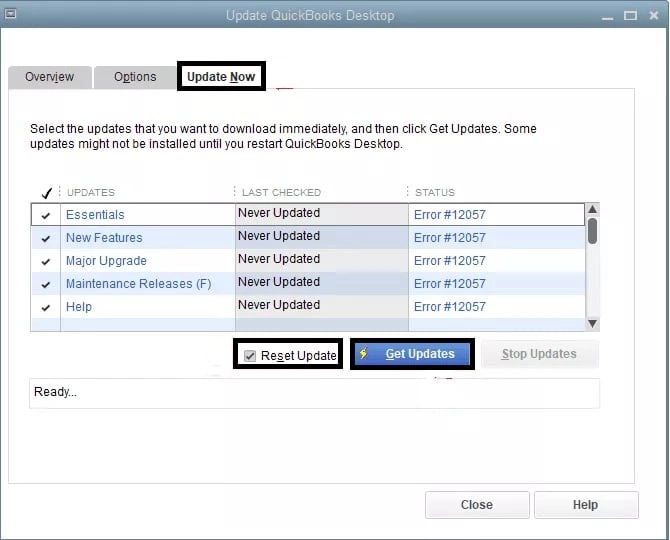
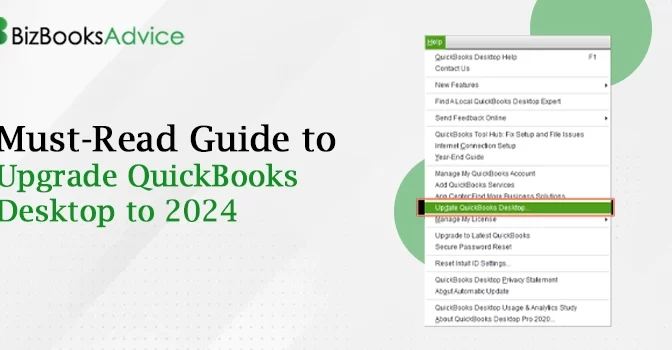
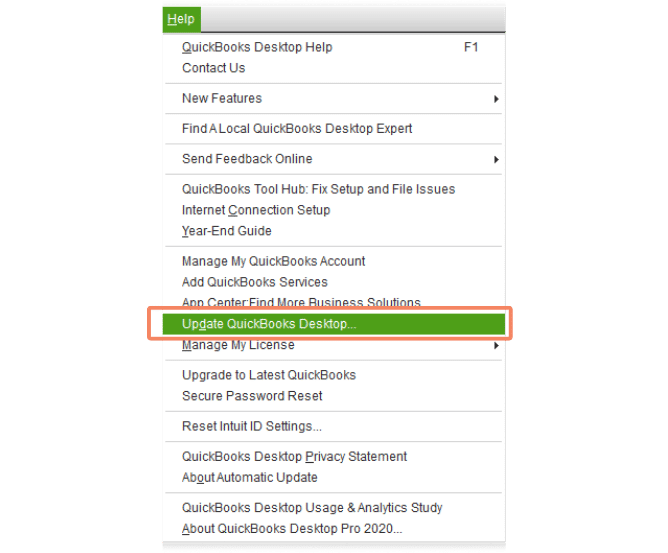
- To begin with this method, first, you need to open your QuickBooks Desktop and move to the Help > Update QuickBooks Desktop tabs.
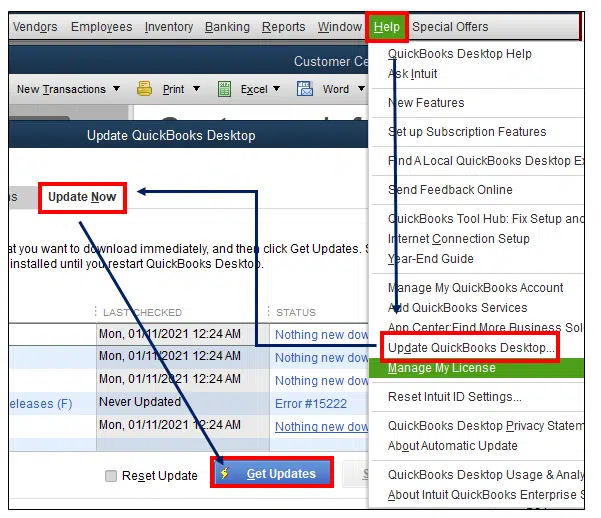
- Next, you must click on the Options tab, select Yes for Automatic Update, and click the Save button.
- However, even with enabled automatic updates, you can manually check for updates to ensure you have the latest version.
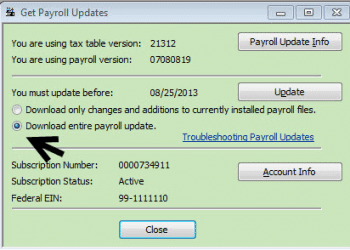
- To do this, you need to visit Help > Update QuickBooks Desktop tabs and click the Update Now tab.
- Following this, choose the Get Updates alternative, and once done, restart your computer system to install the downloaded updates.
3rd Method – Update QuickBooks Desktop via Release Download
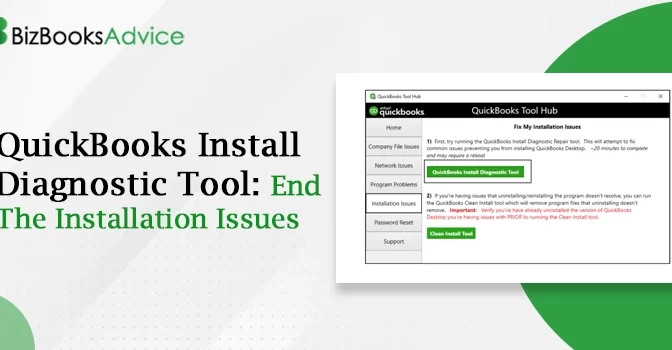
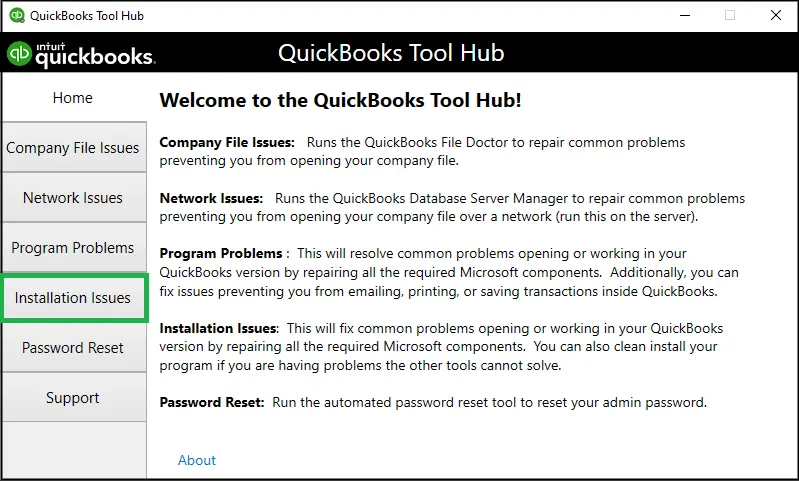
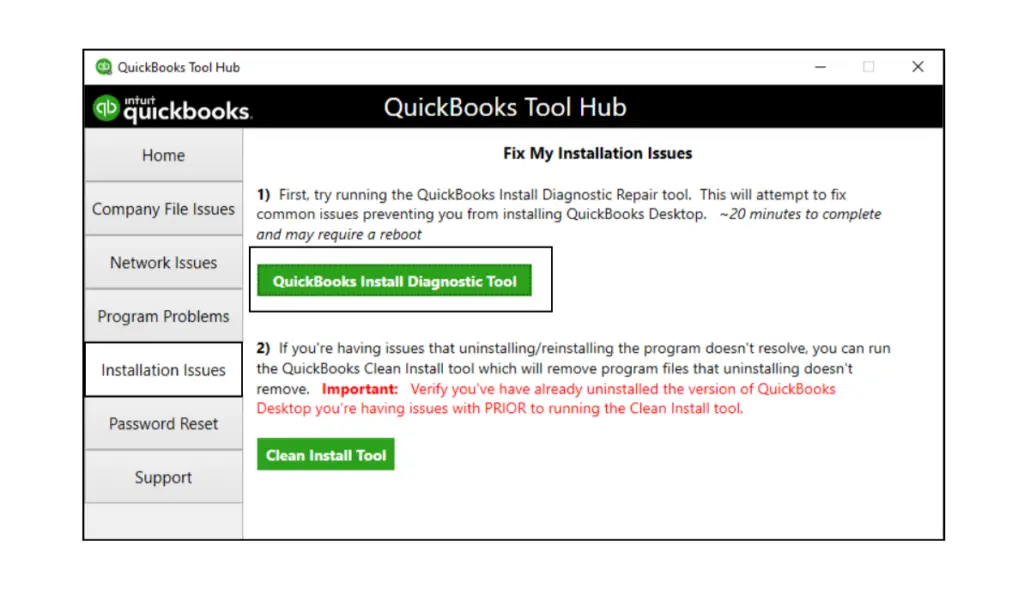
This method of release download involves using the QuickBooks Install Diagnostic Tool to download and install the latest release. Let’s see how to use the tool and update QuickBooks Desktop to 2024:
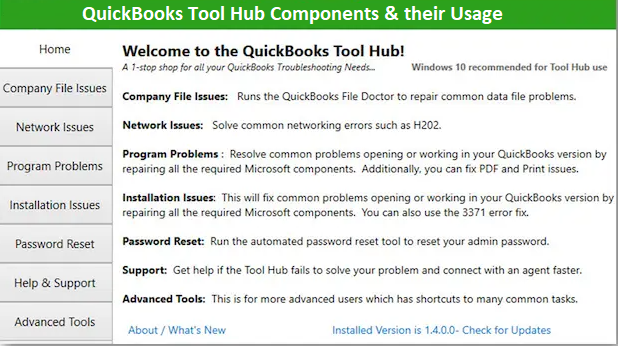
- Initially, you must visit the QuickBooks Tool Hub Page and start downloading the QuickBooks Tool Hub.
- Save the downloaded installer QuickBooksToolHub.exe file on your computer.
- Follow the on-screen prompts and begin the installation.
- Now, open the QuickBooks Tool Hub and choose the Installation Issues tab. Following this, click the QuickBooks Install Diagnostic Tool within the tab.
- Afterward, begin following the given prompts to run the tool.
- Finally, after running the tool, follow the on-screen instructions to download and install the latest QuickBooks Desktop 2024 release.
How to Ensure the Successful QuickBooks Desktop Update 2024?
After successfully updating QuickBooks Desktop to 2024, there are a few tasks you should perform to ensure everything is working correctly:
Verification of QuickBooks Update
- To verify the QuickBooks Desktop update 2024, you must navigate to Help > About QuickBooks Desktop.
- Following this, verify that the version and release number match the latest Update.
Check your QuickBooks Company File
For this, simply open your company file and ensure that all company data is intact and accessible.
Re-enable your Antivirus or Security Program
If you disabled your antivirus software during the Update, do not forget to re-enable it. It will ensure your system is protected.
Update the Scheduled Backup
The next task is to update your backup schedule to ensure that you have regular backups of your QuickBooks company data files.
Explore and Access New Features
Every QuickBooks Desktop brings improvised and advanced features, utilities, plus tools within the software. Finally, after updating QuickBooks Desktop to 2024, explore these new features or tools introduced in the latest Update.
Read more- QuickBooks Desktop 2021 Discontinued! What To Do About It?
What Common Issues Can Arise When Update QuickBooks Desktop to 2024?
While performing the Update QuickBooks Desktop to 2024 process, you may encounter multiple technical issues and errors. Below we have jotted down some common issues and their troubleshooting solutions:
QuickBooks Update Error Code 1603
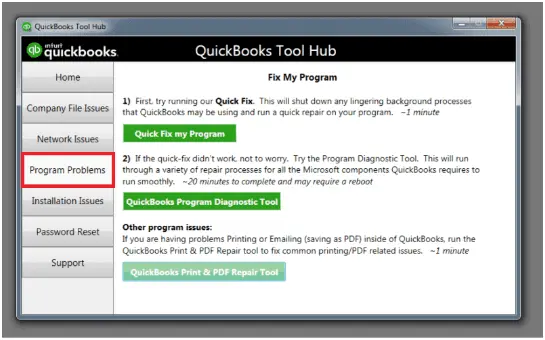
It’s a fatal error that may trigger during the Update QuickBooks Desktop process. To overcome this problem, a user must run the QuickBooks Install Diagnostic Tool, regularly update Windows, and perform a clean QuickBooks installation.
Slow Download-related Issues
A user can also face delayed or slow download of the required QuickBooks Desktop updates due to multiple technical factors or internal glitches. If you also face such issues, make sure your internet connection is stable and fast, avoid downloading during peak internet usage times, and temporarily disable antivirus or firewall software.
QuickBooks Error 15271
Often, when updating QuickBooks Desktop to 2024, users encounter error messages that read, “Error 15271: The update cannot be validated.” At this point, users must temporarily disable User Account Control (UAC). To do this, go to the Control Panel > User Accounts > Change User Account Control Settings > Never Notify.
System Compatibility Problems
Compatibility problems are pretty common that users possibly face after updating their QuickBooks Desktop software. To avoid these interruptions, it’s better to check minimum system requirements for the latest software release. Additionally, ensure the updated Windows OS, and check all the hardware drivers, especially network and video drivers, are up to date.
Network Issues
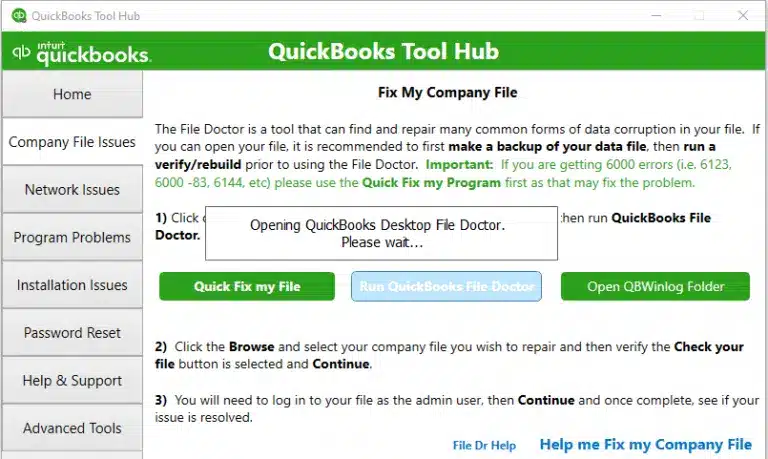
QuickBooks update problems like network issues are a result of poor network setup. Therefore, a user must ensure that your network is correctly set up and all necessary ports are open. In addition, it’s also essential to use the File Doctor Tool. To do this, open the QuickBooks Tool Hub > Company File Issues > QuickBooks File Doctor to check and fix network issues.
Error Code 12152 in QuickBooks
Another issue is the error 12152 in QuickBooks Desktop. During the update process, a user might face an error message reading, “Error 12152: Problems with the internet connection.” However, this issue can be resolved by simply checking the internet connection and restarting the router. Furthermore, by adjusting the Internet Explorer settings, users can fix the error 12152.
Windows User Accounts-related Glitches
Windows user account settings significantly affect the update process of the QuickBooks Desktop software. If anything goes wrong related to these settings, users may meet issues while updating QuickBooks Desktop to 2024. To resolve this, users must create a new Windows user or temporarily set UAC to “Never Notify” during the update process.
Why Is Updating QuickBooks Desktop to 2024 Version Crucial?
After learning how to update QuickBooks Desktop to 2024, let’s quickly discuss why updating QuickBooks Desktop to 2024 version is important. To understand this, take a look at the following benefits:
- Security Enhancements: Each Update includes security patches that protect your company’s sensitive data. The 2024 QuickBooks Desktop update includes the latest security patches, safeguarding your financial data from potential threats and vulnerabilities. Also, the enhanced encryption methods protect sensitive information, ensuring that your data remains confidential and secure.
- Easy Troubleshooting and Bug Fixes: Updates address known issues and bugs, ensuring that your software runs smoothly without glitches and providing a more reliable and error-free experience. The latest QuickBooks Desktop 2024 update incorporates user feedback, resulting in features and fixes that directly address customer needs.
- New and Improvised Features: Intuit frequently introduces new features and tools in updates that can improve your workflow and efficiency. Furthermore, with the 2024 update, users can get improved integration with banks, allowing for more automated transaction downloads and categorization, saving time on data entry. Also, the new and improved reporting tools are helpful with more insightful analytics, helping you make informed business decisions.
- Performance and Compatibility Improvements: Updates ensure compatibility with other software and systems, preventing conflicts and ensuring seamless integration. After you update QuickBooks Desktop to 2024, you will experience optimized code and performance enhancements, resulting in quicker data processing and reduced lag times. Additionally, the stability improvements will reduce the possible crashes and errors, ensuring a smoother user experience.
- Compliance: Regular QuickBooks Desktop updates ensure that your software complies with the latest tax laws and regulations, reducing the risk of non-compliance penalties. Certainly, the 2024 version includes the latest tax tables, ensuring compliance with current tax laws and regulations. Also, the automatic updates to compliance features keep you aligned with new financial regulations and reporting requirements.
Read here- How to Fix QuickBooks Error 80004?
Contact Us for More..!
Keeping QuickBooks Desktop updated to the latest release is essential for the security, performance, and functionality of your accounting software. By following the steps outlined in this guide, you can ensure that your QuickBooks Desktop is always up-to-date, allowing you to take full advantage of the latest features and improvements. Regular updates not only enhance your user experience but also protect your financial data and ensure compliance with the latest regulations. If you are still confused about how to update QuickBooks Desktop to 2024, call us at +1-866-408-0444.