All posts by admin

New! QuickBooks Desktop Enterprise 2025: Features & Setup

To enhance the accounting experience of the users, QuickBooks launches a new version every year with more improved features and functions. QuickBooks Desktop Enterprise 2025 is the newest version, which is a power-packed accounting suite comprising numerous enhanced and amazing features. This accounting solution is a one-stop shop for all the accounting solutions comprising features such as time tracking, point of sale, payroll and online payments. Besides this, it also comes up with high-end security encrypted technology that helps in keeping financial data safe and secure.

Furthermore, to gain more insightful knowledge about QuickBooks Enterprise Solution 2025, continue reading this post. Herein, we have mentioned everything from the features, benefits, download, installation and pricing of the accounting application.

Want complete instructions for setting up QuickBooks Desktop Enterprise 2025 to complete your financial tasks? Contact our highly certified QuickBooks professionals at +1-866-408-0444, and they will guide you in the best possible manner.

Details Regarding QuickBooks Desktop Enterprise 2025 Release Date

If you are still working on the older version of the QuickBooks Enterprise, then stop using it and get the newest version installed immediately. As per the latest updates, the QuickBooks Desktop Enterprise 2025 release date will be announced. With this improved version, you can get your hands on the unmatched and high-end security features that will help improve your accounting experience. Moreover, the new release will also help improve the application’s overall financial performance of your organization.

Exclusive Features Included in QuickBooks Desktop Enterprise 2025

QuickBooks Desktop Enterprise 2025 is a renowned application that provides an improved accounting solution to enhance your financial experience. Moreover, the newly added features of the software will help you complete your accounting tasks smoothly without worrying about data safety. Besides this, there are numerous other features that you can access when running this accounting software.

1. Simplified the Task of Preparing Inventory Turnover Report: –

Now, it has become easier for business owners to identify how much products are selling and when. In the newly added version of QuickBooks Desktop Enterprise, users can access the leverage key metrics feature, which helps them get a better understanding of inventory performance. Getting a proper picture in mind regarding the inventory makes it much easier to make decisions regarding optimizing quantities on hand, sales prices, and re-orders.

Furthermore, users may impose the filters and get a clear picture of your inventory, which helps in managing the inventory easily.

2. Linking of the Sales Order Along with Purchase Orders: –

Businessmen can now easily receive orders from their customers and monitor sales by linking the sales order along with the purchase orders. Moreover, you may also improve customer satisfaction by providing the product delivery dates with the help of a consolidated report. Besides this, the users may also efficiently manage inventory by determining the inbound delivery dates for the sales order items.

3. Improvised Customer Prepayments: –

Earlier, keeping track of the prepayments was a bit difficult for businesses, which might cause discrepancies in inventory monitoring. But now, with the improvised customer prepayments in QuickBooks, it becomes much more convenient to monitor the prepayments. Once the amount of the prepayment is recorded, then you can eventually apply those payments once the sales payments are converted to invoices. After viewing the customer prepayment amounts, you can provide proof of payments through email or email to give them the surety of payment.

4. Enhance Readability in Reports: –

It might get difficult for the users to take out information about one particular employee from the list of thousands of employees by scrolling the names one after the other. But not anymore. Using the viewing key reports with Zoom functionality, you can enhance the readability and get the employee’s information. Besides this, you can also use the printed grid lines option to read the reports easily. Furthermore, with the help of these features, you can easily prepare reports without wasting too much time and effort.

5. Landed Cost Calculator: –

Another new feature included within the QuickBooks Enterprise 2025 edition is the landed cost calculator. The new built-in calculator makes it much easier to generate competitive sales prices. Thus, it also helps enhance the organization’s profits.

6. Inventory and Reporting Enhancements: –

The inventory and reporting enhancement feature in QuickBooks gives a clear vision to handle the company’s inventory. Moreover, with the help of the product expiration dates, lots, category specifics you can get all the details regarding single product. Besides all of this, the Reports Center is a one-stop shop where you can keep all the inventory reports.

7. Improved List Search Feature: –

Previously, users had to spend a lot of time finding information regarding one single product among a list of various products. But now businesses can save their precious time by using new search and edit functionality. You can easily take out the inventory data. Moreover, it also allows you to modify the lists using keyword searches.

Benefits To Update QuickBooks Desktop Enterprise 2025 Edition

QuickBooks Desktop Enterprise 2025 is a great accounting solution for the enterprises to handle their day-to-day business operations smoothly. Moreover, using the updated features it becomes much more convenient for the businesses to perform payroll-related tasks, online banking, inventory management and other tasks efficiently. Besides this, you can get your hands on various other benefits, which we have discussed below.

1. App Integration Becomes Easier: –

The users can now integrate their QuickBooks Enterprise application with more than 200 apps to enhance their accounting experience. By linking the QuickBooks application with other third-party apps, it becomes much more convenient to handle the business process in an efficient way.

2. Simplifies the Task of Mileage Tracking: –

Another great benefit of using the Enterprise Solution is that you can use the mileage tracking feature to track the fuel used while travelling during business hours.

3. Get All the Data on Your Fingertips: –

Within the QuickBooks application you can keep all the data associated with the vendors, pricing and other customer details under one single roof. Thus, it will help you in giving a clear picture regarding the sensitive company data which would help in taking decisions for the development of the organization.

4. Handle the Inventory-Related Tasks Smoothly: –

Now having your hands on the advanced inventory tracking feature it gets convenient for the users to know exact status regarding the inventory. You can now take the estimate of the stock available and how much stock is running short. Besides this, you may also set the low stock alert notification which will update you whenever the stock is running short.

5. Manage the Sales Orders Effortlessly: –

Moreover, you can also take care of the sales order and monitor the inventory through different locations in QuickBooks. Once you link your sales orders along with the purchase orders you can upgrade the order fulfilment. It becomes much more convenient for the users to process sales order from start to finish with end-to-end pickup, pack as well as shipment facility.

6. Helps in Improving the Productivity: –

The QuickBooks Enterprise 2025 Solutions provides its users with an easy-to-use interface which let them work faster. Thus, it would help in enhancing the productivity which would be helpful for the growth of an organization.

System Specifications For QuickBooks Desktop Enterprise 2025 Version

Before you initiate the setup process of the QuickBooks Desktop Enterprise 2025 version, you must know the system specifications. Thus, it will help in running your accounting software smoothly without creating any issues. So, let’s study the system specifications by reading the pointers given below.

  • The server required for the regular or small business server’s are: Windows Server 2016, 2019 or 2022.
  • Moreover, the QuickBooks Desktop 2025 version supports the following Windows operating systems i.e. Windows 11 (64-bit), Windows 10 (64-bit), Windows 8.1, Windows 10 S Node.
  • Also, it is advised that your Windows operating system must require 2.5 disk space to run the QuickBooks Enterprise application smoothly.
  • You must also verify that you have a 2.4 GHz of processor.
  • Make sure that you have a valid and updated QuickBooks Product Registration is required to activate the QuickBooks Enterprise application.
  • Additionally, it is advised that the screen size to run the Enterprise Solution is 1280 X 1024. Despite this, it supports a camera-enabled mobile device via Android 6.0 or iOS 14.
  • Besides this, ensure that the Server RAM required is 8GB for up to 5 users, 12 GB for 10 Users, 12 GB for 10 users, 16 GB for 15 users and 20 GB for up to 20 + users.

Process To Get QuickBooks Desktop Enterprise 2025 Download

Now that you are well-aware of the system specifications, you can easily get the QuickBooks Desktop 2025 download using the steps instructed below.

  • Reach the main webpage of Intuit and purchase the QuickBooks Desktop Enterprise 2025 subscription plan according to your requirements.
  • After purchasing the QuickBooks Enterprise application, you will get a download link on the Purchase Confirmation Email on your registered email address.
  • Now, browse your email and tap on the downloaded link you receive on your Purchase Confirmation email.
  • Eventually, after clicking on the download link, it will automatically start downloading the QuickBooks Desktop Enterprise application on your Windows device.
  • Finally, the users have to wait for some time and allow the QuickBooks Enterprise application download on your device.

QuickBooks Desktop Enterprise 2025 Install Process

After completing the download process, get the QuickBooks Desktop Enterprise 2025 install to accomplish the setup process. Below, we have explained the detailed process for the same. Let’s read all the instructions carefully.

  • Visit the Download section of your computer and run the installer file of the QuickBooks Desktop Enterprise 2025 version.
  • Next, the users are required to add the relevant Product key and License Information.
  • Afterwards, proceed ahead with the installation part by choosing the appropriate install option between Express Install or Custom Install.
  • Now, you are supposed to opt for a suitable location for saving the QuickBooks Enterprise downloaded file. Alternatively, you can either pick the default location or any other location as per your preference where you can access the file easily.
  • Thereon, move to the Install menu and let the QuickBooks Enterprise 2025 application install successfully on your computer.
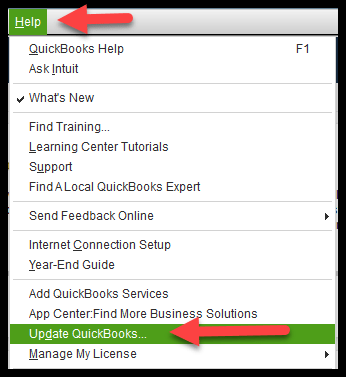
  • Furthermore, try running the QuickBooks application and then activate the product using the correct product details. Then, jump to the QuickBooks Help menu and then click on the highlighted Activate QuickBooks Desktop menu.
  • Finally, you are required to setup the company file after activating the QuickBooks Enterprise. Later on, complete the entire installation task with the help of the guidelines seen on the screen.

QuickBooks Desktop Enterprise 2025 Price Structure

Before setting up the latest version of the QuickBooks, it’s necessary to know about the QuickBooks Desktop 2025 price breakdown. Herein, we have described the pricing of the different subscription plan which may vary according to the number of users you are using. Furthermore, to stay updated regarding the latest pricing in QuickBooks Enterprise, you can visit the Intuit’s main website.

1. QuickBooks Enterprise Gold Plan:

This subscription plan can be utilized by up to 30 users with custom roles and permissions. For buying this plan you need to pay around $1537 in the 1st year. Under this plan, you can get access to the features such as Advanced Reporting, QuickBooks Priority Circle.

2. QuickBooks Enterprise Platinum Plan:

Whereas this Enterprise plan could be accessed around 30 users with custom roles and permissions. The pricing of the QuickBooks Enterprise 2025 might be around $1890 in the 1st year. Moreover, using this subscription plan, you can use the features including advanced reporting, QuickBooks Priority Circle, Advanced Pricing, Advanced Inventory and Bill & PO workflow approvals.

3. QuickBooks Enterprise Diamond Plan:

Moreover, the QuickBooks Enterprise Diamond Plan users need to pay around $3734 in the 1st year and it can be accessed up to 40 users. Moreover, you may also access the features such as Advanced Reporting, Advanced Inventory, Advanced Pricing, Bill workflow approvals, QuickBooks Time Elite and Salesforce CRM connector.

Crux Of this Blog!!

That’s all about the QuickBooks Desktop Enterprise 2025 version and we hope that this post has provided you with enough details regarding this newest product added. Moreover, we hope that you may find this post worth-reading and helpful in accomplish your accounting task seamlessly. Furthermore, if you still want to get any additional information regarding this accounting suite then connect with our QB experts at +1-866-408-0444 for immediate assistance.

Fixing QuickBooks internet connection error read error Swiftly

QuickBooks has always been a foremost choice of small and medium-scale businesses to manage their financial operations efficiently and quickly. But sometimes, users might encounter the QuickBooks internet connection error read error when they fail to include the employee direct deposit details. This issue might occur due to inadequate internet access or improper internet configuration.

Getting rid of the internet connection error QuickBooks is essential, so you must test the internet connection. Also, you must configure the settings properly for a smooth network connection. For more details about this error, stay connected with this post and resolve the issue.


Are you looking for simple strategies to address the QuickBooks internet connection error read error? Give us a call at the Helpline number +1-866-408-0444 and find the best ways to overcome the issue .

Reasons That Trigger “Internet Connection Error Read Error QuickBooks”

Whenever users encounter the “Internet Connection Error read error QuickBooks ,” it states that the QuickBooks application they are using isn’t updated and that the payroll software needs some updates. However, plenty of other factors might also be responsible for the appearance of this error. Some of the possible causes are given below.

  • Some security applications, such as Windows Firewall or the third-party antivirus software installed on your system, are stopping QuickBooks from accessing the Internet connection.
  • The QuickBooks Payroll subscription you are using isn’t valid and is causing issues when you try to get the latest tax table returns.
  • System date and time aren’t configured properly which might trigger the QuickBooks internet connection error read error.
  • You haven’t configured your internet settings properly, creating issues in adding the new employees in direct deposit.
  • The cache files or the browsing history of your web browser is creating issues while running the QuickBooks Desktop application appropriately.

Exploring the Simple Procedures to Rectify Internet Connection Error Read Error QuickBooks

After finding all the possible causes that strike internet connection error read error QuickBooks, it’s high time to resolve it. For that, we have described below all the top-recommended solutions to rectify the issue seamlessly.

1: Start Making Changes To Your Internet Connection Settings

Inadequate internet settings might be responsible for the QuickBooks Desktop internet connection error. Therefore, it is mandatory to configure the settings properly by implementing the steps below to rectify the issue.

  • Open the QuickBooks Application on your workstation and then hit the Help menu.
  • After doing this, switch to the Internet Connection Setup tab and select “Use my computer’s internet connection settings.”
  • Once you are done making changes, click the Next option and then the Advanced Connection Settings tab.
  • Eventually, after this, the Internet Options window will appear on the screen, where you can make the changes according to your requirements.

2: Attaching Up the QuickBooks Desktop Security Certificate Manually

The users must manually undertake the following steps for mentioning the QuickBooks Desktop security certificate.

Also Read- QuickBooks Can’t Find Company File? Step-by-Step Solutions

First Step: Begin Looking For Your Company File

  • Reach your desktop, right-click on the displayed QuickBooks icon.
  • Now, from the extended list of options, go with the Properties option.
  • After doing this, hit the Open File Location using the shortcut tab and click the OK tab.
  • If you are a Pro, Premier, or Premier Accountant User, then browse to the following path “C: >> Program Files (X86) >> Intuit >> QuickBooks 20XX.”
  • Apart from this, the Enterprise or Enterprise Accountant users must move to the following location “C: >> Program Files (X86) >> Intuit >> QuickBooks Enterprise Solutions XX.O

Second Step: Get Ready To Install the Certificate

  • Visit the File Location screen and search for the Application file, which is presented as (.exe). Then, right-click on the same file and hit the Properties tab.
  • With this, you will instantly land on the Properties window, opting for the Digital Signatures tab. Then, you must select any of the entries from the Signatures Field List and then hit the Details menu.
  • Go with the View Certificate option from the Digital Signature Details window.
  • Following this, right beneath the General tab, you must choose the Install Certificate tab.
  • Now, you must ensure that the Store Location is set as the Current User and then click the Next tab.
  • Browse to the Certificate Store window and verify that Windows already selected the certificate store based upon the certificate type. Then, choose the Next and then click on the Finish tab.
  • Finally, when you see a prompt regarding “Import was successful“, then tap on the Next option.

3: Review the Tax Tax Table Version You Are Using & Install The Latest Updates

Most often, the issue may arise if the users are not accessing the latest version of the tax table version. Therefore, to resolve the issue, you must check the tax table version you are currently using and, if it’s not, install the latest updates. To do so, you must follow the step-by-step instructions outlined below.

Checking the QuickBooks Tax Table Version You’re Presently Working On

  • Primarily, you must have a look at the number which is mentioned beside the “You are using tax table version:” section.
  • After doing this, for making sure that you are using the appropriate version, start looking for the latest payroll news and updates section.
  • Furthermore, to obtain more knowledge associated with your tax table version, switch to the Payroll Update Info tab.

Instructions For Installing the Latest Tax Table

  • Initially, the users must access the highlighted Download Entire Update tab.
  • When you are done, hit the Update option and it will present you with an informational window after winding up the downloading part.

Read More- Troubleshooting QuickBooks Payroll Not Withholding Taxes

4: Checking the Authenticity of Your QuickBooks Payroll Subscription Again

It is important that the QuickBooks Payroll subscription you are currently using to perform the payroll tasks is valid and updated. However, if it’s invalid then it might create trouble in the functioning of the payroll. Below, we have illustrated the steps to verify the authenticity of your current QuickBooks Payroll subscription.

  • Firstly, launch the QuickBooks application and switch to the Employees tab followed by the My Payroll Service from the list of options.
  • Afterwards, move to the Account/Billing Info menu and enter the Intuit account with the valid login details.
  • Consequently, it will land you to the QuickBooks Account Page and look below the Status section to choose the Resubscribe option.
  • Finally, you must go through the guidelines presented on the screen for the seamless activation of the payroll service.

5: Configuration of the Windows Firewall Smoothly

To make the necessary changes to the Windows firewall and run the internet connection smoothly, you must follow the procedure below.

  • Use the Windows Logo key to open the Start menu and add Control Panel in the search console.
  • When you reach the Control Panel window, click on the System and Security and then hit the Advanced Settings tab.
  • Afterwards, jump to the Inbound Rules, then the New Rule option.
  • Now, you must browse to the Programs tab and select the Next tab.
  • Following this, choose the This Program Path tab and switch to the location where your company file is placed.
  • Furthermore, select the highlighted “Allow the Connection” tab and review that you have marked the relevant checkboxes.
  • End the process by mentioning the name of the latest firewall rule and then see if the issue still exists.

6: Listing the Intuit As the Trusted Website in Your Browser

Sometimes, the users might end up with the Internet Connection error read error QuickBooks Desktop if the Intuit is not added as the trusted website in your web browser. Below, we have illustrated the complete procedure to mention Intuit as a trusted website.

  • Begin the procedure by clicking on the Settings and More option and then move to the Settings menu.
  • Now, you must jump to the Cookies and Site Permissions > Manage and Delete Cookies and Site Data.
  • When you are done till now, proceed to the Allow section and then move on to the next step.
  • Next, you are supposed to hit the Add option and mention Intuit.com. Later on, the users must head to the Add tab for saving the Intuit as a trusted website to complete the process.

Learn More- How to Update QuickBooks Desktop to the Latest Release

7: Erase All The Cookies and Cache Files Stored In Your Web Browser

The unnecessary storage of the cache files and the cookies stored in your web browser might disrupts while running the internet smoothly. Therefore, to get rid of the issue it is important to delete the unnecessary browsing history with the help of the following steps.

  • Primarily, you must access the latest version of Internet Explorer and switch to the Tools icon.
  • Then after this, choose the Internet Options from the menu and tap on the General tab. Later on, the users must pick the Internet Options tab once again to move ahead with the process.
  • In the next step, shift to the General tab and navigate to the Browsing History, followed by the Delete option.
  • Furthermore, you must opt for the following options to successfully delete it from the history records.
    • Cookies and website data
    • Temporary internet files and website files
    • History
    • Passwords
  • After verifying that the necessary checkboxes are marked, tap on the Delete tab. Then exit from the Internet Options window.
  • Finally, shut down the Internet Explorer window and then try to use the Internet option to see the exact status of the error.

Crux Of this Blog!!

That’s all you must know about the QuickBooks internet connection error read error and we hope you might find this post helpful. If you still find any issues while accessing the internet connection then take immediate help from our certified QB experts at +1-866-408-0444 for help.

QuickBooks Desktop 2022 Discontinued: Know What Should Be Your Next Move!

Every year, Intuit discontinues certain products and services so that users can upgrade to the newest version, which will help enhance the performance of the QuickBooks application. Thus, in the next year as well Intuit is going to launch the QuickBooks Desktop 2022 Discontinued policy from May 31, 2025. After implementing this policy, users won’t be able to get the latest security patches and cannot access the live support facility.

So, without wasting any time, let’s learn everything regarding the discontinuation policy of QuickBooks Desktop 2022 and switch to the upgraded version or to QuickBooks Online with the help of this post. Moreover, we have also discussed the impact of the discontinuation policy on the remaining subscribers of the 2022 edition users of QuickBooks.

Want to gather more details regarding the QuickBooks Desktop 2022 discontinued policy? If yes, then worry not and connect with our highly-certified experts for immediate assistance at +1-866-408-0444.

Let’s Understand About the Discontinuation of QuickBooks Desktop 2022 

Intuit, the parent company of QuickBooks, periodically reviews its product offerings to stay compliant with technological advancements and market demand. The discontinuation of QuickBooks Desktop 2022 is part of this strategic shift towards cloud-based solutions. The main motive of the discontinuation is to offer its users more flexibility, improved security, and the ability to access their financial data from anywhere, anytime.

Read Also- QuickBooks Desktop 2025 Release Date?


Is QuickBooks Desktop 2022 Being Discontinued? Know About the Complete Details.  

Yes, according to the latest update by Intuit, it is specified that the QuickBooks Desktop 2022 software is going to phase out after May 31, 2025. As a result, it prevents the users from getting the security updates from June 1 2025. However, it is advised that if you notice any updates launching before this discontinuation date, install them immediately. Moreover, after the discontinuation, the users fail to access the 2022 versions of QuickBooks Desktop, which might consist of QuickBooks Desktop Pro, Premier, Enterprise Solutions and Accountant Editions 2022.

After the discontinuation the users can also switch to the QuickBooks Online application for more flexibility and collaboration. Moreover, it also provides you with the features like automatic bank account updates using which you can access the data remotely.

Also Read: QuickBooks Desktop 2021 Discontinued


When will QuickBooks Desktop 2022 be discontinued​? – Explained Briefly

The QuickBooks Desktop 2022 is going to be discontinued after May 31 2025 which prevents the users from getting the live support facility. Therefore, for completing your financial tasks all you require is to migrate from QuickBooks Desktop to Online. Otherwise, if you wish to use the QuickBooks Desktop version then it’s suggested to upgrade them to the newly launched version.

What Would be the Impact of QuickBooks Desktop Service Discontinuation Policy On Current Users?

After the latest announcement made by the Intuit regarding the QuickBooks Desktop Service Discontinuation Policy has caused a severe stress on the current Desktop users. This is so because the discontinuation policy will prevents the users from accessing numerous features which might hamper their ongoing work. However, below, we have discussed about all those factors that is being affected with the discontinuation.

  • Unable to Access the Live Support Facility:-

The current subscribers of the QuickBooks Desktop 2022 editions will not be able to obtain the live support facility if you are stuck with the issues faced while running other Intuit services. These services might include QuickBooks Desktop Payroll, online bank feeds, and QuickBooks Desktop Payments.

  • Products You Can’t Use After Discontinuation:-

Moreover, the users also won’t be able to access certain QuickBooks Desktop 2022 products after the discontinuation, which are as follows:

  1. QuickBooks Desktop Pro Plus 2022
  2. QuickBooks Premier Accountant Edition Plus 2022
  3. QuickBooks Desktop for Mac Plus 2022
  4. QuickBooks Desktop Premier Plus 2022 (General Business, Professional Services, Contractor, Manufacturer & Wholesale, Non-Profit)
  5. QuickBooks Enterprise Solutions 22
  6. QuickBooks Enterprise Accountant 22
  • Affected Services of QuickBooks Desktop 2022 Edition

Below, we have listed all those services that you won’t be able to access after the QuickBooks Desktop 2022 discontinuation policy.

1. Payroll Services:-

  • Assisted Payroll:-

After the discontinuation policy, the users won’t be able to compute the appropriate payroll taxes, payroll forms or send the payroll data to their employees. Moreover, it will cancel your subscription automatically after the May 31, 2025 and it won’t allows you to file the tax forms on your behalf. In short, the users have to file their forms on their own.

  • QuickBooks Workforce (usually via PayCheck):-

Now, the users will not be able to use the QuickBooks Workforce feature anymore. For that, all you require is to have an active and valid payroll subscription to run this payroll service seamlessly.

  • Basic, Standard or Enhanced Payroll:-

With the effect of the discontinuation policy, it stops the users from calculating the payroll taxes accurately. Besides this, you may found that the paychecks might be incorrect and your subscription will be canceled automatically.

  • Payroll:-

Fails to computer the paychecks accurately as per the latest tax table returns and your subscription will automat’ gets deactivated.

2. Credit Card Processing:-

  • Payment Processing:-

The users might get a notification alert on their screen reflecting service is not available any more. As a result, it restricts the users from processing credit card and check transactions via QuickBooks Desktop 2022. Moreover, it will start flashing the message that carries the guidelines regarding processing credit card and check transactions outside of the QuickBooks.

  • eInvoice:-

Another feature you can’t be able to perform is processing the eInvoice via QuickBooks Desktop 2022 edition. To make this feature available, you must have a valid QuickBooks subscription and an active payments subscription.

  • Recurring Payments:-

Recurring payments feature is no longer available for the Desktop 2022 users. For keeping track of the recurring payments you must visit us at MerchantCenter.intuit.com.

  • Merchant Service Deposit (reconciliation):-

It prevents users from getting credit cards and checking the details of the product downloaded.

3. Other Services:-

  • Online Banking:-

The users won’t be able to download the transactions, or might face difficulties while sending the online transfers. However, the error message that you receives on the screen entirely depends upon your download method.

  • Contributed Reports:-

This feature can’t be accessed by QuickBooks Desktop 2022 users.

  • Multi-Currency/Exchange Rate:-

The users don’t require to enable or disable this feature for assigning some specific currency types along with your profiles and accounts in the QuickBooks Desktop application.

  • Accountant Copy Transfer Service:-

Another feature is that it prevents you from sending the accountant copies in QuickBooks Desktop with the help of this service.

Explaining the Features That You Won’t Be Able to Access in QuickBooks Desktop 2022

According to the latest announcement of the QuickBooks Desktop 2022 discontinuation policy, users won’t be able to access certain features, which are as follows.

1. Loan Manager:-

The Loan Manager is a feature that lets the users compute the interest and payment schedules. Moreover, it allows new and existing loans to be made repayments. But, now you won’t be able to use this feature in the QuickBooks Desktop 2022 edition any more.

2. Scan Manager:-

The QuickBooks Scan Manager is used to scan the receipts, reports and other financial documents so that you can add them to your invoices, sales receipts and other transactions. But, the sad part for the QuickBooks Desktop 2022 editions is they won’t be able to use this feature anymore. For using it, they are required to upgrade their application to the QuickBooks Desktop 2024 edition.

Learn hereUpdate QuickBooks Desktop to 2024: A Comprehensive Guide

3. Cash Flow Projector:-

The main purpose of the Cash Flow projector in QuickBooks Desktop is to show you the current as well as the future cash flows, which depend upon the different circumstances. After estimating the projection, the data will be utilized in QuickBooks to learn about the status of your business finances in the upcoming six weeks. However, if you wish to access this feature, then you are required to switch to the updated version as it won’t be available in QuickBooks Desktop 2022 anymore.

4. QuickBooks Pro Timer:-

QuickBooks Pro Timer is used to monitor the total time spent by the employees during their working hours. This application gives you a clear picture of the time the employees spend, which will help them compute payroll. However, it won’t be able to be used in the QuickBooks Desktop 2022 edition.

What Features Can You Use With the QuickBooks Desktop 2022 Edition?

We have described the features that users can use by accessing the QuickBooks Desktop 2022 edition herein.

1. Uploading Of Documents With Your Mobile:-

The scan manager feature in QuickBooks is replaced with the Attach documents feature. So, now the users have the option to upload their documents through their mobile phones and then import them to the QuickBooks application.

2. Monitoring the Loans in QuickBooks:-

You won’t be able to monitor the transactions consisting of principal repayment and interest expense automatically. The users are supposed to include all such transactions manually in the QuickBooks Desktop 2022 edition.

3. Searching of the QuickBooks Desktop Marketplace:-

You can now look for the alternative low-cost solutions to the Cash Flow Projector in QuickBooks Desktop Marketplace. This feature mainly focused on the third-part applications which is sponsored by the independent developer partners.

4. Access the Time Tracker Feature in QuickBooks Desktop:-

Another feature you can use with the QuickBooks Desktop is Time Tracker, which you can’t import the timesheets from the QuickBooks Pro any longer. For that, you need to manually include the timesheets within the application.

Summarizing the Above!!

So, here we are going to end this post and hope that you have gained enough information regarding the QuickBooks Desktop 2022 Discontinued policy. However, if you are still struggling with this issue, then simply consult with our QB professionals at +1-866-408-0444 and clarify all your doubts within no time.

QuickBooks Database Server Manager Stopped? Try These Fixes

QuickBooks is a great accounting solution that is preferred by small to large-scale businesses to handle day-to-day financial tasks easily. Moreover, it provides users with a QuickBooks Database Server Manager service, which lets the employees work on the same data file at the same time over the network. But, sometimes, due to an incorrect setup of the service, users might find the QuickBooks Database Server Manager has stopped working issue. Unfortunately, this issue could create issues while running the file in multi-user mode, resulting in delayed ongoing business tasks. In this write-up, we have explained the possible causes along with the simple troubleshooting methods to fix the issue.

Didn’t have much time to resolve QuickBooks Database Server Manager Has Stopped Working issue and need immediate resolution? Give us a call at +1-866-408-0444 and have a one-to-one consultation with our QB experts to address the issue immediately.

Let’s Have a Quick Overview Regarding the QuickBooks Database Server Manager Not Working Issue

Basically, the QuickBooks Database Server Manager is a service that allows users to work on the same project remotely while sitting at different places. However, if, for certain reasons, QuickBooks Database Server Manager is disabled, then the QuickBooks application will stop running in single-user mode. As a result, it might start reflecting the error messages stating “QBDBMgrN not running on this computer” or “QuickBooks Database Server manager Has stopped”. This issue mainly indicates that something interrupts QuickBooks from working on certain services and might create certain issues while opening the company in multi-user mode.

Describing the Prominent Factors That Influence QBDBMgrN Not Running On this Computer

Before finding a way out of the QBDBMgrN Not running on this computer issue, it is essential to know what is causing this problem. After a deep investigation, we have come up with some of the root causes that might lead to this issue, which are as follows:

  • Firstly, the issue may arise when the users work on an incompatible QuickBooks Database Server Manager version.
  • Another obvious reason is that the Windows Firewall is interrupting while running the QuickBooks Database Service Manager due to some security concerns.
  • In other cases, the QuickBooks Database Server Manager has stopped working, and issues may arise due to a corrupt network path.
  • Sometimes, the issue may arise when certain components required for the QuickBooks installation are missing.
  • Users might not have enough permissions to operate the QuickBooks Database Service Manager on the device.
  • Another possible reason why the QuickBooks Database Server Manager stopped working is a disturbance with the network connection.

Pre-requisites That Are Required Before Resolving QuickBooks Database Server Manager Not Running

Here, we have listed some of the important considerations required before fixing the QuickBooks Database Server Manager Not Working issue.

  • In the initial stage, it is beneficial to cross-check the system specifications required to run the QuickBooks Desktop smoothly on your workstation.
  • Moreover, you must check that the QuickBooks Database Server manager on the computer hosting the data file is configured accurately.
  • Thirdly, the users must keep the QuickBooks application up-to-date according to the latest version available.
  • Also, it is necessary to generate the secure backup of the company file at a location. where you can access it easily if the original file gets hampered.
  • Moreover, the users must look into the user permissions required to run the QuickBooks Database Server Manager smoothly on your device.

What Would be the Impact of QuickBooks Database Server Manager Not Running On This Computer Issue?

Whenever the users come across the QuickBooks Database Server Manager not running on this computer issue, they might observe the following consequences. Below, we have discussed about all of those repercussions so that you can prevent the error from happening in the future.

  • You may discover certain challenges while running the QuickBooks Database Server Manager Service.
  • The inability to run QuickBooks Multi-user mode hampers ongoing business tasks.
  • In certain instances, the users might discover certain issues while opening the company file.
  • Sometimes, the QuickBooks Database Server Manager might cause sudden crashing, freezing or slowing down of the QuickBooks application.
  • Another symptom you may observe is problems at the end of the QuickBooks File Copy Service.

Read More- Resolve QuickBooks Multi-User Mode Not Working with These Tips

Verified & Proven Ways to Fix QuickBooks Database Server Manager Not Running On This Server Issue

After understanding the causes and symptoms of QuickBooks Database Server Manager Not Running on this server, let’s move to the troubleshooting part. Thus, it would help you in resume working with Database Server Manager.

Solution 1: Consider Starting the QuickBooks Database Server Manager Service Once Again

By restarting the QuickBooks Database Server Manager you can refresh the connection and enhance the overall performance of the service. Thus, it would help you in running the company file in multi-user mode so that you can pursue your task easily.

  • Firstly, the users must launch the Run window on their workstation with the help of Windows Logo and the R keys.
  • When on the Run window, the users must input “services.msc” in the empty text area and then hit the enter key to open the Services screen.
run
  • Now, from the available Services list, pick the service reflecting “QuickBooks Database Server Manager” to move further.
  • Afterwards, you must right-click on the QuickBooks Database Server Manager service and then go with the Restart option.
  • Finally, you must open the QuickBooks application and then try running the QBDBMgrN to check if the issue still exists. If the issue persists while running the QBDBMgrN service then move to the next troubleshooting step.

Solution 2: Configuring the Administrator Access Permissions Accurately to Run QBDBMgrN Smoothly

There are certain scenarios when the users might face difficulty in running the QuickBooks Database Server Manager on the computer due to lack of admin rights. Therefore, it is essential to use the service with proper permissions with the help of the steps outlined below.

  • First of all, open the Start menu and from there move to the Settings followed by the Accounts menu.
  • After this, you must ensure that the checkbox beside the “Add Another user” option is selected and then hit the Add Account tab.
  • Thirdly, choose the “I don’t have this person’s sign-in information” option. Then from the upcoming page, go with the “Add a user without a Microsoft account” issue.
  • Afterwards, fill-in some important details such as username, password, or password hint to the security questions. When you are done providing all the details properly, move to the next step.
  • Now, the users must alter the local user account into an administrator account. For that, you must go to the Start menu > Settings and then click the Accounts option.
  • Next, look beneath the Family & Other Users section and then select the account owner’s name followed by the Change Account Type.
  • Thereon, pick the highlighted Administrator option located right below the Account Type and then hit the OK tab.
  • Subsequently, you must sign in to the Windows with the help of the new administrator account.
  • At last, the users must input the Windows as an administrator. Then, launch the QuickBooks application with the proper administrative rights.

Solution 3: Get the Most Recently Launched Updates of the Windows Firewall

You can obtain the most recently added security updates and fixes by installing the latest Windows Firewall updates. Once you download the latest payroll updates, you might restrain the QuickBooks application from opening the company file.

windows firewall inbound rules
  • In the primary stage, open the Windows Run window and include “Control Panel” in the empty text area to open it on the device.
  • After doing this, it will instantly open the Control Panel window, wherein you must choose the “System and Security” option.
  • Now, when you are on the Firewall Settings screen, you must navigate to the “Check For Updates” option.
  • Next, when you observe that the Windows get the latest updates, then move ahead with the Update Now tab followed by the “Use Recommended Settings” tab. Then, you must let the Windows Firewall updates install on your workstation and wait patiently unless you are done with the setup part.
  • Once you are successfully installed the updates, it is recommended to relaunch your system and then try to run the QuickBooks Database Server Manager.

Solution 4: Review the Multi-User Hosting Settings On Your Server Computer

Issues with the multi-user hosting settings on the server computer may also be responsible for the appearance of QuickBooks Database Server Manager Not Working issue. So, to rectify the issue, it is important to cross-check the hosting settings by implementing the instructions outlined below.

host multi user access
  • Begin the process by opening the QuickBooks Desktop application on the server workstation and then clicking the File menu.
  • Afterwards, go ahead with the Utilities option from the expanded list of options.
  • Now, verify that the QuickBooks is configured properly to access multiple users to use the data files on the network.
  • Next, if you observe the “Host Multi-User Access” option, it states that multi-user hosting is switched off presently. If the “Stop Hosting Multi-User access” option is visible, it states that your system is properly set up for using the multi-user mode.
  • Conclude the entire process by switching on the multi-user hosting in the QuickBooks application.

Solution 5: Try Setting Up the QuickBooks Database Server Manager Again on Your Workstation

Sometimes, issues with the setup of the QuickBooks Database Server Manager are one reason the service stops running. So, to resolve the issue, you must try to reinstall the database server manager on your device. For the detailed procedure, you must perform the stepwise instructions illustrated below.

First Step: Removing the Already Installed QuickBooks Database Server Manager

  • To commence with the process, open the Run window, wherein you must insert “appwiz.cpl” command in the empty search area.
run window
  • Consequently, you will obtain a list of options, from where you must opt for the QuickBooks Database Server Manager.
  • Later on, you must right-click on the QuickBooks Database Server Manager and choose the highlighted “Uninstall/Change” option.

Second Step: Assigning a New Name to the Installation Folder

  • Primarily, you must browse to the installation folder by browsing the following location “C: >> Program Files >> Common Files >> Intuit.”
  • Furthermore, the users must launch the Run Command window and then paste the location in the empty search area.
  • When you reach the folder, right-click on the same and hit the Rename option from the expanded list of options.
  • Thereon, modify the name of the folder by including the extension “.OLD” at the end of the file name.

Third Step: Installing the Latest Version of the QuickBooks Database Server Manager Once Again

  • Before proceeding ahead, exit from all the open programs on your server computer consisting of QuickBooks.
  • Afterwards, launch the downloaded setup file naming as “Setup_QuickBooks.exe”. Then, go ahead with the steps provided on the screen to complete the installation part.
  • Now, you must pick the installation type as “Custom or Network Options” to procced further.
  • Furthermore, opt for the appropriate choice for the network setup and then click the Next tab. You can get the QuickBooks Database server manager installer through both the options. But, while choosing the installation type, check if QuickBooks Desktop is previously installed on your PC.
    • Having both Database Server Manager and QuickBooks Desktop on server computer, then move to the option stating “I’’ll be using QuickBooks Desktop on this computer, AND I’ll be storing”.
    • On the other side, if you only wish to have the Database Server Manager on the server computer, pick the option stating “I will not be using QuickBooks Desktop.”
  • After making the right choice for the installation, hit the highlighted Install tab to conclude the process.

Summarizing the Above!!

With this illustrative post we hope that now you can easily fix the QuickBooks Database Server Manager has stopped working issue smoothly. However, if you are looking for any further help, then directly communicate with our professionals at +1-866-408-0444 for immediate resolution.

Get Heavy Discounts Shopping At QuickBooks Cyber Monday Sale

Finally, the wait is over as the announcement of the biggest shopping event of the year, the Cyber Monday Sale, will knock at our doorstep on 2nd December 2024. It’s good news for all the existing and new users of QuickBooks as they can take advantage of the QuickBooks Cyber Monday Sale to grab heavy discounts on their favourite products. So, what are you waiting for? Start filling your shopping cart with your favourite QuickBooks product at a great discount and accomplish your accounting tasks smoothly.

In this write-up, we have described everything regarding the benefits and features you can get while shopping at QuickBooks Desktop Cyber Monday Sales. Thus, it will help improve your shopping experience with great discounts and deals on accounting products.

Eagerly waiting to get more information regarding the QuickBooks Cyber Monday Sale 2024? Connect with our QuickBooks experts at the helpline number +1-866-408-0444 to know more about the amazing deals and offers on the Cyber Monday Sale.

Explaining the Relevance of Intuit QuickBooks Cyber Monday Deals 2024

Intuit QuickBooks Cyber Monday Deals 2024 is going to be another record-breaking online shopping event to upgrade users’ shopping experience. In this sale, you are going to get unexpected discounts and offers on all the QuickBooks products, whether it is for inventory management, payroll processing, tax filing or bank reconciliation. Now, you can save a lot of money and can do budget-friendly shopping for your favourite accounting software.

So, let’s stop wasting much time and mark your calendars for the most awaited QuickBooks Desktop Cyber Monday sales to get unmatched discounts. You can get up to 30% discount on all of the below-mentioned QuickBooks products and services. Let’s have a glance at all those QuickBooks versions given below.

CategoryQuickBooks Versions
1. QuickBooks DesktopQuickBooks Desktop Pro
QuickBooks Desktop Premium
QuickBooks Desktop Enterprise
QuickBooks Desktop for Mac
2. QuickBooks OnlineQuickBooks Online Simple Start
QuickBooks Online Essentials
QuickBooks Online Plus
QuickBooks Online Advanced
3. QuickBooks PayrollEnhanced Payroll
Assisted Payroll
Full-Service Payroll
4. QuickBooks Cloud-HostingQuickBooks Pro Hosting
QuickBooks Premier Hosting
QuickBooks Enterprise Hosting
5. QuickBooks Accountant VersionsQuickBooks Accountant Desktop
QuickBooks Online Accountant
6. QuickBooks Point of Sale (POS)QuickBooks Point of Sale (POS)
7. QuickBooks Self-EmployedQuickBooks Self-Employed

How does Cyber Monday Deals on QuickBooks Benefit the Users?

The upcoming “QuickBooks Cyber Monday Sale” is the best time of the year to invest your money and get exciting deals on your favourite accounting product. This is the best sale for business owners who can get their financial software within their budget according to their preferences. So, mark your dates in the calendar and don’t miss the chance to be the lucky person to take advantage of the biggest event of this year. Besides this, there are several other benefits that you get while shopping at Cyber Monday QuickBooks Sales 2024.

Take the Advantage of Super-exciting Discounts and Offers:-

With the help of the great QuickBooks Cyber Monday Deals you can enhance your accounting experience as you can shop more by spending less money. Moreover, if the users get more exciting deals and offers then it increases the chance to shop more and get their accounting tasks done smoothly.

Budget-Friendly Shopping:-

Another great benefit of shopping at the QuickBooks Black Friday Sale is that you don’t have to spend more money on buying good accounting software for your business. By availing yourself of the flat 70% discount on your favourite QuickBooks products, you can pick the one that fits your business best and is within your budget.

Obtain a Different Range of Options:-

While doing the shopping from the Cyber Monday Sale QuickBooks 2024 you have the option to pick any QuickBooks product according to your suitability. Once you are satisfied with the product, you can add directly to your cart so that it gets easier while shopping.

Promotes Smart Spending:-

When you know that the QuickBooks Cyber Monday sale is going to arrive, then the users won’t spend their money on the items which they don’t require. Instead, of it, they prefer to invest their money on buying the QuickBooks products at a heavy discounted rates which will be beneficial for their business.

Chance to Use New QuickBooks Products:-

The Cyber Monday Sales in QuickBooks could be a great chance for the users to try new products to make a better decision for their business. By taking the benefit of the discounts and deals during the sale you can try experimenting the new products without investing a lot of money.

How To Get the Most out of the Cyber Monday Sales QuickBooks?

Here, we have shared some suggestions that you must consider while shopping at QuickBooks’s Cyber Monday sales. These will help you maximize your savings and enhance your shopping experience.

Limited Time Deals & Offers:-

During the time of sale, there are few of the products which go out of stock very quickly due to huge demand and limited stock. So, to be the first person to get your hands on your preferred

Prepare Your Shopping List:-

The first thing you need to do is to generate a list that you want to buy from the varied range of QuickBooks product along with its prices which makes it easier to take decision. Doing so will help you cut down the time spend on scrolling different products.

Fix Your Budget:-

Before making the purchase during the sale, it is necessary to determine your spending limit and stick to it to avoid overspending.

Set Up Your Online Accounts in Advance:-

At the time of the sale, there are billions of users browse the website to make the purchases due to which it slows down the speed of the website. As a result, it might create discrepancies in making the payment so to avoid that mess it’s better to set up the online account prior. Doing so, will will let you make the payments early without any further delays.

Start Making the Comparison of the Prices:-

Another most thing you must consider while making the purchases at the Cyber Monday Sales is to monitor the prices from now onwards to ensure that you get your hands on the best deals and offers.

Opt for a Credit Card For Making the Payments:-

Credit card is proven to be the most safest mode of making the payments while purchasing at the QuickBooks Desktop Cyber Monday Sales 2024.

Unmatched Features You Can Get With the QuickBooks Desktop 2025 Version

Now, it’s high time to upgrade your QuickBooks Desktop application to the 2025 version to welcome more improved features and better functioning of the program. Below, we have explained all the features that you can enjoy by upgrading, which are as follows:

Improvised Inventory Management:-

With the advanced inventory tracking feature it has become very easy to track the inventory in real-time. Moreover, it also provides you with an alert messages whenever the stock is low. As a result, it will ensure that you restock the items that is low at the right time before it gets too late. However, it also provides you the option to access the inventory through different locations easily without visiting the office.

Smoothens the Process of Payroll:-

Within an organization, managing the employee’s payroll is the most difficult task, as it requires complete attention and effort. But now, with the help of QuickBooks Desktop 2025, users can easily prepare their paychecks and process their payroll on time depending upon their working hours. Moreover, it also makes it easier to compute the taxes and file it on time without any further delays. You can but your QuickBooks Payroll product at the most discounted rate during the sale time and get your payroll done accurately and on time.

Multi-Currency Support Feature:-

With the help of the QuickBooks Desktop 2025, you can use the multi-country management and multi-currency which helps in dealing with the international markets easily. Moreover, with the help of this feature your customers can pay in their native currency without any issues.

Upgraded AI-Generated Expense Category:-

Now, it has become much more convenient to handle expenses with the help of the User-generated expense category feature. Moreover, this feature also enhanced the speed and accuracy of computing the expense amount.

Crux Of This Blog!!

We hope that you find this post worth reading and it helps you in providing the accurate information required for QuickBooks Cyber-Monday sales. However, if you still need to get any additional information regarding the sales, then immediately consult with our QB experts at +1-866-408-0444.

Grab Exciting Discounts & Offers At QuickBooks Black Friday Sale

The most awaited moment of the year, “Black Friday Sale”, is going to knock on your doors where businesses can get amazing discounts and deals on their QuickBooks software. So, what are you waiting for? Hurry up and mark your calendars for the QuickBooks Black Friday Sale coming on 29th November 2024. Moreover, in this sale, you can get blockbuster deals on all of the QuickBooks versions like Online, Pro, Premium, Payroll, and Enterprise. As a result, it will help save a lot of money, which can be used for the further growth of the organization.

In this post, we have discussed everything regarding the features, benefits that you can get with the QuickBooks Sale Black Friday. Besides this, you can save up to 70% on the purchase of every QuickBooks product.

Want to get more information regarding the deals and discounts you can get on QuickBooks Black Friday Sale 2025? Ring us at +1-866-408-0444, and our QB experts are available round the clock to clarify all your doubts within the shortest possible time.

Learn More About the QuickBooks Black Friday Day Offers & Deal

Every year, in the month of November it’s a great opportunity for the Americans to get an amazing discounts on QuickBooks Black Friday Sale and will be extended up to Cyber Monday. You can avail up to a flat 70% discount and other mindblowing deals on the purchase of any QuickBooks products. As a result, it is the best way for the businesses to save their money and get the financial tasks done without paying much charges.

So, get ready to streamline your daily schedule and improve your business by grabbing the QuickBooks Black Friday Sale 2025. Thus, it will help you pay taxes timely, process payroll accurately and manage other financial matters smoothly. Below, we have discussed QuickBooks products and services, for which you will get up to a 70% discount at QuickBooks Black Friday Sales.

CategoryQuickBooks Versions/Products
1. QuickBooks Desktop VersionsQuickBooks Desktop Pro
QuickBooks Desktop Premium
QuickBooks Desktop Enterprise
QuickBooks Desktop for Mac
2. QuickBooks Online VersionsQuickBooks Online Simple Start
QuickBooks Online Essentials
QuickBooks Online Plus
QuickBooks Online Advanced
3. QuickBooks Point of Sale (POS)QuickBooks Point of Sale (POS)
4. QuickBooks Self-EmployedQuickBooks Self-Employed
5. QuickBooks Accountant VersionsQuickBooks Accountant Desktop
QuickBooks Online Accountant
6. QuickBooks Cloud HostingQuickBooks Pro Hosting
QuickBooks Premier Hosting
QuickBooks Enterprise Hosting
7. QuickBooks PayrollEnhanced Payroll
Assisted Payroll
Full-Service Payroll

Why Is It Beneficial to Shop On Intuit QuickBooks Black Friday Sale?

It’s the best month of the year, as the upcoming of Intuit QuickBooks Black Friday Sale on 29th November 2024 is going to set a remark this year also. So, don’t miss a chance to get your hands on the unmatched discounting rates on your QuickBooks product. Well, there are several other benefits that you can get from the upcoming QuickBooks Black Friday Sale.

  • Making a purchase at QuickBooks Black Friday Sale is the best decision you will make this year as you can get up to 30 % discount on all the QuickBooks versions.
  • The main benefit of the Black Friday Sale in QuickBooks is for the individuals or businesses who are newly added with the QuickBooks Online.
  • Moreover, you can also get excellent deals on signing up for the services that you will get on the Black Friday promotion.
  • Now, you can cut down on overspending with the upcoming Black Friday sale.
  • The users have multiple options available till the time Black Friday Sale is live according to your business requirements and budget.
  • Additionally, the users can shop their QuickBooks product of their preference under their budget at a most discounted rates.
  • You may also get a clear picture of your business with more customizable reports.
  • Another great benefit is that you can keep your crucial business data safe and secure with the more improvised security features.

What Tips You Must Consider Before Shopping on QuickBooks Sale Black Friday?

Herein, we have discussed about certain tips that you mustn’t miss to grab the most exclusive deals and offers at QuickBooks Sale Black Friday.

Limited-Time Offers:-

There are some of the most exciting deals and offers that is available on the QuickBooks Black Friday Sale for a specific period of time. So, if you want any specific product, so be the first one to get it on a flat discount of up to 70% before it gets out of stock.

Get Ready With Your Wishlist:-

Another important thing you must remember while shopping in Black Friday Sale QuickBooks is to start saving the items to on online wishlist. Doing so, will reduce your time on choosing the product on sale and it will save your time as well as money.

Be Prepared By Setting Up Of Online Accounts in Advance:-

As billions of users will shop at the same time on the sale due to which the website may slow down. Due to which, to save your time from such hustle and bustle it’s better to set up an online account earlier. As a result, it will help you in entering the payments faster and delivery details so that you can make the purchase easily.

Began Tracking the Prices earlier:-

It is important for the users to track down the prices from now onwards to assure that you are getting a better discount on the Black Friday Sale.

Make Use of the Credit Cards While Making Payments:-

Credit card is one of the most easiest and safest method to pay while purchasing the products from the Black Friday Sale.

Let’s Study About the Features And Improvements In QuickBooks Desktop 2025 Upgrade & Update

Herein, we have explained all the features and improvements that you may experience in QuickBooks Desktop 2025 upgrade and update.

1. AI-Sponsored Expense Categorization:-

Now it has become much more convenient to manage your expenses with the help of the automated expense categorization feature in QuickBooks. Moreover, this feature also helps in improving the speed of completing the tasks and accuracy by cutting down the cost.

2. More Advanced Security Features:-

Intuit, the parent company of the QuickBooks focuses more on the safety and security of the company data every time it releases its QuickBooks product. Considering this, the QuickBooks Desktop 2025 has now come up with the more enhanced security features. However, such security is hard to crack by the hackers which helps in keeping your data safe.

3. Usage of Multi-Currency Support:-

The multi-currency support feature in QuickBooks enables the users to pay through any of the native currency using the preferred mode of payment. With this, it becomes much more convenient to make the payments through any currency.

4. Advanced Inventory Management:-

Another great benefit of accessing the QuickBooks Desktop is that you can obtain better insight regarding the inventory. Thus, it lets you manage the inventory effectively with the help of generated reports based on product specific levels.

5. Prepayments On Sales Orders and estimates:-

It has now become much more easier convenient to record and monitor the customer prepayments based upon the estimates and sales orders.

Summarizing the Above!!

So, we conclude this post and hope that you have acquired all the essential details regarding the QuickBooks Black Friday Sale 2025. Furthermore, if you want to ask for more details about this sale, feel free to connect with our QB experts at +1-866-408-0444 for help.

Finding the Easy-to-Use Methods to Fix QuickBooks Error Code 6129

Struggling with company file errors such as QuickBooks Error Code 6129 isn’t less than a nightmare for the users as it causes a heavy loss to the business data. The users mainly encounter this issue if either they are using the wrong file path or the file itself is damaged. Moreover, when it occurs, it interrupts the users by flashing an error message, “QuickBooks Pro has encountered a problem and needs to close. We are sorry for the inconvenience.”

If you are also confronting the QuickBooks Error Message 6129 while accessing the data file, stick to this post until the end to obtain the quick fixes to address the issue asap. Thus, it will help you regain access to the data file and let you complete your ongoing business activity without any hassle.

Does your work seem to be hindered by the sudden arrival of QuickBooks Error Code 6129? If yes, don’t worry—simply connect with our certified QB professionals at +1-866-408-0444 to find a timely resolution for the query.

Reasons Why Users Struggle With the QuickBooks Error Code 6129

The first step in troubleshooting QuickBooks Error Code 6129 is understanding what triggers this issue. So, we will first attempt to understand what is causing the error and interrupting users’ access to the company file. Below, we have listed all the possible causes for better understanding.

  • Proper Administrative rights are necessary for running the QuickBooks company file without any interruption. However, if the user doesn’t have proper access rights, it might restrain them from accessing the file, resulting in QuickBooks Error 6129.
  • Another reason behind the emergence of the error is the interruption of the Windows Firewall or third-party security apps while opening the file.
  • It is necessary to store the company file at a designated place which can be easily accessible by QuickBooks. Otherwise, it might be responsible for the appearance of Error 6129 in QuickBooks.
  • A strong database connection is mandatory to run the company file in QuickBooks. However, the slightest fault or disturbance at the end of the network connectivity might result in QuickBooks Error 6129.

Things You Can’t Ignore While Before Rectifying Error 6129 QuickBooks

To work smoothly with the QuickBooks company file, it is important to consider a few things.

  • It’s necessary to have the up-to-date version of QuickBooks and the Windows operating system.
  • Another important point is that you must never miss getting the backup of the company file in a timely, otherwise, it might put your entire data at risk.
  • The users must log in to the QuickBooks Desktop with enough administrative rights for security purposes.
  • Smooth internet connectivity is required to run the company file and to keep the data safety intact.

Proven and Reliable Solutions to Deal With QuickBooks Error 6129

After a deep understanding of QuickBooks Error 6129, it’s time to implement effective solutions to address the issue.

Solution 1: Start Naming the Network Data File (.ND) For Fixing the issue

The damage or corruption in the network data file is also one of the prominent causes behind Error 6129 in QuickBooks. Therefore, to deal with such an issue, you are required to use the instructions below.

  • Primarily, launch File Explorer on your server computer and jump to the location to access the company file.
  • To get to your company file, use the following path: “C: >> Users >> Public >> Public Documents >> Intuit >> QuickBooks >> Company Files.”
  • In the next step, start searching for the company file having the extension corresponding to your company file. Then, you will discover that the.ND file has the exact name as the data file has with the .ND extension.
  • Soon after this, right-click on the .ND file corresponding to the company file and then hit the Rename option.
  • Then after this, add “.OLD” at the end of the file name and then press the Enter key to store the file name.
  • At last, you must try opening the QuickBooks application and then your data file once again. Eventually, after this, you can recreate the .ND file automatically.

Solution 2: Shifting Your Company File to the Desktop

In other cases, the issue may arise due to the damage or corruption with the QuickBooks company file. Therefore, in order to address the issue, you must transfer your data file to the desktop by implementing the following steps.

  • In the initial stage, you must copy your company file to the QuickBooks installation folder.
  • Move on to the next step, which is to construct a new folder on the desktop.
  • After that, you must paste the data file into a newly generated file.
  • Ultimately, the users must open the QuickBooks Desktop application and copy the data file to a new folder.

Solution 3: Get the Most Latest Version of QuickBooks & Database Server Manager

If you are still struggling with the QuickBooks Error 6129, then you must ascertain that the QuickBooks and the Database Server manager you are using is up-to-date.

Instructions to Install the Latest QuickBooks Version

  • To start this process, firstly launch the QuickBooks Desktop application and then move to the Help menu.
update quickbooks option
update quickbooks desktop
  • When you are done with the steps, try to open the QuickBooks application and get the updates installed successfully.

Instructions to Get the Updated QuickBooks Database Server Manager

  • Under this process, the users must ascertain that the QuickBooks Database Server Manager is installed successfully on the server.
  • Then after this, you need to launch the QuickBooks Database Server Manager and start getting the latest updates.
  • Conclude the process by trying to download and install if there are any available updates.

Solution 4: Take Help By Running the QuickBooks File Doctor Tool to Resolve the Issue

The users mainly run the QuickBooks File Doctor Tool in order to address the network-related issues and the damage present in the company file. However, to operate this tool, it is necessary to get the QuickBooks Tool Hub on your device by performing the steps below.

  • In the beginning, get the most updated version of the QuickBooks Tool Hub from a secure website.
  • After doing this, you must access the download area and double-tap on the downloaded setup file to start the installation process.
  • Now, from the upcoming window, thoroughly review the License Agreement and give your consent for running the tool seamlessly on your device.
  • Later on, it is advised to use the instructions presented on the screen carefully to accomplish the installation process.
  • Next, go to the desktop, open the QuickBooks Tool Hub, and from there pick the Company File Issues tab.
company file issue tab
  • Following this, you must opt for the QuickBooks File Doctor tab among the various tabs available on the screen.
  • Moving on, what you require is to choose the company file that is causing the issue from the File Explorer and then hit the Start tab.
  • Furthermore, you will notice that the process will take up to approx 10 to 20 minutes to complete.
  • Once the tool diagnoses and addresses the issue, relaunch the device and launch the QuickBooks application. If you still facing any issues while running the file, then simply try to use another troubleshooting method.

Solution 5: Began Constructing Another Folder and Browse the QuickBooks Company File

If you are working on a single computer, then you can easily launch the QuickBooks company file through a new folder.

  • Start the process by constructing a new folder on your workstation.
  • After this, you must shift the QuickBooks company file to a newly launched folder.

On the other side, if you are working on more than one computer, use the instructions as stated below.

  • Commence the process by pressing the Windows logo key to open the Start menu and then browse to the Programs and Applications.
  • Afterwards, from the available list of applications, jump to the QuickBooks application.
  • Now that you are done scanning the folder go ahead and use the QuickBooks Database Server Manager option.
  • If you are unable to get the folder having the data file, then simply skip to the Add Folder menu to include it.
  • Soon after this, you must hit the highlighted Scan option and let the process complete.
  • In the end, after winding up with the process, simply shut down the QuickBooks application to see if the issue still persists.

Read More- QuickBooks Error 6177: Easy Solutions to Try Today

Solution 6: Starting Running Your Computer in Selective Startup Mode

  • In the initial phase, open the Run Command window and input “msconfig” into the search console.
  • Soon after this, you must jump to the General tab and then hover your cursor over the Load System services, followed by the Load Startup Items.
  • Thereon, the users are required to hit the Services tab and then mark the checkbox of the “hide all Microsoft services” option. Then, mark the checkbox beside the Windows installer and hit the OK tab to proceed further.
  • Now, after implementing the above steps, you must relaunch the system and try reinstalling QuickBooks after uninstalling it.
  • Conclude the entire process by saving the changes made in the normal startup mode. Later on, try relaunching the device to spot whether the issue is resolved.

Solution 7: Access the Verify & Rebuild Data Tool For Addressing the Company File Issues

Another step involved in resolving QuickBooks Error 6129 is fixing the damages or corruption that lies with the QuickBooks company file. The main role of this tool is to detect the data integrity issues and then run the Rebuild data tool to configure the issues with the company file. You must perform the steps instructed below in the same manner as described below to rectify the issue.

  • First of all, open the QuickBooks Desktop application and skip to the File menu.
  • After doing this, from the expanded drop-down menu list, go with the Utilities option.
  • When you are done, then proceed to the highlighted Verify Data tab.

Later on, you are supposed to run the Rebuild Data tool once the data integrity issue is found to resolve the issue.

  • Herein, you first need to click the File menu and, after this, the Utilities menu.
  • From there, you must tap on the highlighted Rebuild Data tab and then wait till the time the tool is repaired.
  • Once the tool is done with the configuration of the company file, simply relaunch your system to check the error status.

Learn More- What is QuickBooks Error 6150 and Here’s How to Rectify It Instantly?

Solution 8: Administrative Rights Are Required For Running the QuickBooks Desktop

For the smooth and successful running of the QuickBooks company file, running the QuickBooks application with the proper admin rights is important. If you don’t have enough admin privileges then it might restrict you from opening the file, and result in QuickBooks Company File Error 6129. So, to resolve the issue you must run it with admin rights by performing the instructions listed below.

  • For running the QuickBooks application with the admin permissions, move to the desktop and start looking for the QuickBooks icon.
  • When you get the QuickBooks Desktop, right-click on its icon to choose the highlighted “Run as Administrator” option.
  • Soon after this, you are supposed to input the accurate login details and then press the Enter key to open QuickBooks with admin rights.
  • At last, try opening the QuickBooks and then the company file to see what’s the actual status of the error.

Summarizing the Above!!

That’s all about the QuickBooks Error Code 6129 and hope that you might find this post worth reading. If this issue is still creating a disturbance while opening the data file, then you can get a one-to-one chat with our QB experts at +1-866-408-0444 for immediate relief.

Expert’s Tips to Migrate From QuickBooks Desktop To Online

With the enhancement of technology, access to financial data from anywhere across the globe is essential. This could be possible only by running the QuickBooks Online application, as it provides immense flexibility to the users to work remotely with a stable internet connection. In that case, it’s best to migrate from QuickBooks Desktop to Online and take advantage of the cloud-based software. In this post, we have covered the facts required for the seamless migration process.

Wondering how to migrate from QuickBooks Desktop to Online and work remotely on the same project simultaneously? Give us a call at +1-866-408-0444 and have a conversation with our highly-certified experts for quick relief.

Revealing the Benefits Of Converting QuickBooks Desktop to Online

The users can experience the following benefits after converting QuickBooks Desktop to Online. So, let’s study all those advantages in detail to enhance the accounting experience.

No Worries of Generating Backup:-

Backup plays a crucial role in saving the crucial company’s data before getting into the wrong hands. With QuickBooks Online, you don’t have to schedule the backup as it generates the backup automatically. Thus, it keeps your data safe and secure to safeguard it from unauthorized access.

Promotes the Collaboration:-

Now, with the Online version in QuickBooks, it gets more convenient to collaborate the work amongst multiple users at the same time. So, now your entire team can work on the same project sitting anywhere across the globe at one time.

Improves the Security and Safety:-

Another great benefit of migrating to the QuickBooks Online edition is that it improves data security by storing every data on the cloud. As a result, only authorized users can access the financial data.

Advanced Integration Capabilities:-

Now, using the QBO application you can easily integrate with a wide range of business applications which will eventually improve the versatility.

Precautionary Measures Before Migrating QuickBooks Desktop to Online

For the seamless migration process, it is important to remember certain key factors in mind when migrating QuickBooks Desktop to Online.

Migrating QuickBooks Desktop to Online

1. Don’t Forget to Backup Your Company File :-

If you want that you data won’t lost or damage then don’t avoid to take the backup of your company file. Below, we have provided with the steps to perform for the seamless backup process.

  • Primarily, you must move to the File menu > Create backup option followed by the Switch to Single-User Mode.
  • From the upcoming window, choose the Local Backup option followed by the Next tab.
  • Now, you must switch to the Local Backup Only section and go with the Browse option. Then, you are required to save the backup of your company file at a safe place.
  • Next, you need to run the test to verify that your backup file is appropriate before you save it.
  • Afterwards, you must hit the OK tab when you’re ready to proceed further.
  • Once you are done, choose the Save it Now option followed by Next.
  • As a result, it will display a confirmation message when the backup is complete.

2. Download & Install the Latest Updates of the QuickBooks Desktop

  • In the initial phase, you must skip to the Help menu and click the Update QuickBooks Desktop from the expanded list of options.
  • After that, choose Update Now > Get Updates > Close tab to proceed.
  • When you are done, navigate to the File menu and hit the Exit menu.
  • After doing this, relaunch the QuickBooks Desktop to wind up with the process.

3. Verifying Your Total Targets:-

Next, you must verify the total number of targets. Within the QuickBooks Desktop application you can access the Product Information window to obtain the details about total target.

Also Read: Windows Firewall is Blocking QuickBooks

4. Built A New QuickBooks Online Account:-

It is essential for the users to have a valid QuickBooks Online account so that they can work remotely and get their financial tasks done.

Procedure to Migrate Your QuickBooks Desktop File to QuickBooks Online Manually

In this blog section, we have provided the stepwise instructions for all the QuickBooks Desktop versions to migrate data to the online edition.

Functions to be Performed by QuickBooks Desktop Pro or Premier Users

QuickBooks Desktop Pro or Premier Users
  • Primarily, you must sign in to your company file to access the proper admin rights that you require while importing.
  • Afterwards, switch to the Company menu, and from there, click the Export Company File to QuickBooks Online tab.
  • When you are done, simply browse to the Get Started tab and then hit the Select Destination tab.
  • At last, after completing the above steps, simply log in to your QuickBooks Online account.

Users Of QuickBooks Desktop Enterprise

  • In the first place, login to your company file with the proper administrative rights.
  • Then after this, you must skip to the Product Information window with the help of the F2 key.
  • When you are on the Product Information screen, hit the Ctrl + B + Q and then hit the OK tab situated at the middle of the page.

To monitor the inventory in QuickBooks Desktop, simply follow the instructions outlined below.

  • In the beginning, hit the Yes tab and then mention the starting date.
  • On the other side, you must tap the No option if you wish to set up new items ahead in the QuickBooks Online application.
  • After the successful conversion process, you will instantly receive an email regarding the same. Later on, choose the Complete Your Setup tab from the email to go further.
  • Then again login to your QuickBooks Online account and launch the data file that you wish to open.

Know More: QuickBooks Portable Company File

Start Migrating QuickBooks Desktop to QuickBooks Online with the Online Tool

Alternatively, you can also use the Online Tool to migrate QuickBooks Desktop to Online. For the successful migration process, you must use the stepwise instructions outlined below.

Phase 1: Began Opening the Online Tool in QuickBooks

  • First of all, it is mandatory to choose the appropriate option that best fit your QuickBooks version.
    • QuickBooks Pro/Premier
    • QuickBooks Enterprise
    • QuickBooks For Mac
  • When you are done making the correct choice, hit the Get Started tab and enter into the Intuit account with the help of accurate login credentials.

Phase 2: Attempt to Upload Your Company File

Now that you have chosen the correct QuickBooks version, it’s time to upload the data file.

  • In the earlier phase, move to the Select File tab and start searching for the supported QuickBooks file you need to shift.
  • Once the file is chosen, navigate to the Open tab and begin uploading the file.
    • Alternatively, you can also drag and drop the QuickBooks file for uploading it.
  • After uploading, it will immediately start auto-update QuickBooks Desktop to the latest release and then skip to the QBO application.
  • In the end, use the on-screen guidelines thoroughly to migrate to the QuickBooks Online application.

Functions to be Performed by the Migrator Tool Built-In QuickBooks Desktop

To run the Migrator tool built-in QuickBooks Desktop, you must follow the detailed instructions given below.

Phase 1: Consider Making the Arrangement of the Company File

There are certain key points that you must consider before you migrate QuickBooks Desktop to Online Edition.

Checking of the Company File Size and Data:-

To switch to the QuickBooks Online application, you need to fulfill a specific target for importing the data. Therefore, to accomplish that certain target you must switch to the Product Information window. From that screen, you must ascertain that the total targets should not be less than 750, 000. Besides this, if you discover that there are any issues related to the file size, then you need to condense the file size.

Ascertain That the QuickBooks Desktop is updated to the newly launched version

Before you proceed with the migration process, it is important to ensure that the application is updated to the latest version. If it is not updated, then get it updated for a seamless migration process.

When you are the QuickBooks Desktop Payroll User, proceed with the following steps.

  • In the first place, it is necessary to deactivate the employees who are not part of your organization any longer and are yet not paid.
  • Also, the users must keep the thing in mind that you need to hold on for at least 2-3 working days after running the payroll to shift the data. With this, you can get the surety that all the paychecks-related details are transferred to the Online application. Besides this, you also need to ensure that you have migrated the data smoothly until the next payroll.

Phase 2: Let’s Commence Moving Your QuickBooks Desktop File to QuickBooks Online

  • If you start running the QuickBooks version which is older than 2018, then you can run the online tool for the data migration.
  • Otherwise, you may also use the QuickBooks company file restoration tool for the upgradation of the file.
  • On the other hand, if you are operating an older version of the QuickBooks application or don’t have access to it, you can download the trial version.

Step-By-Step Guidelines To Apply By the QuickBooks Desktop Pro or Premier Users

  • Under this process, you are first required to sign in to the data file with proper admin rights that needs to be imported.
  • Next, you must switch to the Company menu > Export Company File to QuickBooks Online.
  • You are supposed to hit the Choose Online Company option followed by the QBO company with whom it needs to be replaced.
  • Now that you are done applying the steps illustrated above click the Continue tab.
  • With this, you can now monitor the inventory in QuickBooks Desktop with the help of the instructions given below.
    • You must press the Yes tab and then list the “As of Date”.
    • Alternatively, you can also move ahead with the No option for setting up of the new items in the QuickBooks Online application.
    • Now, you are required to input “Agree” in the empty area and then move to the Replace button.
    • Once you are done with the above steps, choose the “Yes, go ahead and replace the data” option followed by the Replace tab.

Also See: QuickBooks Desktop 2025 Release Date

Phase 3: Let’s Start Running the QuickBooks Online Application

After the successful migration of the QuickBooks Desktop to Online, you must implement the stepwise instructions outlined below.

  • Now, users are able to connect to their bank or credit card accounts smoothly.
  • Moreover, you can also establish and send the invoices to your customer.
  • After that, you can now easily monitor the bills and pay them using the QuickBooks Online application.

What Data You Can’t Migrate from QuickBooks Desktop to Online?

Unfortunately, there is certain data that you won’t be able to migrate from QuickBooks Desktop to Online. Below, we have described all of the information.

  • Due to certain security reasons, you won’t be able to transfer the bank or credit card details. You are advised to transfer that information manually.
  • Moreover, it also won’t allow you to move the three different types of currencies to the QuickBooks Online application.


Ending Point!!

So, here comes to the end of this post, and hope you can now easily migrate from QuickBooks Desktop to Online. Thus, it will help you accomplish business activities easily without any interference. If you are still searching for any further assistance then feel free to communicate with our QB experts at +1-866-408-0444 for help.

Windows Firewall is Blocking QuickBooks? Here’s How To Figure It Out.

A firewall is found to be one of the most important parts of network security, which blocks inbound access for harmful programs and applications for security reasons. Similarly, there are certain instances when a Windows firewall is blocking QuickBooks, which prevents you from opening the company file. Thus, it not only disturbs the ongoing business process but leads to delays in ongoing tasks. Therefore, it is necessary to assign proper permissions to the Windows firewall for the smooth running of the QB program.

In this write-up, we have described all the possible causes along with simple troubleshooting methods to overcome QuickBooks Windows Firewall blocking issues. Thus, it would help you accomplish financial tasks easily with QuickBooks without interruption from the Firewall.

Is the Windows Firewall blocking QuickBooks and you cannot proceed with your accounting tasks? Ring us at+1-866-408-0444 and address the issue quickly by reaching our highly-certified QB professionals.

What Could be the Reasons That Triggers QuickBooks Windows Firewall is Blocking Issue?

If you ever encounter the QuickBooks Windows Firewall blocking issue, it could happen for multiple reasons. So, it is essential to understand the possible causes, which will eventually help you find the right solution for the issue. Below, we have provided you with all the possible causes that might be hampering your smooth running of QuickBooks.

windows firewall
  • Misconfigured Settings of the Windows Firewall are one of the reasons that might prevent you from accessing the QuickBooks application.
  • You might receive the Windows Firewall blocking QuickBooks issue when the QuickBooks version you are using isn’t supported on your Windows operating system.
  • Sometimes, the Windows firewall blocks QuickBooks, interrupting the users when the port utilized by QuickBooks to run webpages isn’t set appropriately.
  • In some cases, the Windows Firewall blocks access to the Internet, which prevents users from using the QuickBooks application.
  • The users might encounter this issue when the third-party security applications create a security wall preventing users from using the QuickBooks program smoothly.

Preliminary Precautions Before Fixing QuickBooks Database Server Manager Windows Firewall is Blocking Issue

You must keep certain key crucial points in consideration before troubleshooting QuickBooks Database Server Manager Windows Firewall is Blocking issue.

  • The first thing you must remember is to ensure the QuickBooks Desktop version you are presently using is the latest one.
  • Another crucial point is to test whether your internet connection is set properly.
  • Moreover, it would help if you see that the ports in the Windows Firewall are set properly.

Here’s How to fix QuickBooks Database Server Manager Windows firewall is blocking QuickBooks Issue

Once you’ve grasped the possible causes, you can explore the most efficient ways to tackle with QuickBooks Database Server Manager Windows firewall blocking QuickBooks issue. So, let’s have a quick overview of all the possible solutions described below to fix the issue effortlessly.

Fixation Way 1: Adjusting the Firewall Permissions Manually To Fix the Issue

Users working on multiple versions of QuickBooks Desktop on one computer need to set up firewall permissions manually. In that scenario, you need to implement the basic steps provided below.

  • Primarily, you must launch the Start menu and input “Windows Firewall” in the search panel in the middle of the screen.
  • After this, choose the “Windows Firewall” option to open a new window, from which you can click the Advanced Settings tab.
QuickBooks windows firewall
  • Thereon, right-click on the Inbound Rules option and choose the New Rule option > Port > Next.
choose the port option
  • If you are done with the steps now, check that the checkbox beside the “TCP” is chosen.
choose TCP option
  • Furthermore, you must head to the Specific Local Ports field and input the ports associated with your QuickBooks version.
  • QuickBooks Desktop 2020 and later: 8019, XXXXX.
  • QuickBooks Desktop 2019: 8019, XXXXX.
  • QuickBooks Desktop 2018: 8019, 56728, 55378-55382.
  • QuickBooks Desktop 2017: 8019, 56727, 55373-55377
select Specific local field
  • Once the port number is added, you need to choose the Allow the Connection option and go ahead.
click on allow the connection
  • Now, you must ensure that you have chosen all the profiles and click the Next tab.
chosen all the profiles
  • In the next step, you must generate a new rule named “QBPorts(year).”
  • Now, choose the Finish tab when you have completed the above steps.
  • At last, the users must apply the same steps to the Outbound Rules and then resolve the issue.

Fixation Way 2: Consider Setting up QB as Exception in Windows Firewall

Setting up QuickBooks as an exception in Windows Firewall will let you run the application smoothly without the interruption of security programs. Use the steps outlined below to accurately set up QuickBooks as an exception.

  • Primarily, open the Start menu, input “Windows Firewall” in the search panel, and hit the Enter key.
  • Secondly, you will discover the Windows Firewall screen, from which you must head to the Advanced Settings option.
  • Then after this, start looking for the Inbound Rules, right-click on it, and then move to the New Rule option.
  • Done till now, you must proceed to the Program option and then click This Program Path followed by the Browse tab.
  • Subsequently, you must locate any one of the executable files through the table illustrated below. Once the above steps are over, then click the Next tab.
    • QuickBooks Desktop 2020 and later: 8019, XXXXX.
    • QuickBooks Desktop 2019: 8019, XXXXX.
    • QuickBooks Desktop 2018: 8019, 56728, 55378-55382.
    • QuickBooks Desktop 2017: 8019, 56727, 55373-55377
  • As soon you add the port number, choose the Allow the Connection option.
  • Now, you must ensure that you have chosen all the profiles and click the Next tab.
  • In the proceeding step, you must generate a new rule and name it “QBPorts(year)”.
  • Finally, choose the Finish tab, and then you must apply the same steps for the Outbound Rule after winding up the steps.

Fixation Way 3: Ensure Setting up Windows Firewall Exceptions in QuickBooks Program

For setting up Windows Firewall as an exception in QuickBooks program will let you run the application smoothly without the interruption of the security programs. Use the steps outlined below for the accurate setting up of QuickBooks as exception.

  • Primarily, you must open the Start menu, input “Windows Firewall” in the search panel, and then hit the Enter key.
  • Secondly, you will discover the Windows Firewall screen from where you must head to the Advanced Settings option.
  • Then after this, start looking for the Inbound Rules, right-click on it, and choose the New Rule option.
  • Done till now, you must proceed to the Program option and then the This Program Path followed by the Browse tab.
  • In the next step, what you need is to locate any one of the executable files through the table illustrated below and then click the Next tab.
AutoBackupExe.exeC: >> Program Files >> Intuit >> QUICKBOOKS YEAR
Dbmlsync.exeC: >> Program Files >> Intuit >> QUICKBOOKS YEAR
DBManagerExe.exeC: >> Program Files >> Intuit >> QUICKBOOKS YEAR
FileManagement.exeC: >> Program Files >> Intuit >> QUICKBOOKS YEAR
File MovementExe.exeC: >> Program Files >> Intuit >> QUICKBOOKS YEAR
QuickBooksMessaging.exeC: >> Program Files >> Intuit >> QUICKBOOKS YEAR
QBW32.exeC: >> Program Files >> Intuit >> QUICKBOOKS YEAR
QBDBMgrN.exeC: >> Program Files >> Intuit >> QUICKBOOKS YEAR
QBServerUtilityMgr.exeC: >> Program Files >> Common Files >> Intuit >> QuickBooks
QBCFMonitorService.exeC: >> Program Files >> Common Files >> Intuit >> QuickBooks
QBLaunch.exeC: >> Program Files >> Common Files >> Intuit >> QuickBooks
QBUpdate.exeC: >> Program Files >> Common Files >> Intuit >> QuickBooks >> QBUpdate
IntuitSyncManager.exeC: >> Program Files >> Common Files >> Intuit >> Sync
OnlineBackup.exeC: >> Program Files >> QuickBooks Online Backup

Once again, after adding the ports, you must choose the Allow the Connection option and then move to the Next step.

  • If asked, verify that all the profiles are chosen appropriately soon after this and then move ahead.
  • Thereafter, it is mandatory to generate a new rule and name it “QBPorts (year).”
  • When you are done naming the rule, you must hit the Finish tab, and then you can implement the same rules for Outbound Rules.

Fixation Way 4: Do the Necessary Changes to the Antivirus Software Settings

  • In the beginning, you must launch the Start menu and then move to the Settings option.
  • When you reach the Settings window, you must opt for the Update and Security option and then the Windows Security.
windows security
  • Thereon, simply browse to the Virus and Protection and access the Manage Settings option to move further.
  • Soon after, you need to head towards the Exclusions field and click the Add or Remove Exclusions.
  • Finally, you must browse to the QuickBooks option, and you will see that the Windows firewall will not block access to QuickBooks.

Fixation Way 5: Take Help To Resolve the Issue Through the QuickBooks File Doctor Tool

run QuickBooks file doctor
  • Before proceeding, you must download and install the most updated version of the QuickBooks Tool Hub on their devices.
  • When you have completed the proper setup of the QuickBooks Tool Hub, you must launch it.
  • Afterward, you need to choose the QuickBooks File Doctor tab. Then, you must start searching for the company file that is having issues. To locate your data file, click on the drop-down menu and then pick the one to proceed with the procedure.
  • Done till now, you must hit the Check your file and network option followed by the Continue tab.
  • As soon you click the Continue tab, it will prompt you to mention the admin password properly, and then hit the Next tab.
  • Soon after this, you need to hold for a few minutes until you finish the scanning process.
  • Finally, you will discover that the “Unsuccessful scan” message will emerge on the screen.

Need More Professional Assistance? Directly Connect With Our QB Professionals

Through this comprehensive guide, we hope you have learned all the possible causes and simple techniques to configure Windows Firewall is blocking QuickBooks issues. If the Firewall is still disturbing you while running QuickBooks, then stop hesitating and immediately communicate with our QB experts at +1-866-408-0444 for quick resolution.