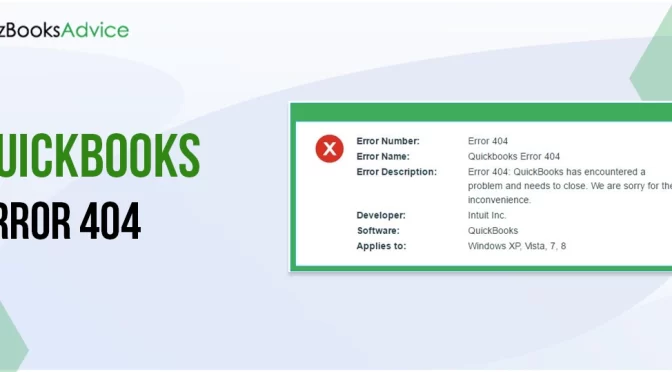
All posts by admin

QuickBooks Error 1904: Causes and Fixes Explained

QuickBooks has undoubtedly earned a great name in the accounting industry, helping streamline complex finance-related activities. But suddenly, users might report the most frustrating QuickBooks Error 1904 while installing the QuickBooks Desktop application. It could happen when there is damage or corruption in your company file. 

Unfortunately, the 1904 Error QuickBooks might cause blunders in proceeding with ongoing tasks seamlessly. So, let this guide act as your support system in finding the causes behind the issue and effective solutions to fix it.

Are you having trouble with the 1904 QuickBooks Error and unable to accomplish your financial tasks? Connect with our QB professionals instantly at 1-844-266-9345 and let them help you resolve your query as soon as possible. 

Here’s a Brief Introduction About the QuickBooks Error Code 1904

The users might have experienced QuickBooks Error Code 1904 during the software installation. It could also occur after upgrading the operating system from one version to another. Besides this, the error throws any one of the following error messages stating:-

Error 1904: [file path / name / extension] failed to register” or “Error 1904: IcWrapper Dll Failed To Register.” 

How to fix QuickBooks error 1904

Error 1904 QuickBooks states that specific Microsoft components, such as NETFramework or MSXML, are required for installing QuickBooks, which isn’t working properly. Other reasons could be inappropriate file locations, an outdated QB application, or a poor internet connection. Fixing the issue immediately is possible; otherwise, it may disrupt the workflow. 

What are the Reasons That Encourage QuickBooks Install Error 1904 to Appear? 

There are plenty of reasons why users struggle with QuickBooks Install Error 1904. It’s mandatory to gain in-depth knowledge of all of them, which will assist you in fixing the issue smoothly. Below, we have stated all the possible root causes that trigger this issue.

Insufficient Storage Space:- 

You must have adequate storage space to download and install QuickBooks Desktop. A lack of storage space might result in installation issues, such as QuickBooks Error Code 1904. 

Software Compatability Issues:- 

The outdated version of the QuickBooks Desktop might not be compatible with your latest Windows operating system. Thus, it might interrupt the users from installing the application and end up with a 1904 QuickBooks Error. 

Inadequate User Permissions:- 

Proper user permissions are required to seamlessly edit and install the QuickBooks Desktop application on your device. However, if the users don’t have proper permissions, this might cause this issue and interrupt the ongoing tasks. 

Problems Due to Corrupted Installer:- 

At times, it has been reported that the installation file gets damaged or corrupted during QuickBooks download or transfer. As a result, it might create problems with the installation and cause this error. 

Network-Related Issues:- 

Sometimes, an inconsistent internet connection might create problems with the QuickBooks installation and give rise to Error 1904 in QuickBooks. 

Presence of Corruption in Windows Registry:- 

The installation issue may be due to the damaged or corrupted Windows Registry. 

Conflicts Due to Interruption of Firewall or Antivirus Software:- 

In certain instances, this issue may trigger when the Windows Firewall or antivirus software blocks access to the Internet, which might prevent users from installing QuickBooks. 

Also Read : QuickBooks Error Code 195

What is the impact of Getting Error 1904 in QuickBooks Desktop? 

Upon the arrival of Error 1904 in QuickBooks Desktop, the users might face the following consequences. Let’s walk through the following repercussions to prevent the error from occurring in the future. 

  1. The QuickBooks application might not be able to be installed, which could create problems while you continue with your financial tasks. 
  2. In some instances, you may observe the computer’s sluggish performance due to this error. 
  3. The users may observe that their system stops displaying automatic updates on their system. 
  4. Sometimes, the QuickBooks Error Code 1904 started freezing or crashing frequently. 
  5. This error will eventually result in the slow performance of their Windows operating system. 

Explore More About How to fix error 1904 when Installing QuickBooks

The procedure for installing QuickBooks Desktop is straightforward and simple. However, complications may arise during the installation due to QuickBooks error 1904. You don’t have to worry anymore if you are struggling with this error, as it can be easily fixed with the following tried-and-tested solutions. Let’s thoroughly review the steps listed in the same sequence as listed below.  

Quick Fix 1: Adjusting the Windows Account Settings Properly 

The inaccurate Windows account settings might be responsible for the appearance of QuickBooks Error Code 1904. So, to overcome the issue, you must modify the account settings by implementing the steps below. 

Transferring to your Windows Admin Account

  1. Initially, tap the Start menu and then launch the Command Prompt window. For that, mention “CMD” in the search console of the Start menu and hit the Enter key.
  2. After that, once you see the CMD icon, right-click on it to pick the Run as Administrator option.
  3. Once you see that the CMD window loads, add the “net user administrator/ active: yes” command and press the Enter key to move ahead. 
  4. Afterwards, the users must remember to shut down the window once the command is complete. 
  5. Following this, you must press the Windows key and choose the Sign-Out option. 
  6. Finally, you must pick a suitable account that states Administrator and then log into the account with the proper details. The best thing is that you don’t require to enter the password manually. 

Also Know : QuickBooks Error Skipped 111

Editing Of User Permissions Manually 

  1. In the beginning, hit the Windows key from the keyboard and add File Explorer in the search field to open it on your workstation.
  2. After that, look for the “C: >> Program Files >> Common Files” to proceed further. 
  3. Following this, right-click the Common Files folder and then hit the Properties option. 
  4. Proceed further by moving to the Security tab and then tap the Edit menu.
  5. Now, you must choose the highlighted “Group or user names” section and click the Users option.
  6. Thereon, disable the following permissions: “Modify, Read & execute, List Folder contents, Read, Write. 
  7. Once you are sure that all the changes are done accurately, hit the Apply and then the OK button to save those changes. 

Perform the Installation of QuickBooks Again and then Log Out

  1. Visit the official Intuit website to download the updated version of QuickBooks Desktop. 
  2. Once the download is over, launch the downloaded setup and use the on-screen prompts to accomplish the QBDT installation. 
  3. After successfully completing the QuickBooks application, click the Start menu and log out of the admin account. 
  4. Thereon, you are required to logged into your usual user account again and open the Command Prompt window.
  5. Furthermore, mention the “net user administrator / active:no” in the search panel and press Enter. Eventually, it will hide your administrator account successfully. 

Quick Fix 2: Take Advantage of the QuickBooks Install Diagnostic Tool 

The QuickBooks Install Diagnostic is the perfect tool to diagnose and repair the issues with the installation of the application. Thus, it helps to troubleshoot the QuickBooks Error Code 1904 so that you can resume your ongoing financial tasks. 

QuickBooks Install Diagnostic Tool 
  1. Firstly, ensure that the users are ready to download the updated version of QuickBooks Tool Hub on their PCs. 
  2. After this, complete the installation of the Tool Hub by implementing the instructions given on the screen. 
  3. Once you are all sorted with the installation, double-tap the QuickBooks Tool Hub icon, and from there, choose the Installation Issues tab. 
  4. Thereon, the users must pick the highlighted QuickBooks Install Diagnostic Tool tab and let the tool run. 
  5. Now, you are supposed to wait patiently unless the tool diagnoses and repairs the damages present in the QuickBooks application.
  6. Finally, relaunch your computer and open QuickBooks to verify whether the issue persists. 

Also See : QuickBooks Error H202

Quick Fix 3: Get Ready With the Updated Version of Adobe Flash Player Installed 

You can also resolve QuickBooks Error Code 1904 by reinstalling the latest version of Adobe Flash Player. 

  1. In the beginning, open the Run Command window by hitting the Windows + R keys together. 
  2. After that, mention “Control Panel” in the search field and hit Enter to bring up the Control Panel window. 
  3. You are supposed to hit the Uninstall a Program option and then tap on the Adobe Flash Player twice from the list of programs available.
Updated Version of Adobe Flash Player Installed 
  1. In the next step, choose the Uninstall option and proceed further with the instructions given on the screen. 
  2. Once you have downloaded and installed the Adobe Flash Player, move further.
  3. Finally, when you are done with the installation part, relaunch your system and try to install QuickBooks again to check the error status.

Quick Fix 4: Start Fixing the Damages in Windows Components Manually 

To troubleshoot damages in Windows Components such as NETFramework and MSXML, follow the steps outlined below. 

Instructions to Repair the .NETFramework Issues 

  1. Before processing ahead, you must shut down all the open programs on your workstation.
  2. Afterward, press the Windows key and open the Control Panel window on the screen. 
  3. Soon after this, from the list of installed programs, go with the .NETFramework option.
  4. Later on, browse to the Programs and Features to repair the issue quickly. 
Fixing the Damages in Windows Components Manually

Instructions For the Registration of MSXML.dll File 

  1. To begin the process, users must type “CMD” in the search console of the Start menu. 
  2. Once you locate the icon of CMD, right-click on it to choose the highlighted Run as Administrator option.
  3. With this, you will notice that the Command Prompt window will open up on the screen wherein mention “cmd” to receive the C: root directory. 
  4. You are supposed to press the shortcut key on the keyboard CD Windows/ syswow64/. 
  5. After getting the syswow64, include regsvr32 MSXML6.dll and press the Enter key. 
  6. Finally, try to install the QuickBooks application again to verify the issue. 

Quick Fix 5: Confirm that Operating System is updated to the latest version 

Running an outdated operating system is a major cause of QuickBooks Error 1904. So, to troubleshoot the issue, it’s crucial to update the operating system using the following steps. 

  1. Users must press the Windows key and hit the Gear icon to continue with the process. 
  2. Afterward, the users must tap the highlighted Update and Security and then the Update tab.
  3. Once you are all set, tap the Check For Updates option to continue the process. 
  4. Finally, relaunch your computer after completing the update process and open the QuickBooks Desktop to verify if the QuickBooks Error Code 1904 exists. 

Read More : QuickBooks Error Code 12000

Other Instances When You Get Error 1904 in QuickBooks Desktop 

In this blog’s section, we have described different instances when you see Error 1904 in QuickBooks Desktop. Use the following troubleshooting steps to eliminate the issue instantly. 

Instance 1: When you experience the Error 1904 While running Bitdefender 

The users must add QuickBooks Desktop to the Bitdefender exclusion list. However, turning of the Bitdefender software won’t fix the issue in the following cases.

  1. When you are running the 32-bit of Windows OS, mention “C: >> Program Files >> Common Files.”
  2. Whereas, if you are operating a 64 bit operating system, then list the “C: >> Program Files >> Intuit C: >> Program Files (x86) >> Intuit.”

Instance 2: When you encounter Error 1904 while installing Adobe Flash Player

If you see Error 1904 while installing Adobe Flash Player, uninstall it and install it again. To do so, you must apply the following steps carefully. 

  1. The first and foremost step is to download and run the QuickBooks Install Diagnostic Tool. 
  2. Once you are all set, hit the Windows key and add “Control Panel” within the search panel to open the Control Panel window. 
  3. Afterward, navigate to the Uninstall a Program option and hit the Adobe Flash Player ActiveX from the available options. Then, tap the Uninstall option to proceed further with the ongoing process. 
  4. Soon after this, you must follow the instructions on the screen to uninstall Adobe Player successfully.
  5. Furthermore, get the updated version of the Adobe Flash Player and then try installing it again by applying the steps given on the screen. 

Instance 3: When you Receive Error 1904 referring to QBversionTool.dll 

Before resolving this issue, you must run the QuickBooks Install Diagnostic tool and adjust the admin settings. Once you are all set, use the steps given below to resolve the issue quickly. 

Testing Of Your Permissions 

Even after running the Install Diagnostic tool if you are still receiving the Error 1904 QuickBooks, run the test to find out if anything else is responsible for this issue. 

  1. In the first stage, open the Start menu and add “Notepad” to open it on your workstation. 
  2. Once the notepad opens up on the screen, write “QBTEST” in the note. 
  3. Soon after this, navigate to the File menu and choose the Save As option to restore the changes made. 
  4. Furthermore, you are required to save the changes done to either “C: >> Program Files >> Common Files” or to the “C: >> Program Files(x86) >> Common Files.”
  5. Afterward, if you fail to save the note to the folder, sign in again and try to install the QB with the proper admin credentials. 

Installation of the QuickBooks With Admin Credentials 

  1. To commence with, you must launch the Start menu, and then log out. 
  2. Once you are all sorted, pick the account named Administrator and then log out. 
  3. End the entire process by installing QB with admin details and following the steps provided on the screen. 

Read About : QuickBooks Error QBWC1039

Taking Everything Into Account!!

We hope you can easily overcome QuickBooks Error 1904 after implementing the solutions described in this post. If you need help with installing the QuickBooks application, get help from professionals. They are just a call away to help you out in the best possible manner. 

QuickBooks Error 6177: Easy Solutions to Try Today

QuickBooks has become the utmost priority for businesses in handling complex accounting, inventory management, and payroll-related tasks. Moreover, it contains the company file that contains all the essential details regarding the company. Considering its importance, keeping the data file safe and secure is the utmost priority for the company. However, sometimes, users might encounter QuickBooks Error 6177 while trying to open the file. This issue is mainly reported when the users have either changed the company file location or damaged the file. 

The inability to access the company file due to Error 6177 in QuickBooks might put the company file data at risk. So, it’s mandatory to fix this issue soon and regain access to the file using the proven methods explained in this guide. 

Are you looking for expert advice on how to tackle the complex QuickBooks Error 6177? Call our QB experts at 1-844-266-9345. who are available 24/7 to fix the issue immediately. 

What Do You Understand By QuickBooks Error 6177 & Why Does it Occur?

QuickBooks error 6177 0

The appearance of QuickBooks Error 6177 usually pops up while attempting to open the company file. This issue states that the data file you are trying to open is either inaccessible or your system doesn’t have enough rights to open it. Apart from this, when the error occurs, it reflects the following error message on the screen that states: “We’re sorry, QuickBooks encountered a problem,” along with QuickBooks Error Code 6177. 

This issue could be caused by multiple other reasons described below. Read all of them properly to understand all the primary causes. 

Also Read: QuickBooks Error 6147

Flaws With the Company File Path:- 

One of the primary reasons for QuickBooks Error Code 6177’s appearance is accessing the wrong file path. This situation usually occurs when you move the file to a different location without updating the path in QuickBooks. Consequently, the mapped drive letter has changed, leading to an incorrect path reference.

Inadequate Configuration of the Network Settings:- 

Sometimes, QuickBooks Desktop may encounter Error 6177 due to improper network settings. The wrong network permissions might prevent users from accessing the company file. 

Problems At the End of your Server:- 

If the server on which you have stored your company file has issues, it might block QuickBooks from accessing the data file, leading to QuickBooks Error 6177 0. 

Insufficient Permissions to Access the Company File:- 

The QuickBooks company file folder must have the correct permissions set so that you can access the file appropriately. However, if the permissions are set correctly, QuickBooks can make the necessary changes.

Incompatible Version of the QuickBooks Desktop:- 

Older versions may not be compatible with newer operating systems or network configurations. Working on an unsupported version of QuickBooks could also result in QuickBooks Error Code 6177.

Presence of Damaged or Corrupted Company File:- 

Your QuickBooks company file may get corrupted due to sudden power outages or improper shutdown of QuickBooks. Consequently, the corrupted file could also be the reason for this issue. 

What Are the Warnings You May Spot When QuickBooks Error 6177 0 Occurs? 

Following are the consequences that you may identify when the QuickBooks Error 6177 0 hits your computer. Let’s study them in detail to prevent the issue from happening in the future. 

Notification Regarding the Error Message:- 

The most immediate and obvious symptom of QuickBooks Error 6177 is the appearance of an error message. This message typically reads:

“QuickBooks is attempting to open this Company file. Before you can open the company file from your computer, QuickBooks needs to update the file location.”

Inability to Access Your Open Company File:- 

Users may be unable to open the company file stored on the server or network drive. 

Sluggish Performance of QuickBooks Application:-

Even if QuickBooks doesn’t crash outright, users may experience performance degradation. It might include slow response times when accessing the company file or delays in executing commands within QuickBooks.

Malfunctioning of the Internet Connection:-

Users may observe network timeouts while attempting to access the data file. Consequently, it may start flashing error messages regarding the network connectivity on the computer screen. 

Error Messages Regarding “Access Denied”:- 

Users may encounter access-denied errors when opening or modifying the company file regarding folder permissions. 

Issues Regarding the Crashing or Freezing of QuickBooks:- 

Another possible symptom is that the QuickBooks application began to freeze or crash while launching the company file. 

Read More: QuickBooks Error Code 6129

Here’s What to Do When You Have the Full Version of QBDBMgrN Installed on the Server 

Use the following troubleshooting procedures if you have only installed the full version of QuickBooks Database Server Manager on the server. 

Quick Fix 1: Start Updating Your File Location 

Switching your location is essential if you have placed your data file on a server, an external hard drive, or in the cloud. You are supposed to follow the steps below to move it to your local drive and back to its original location using the following steps. 

Stage 1: Begin Transferring Of Company File from its original location- 

  • Launch the Windows Start menu on your server computer or workstation in the initial phase.
  • After that, insert “File Explorer” into the search area and open File Explorer on your system.
  • In the next step, search for and open your QuickBooks folder. Alternatively, press F2 while QuickBooks is open to get the location.
  • You are supposed to find your company file, which ends with QBW. Herein, you must verify that the file name must be represented It should look like this: [company name].qbw.
  • Now, you must write down the name and location of the drive. You’ll put the file back here later on. Here’s an example: “C: >> Users >> User >> Documents >> Intuit >> QBFiles >> sample_product-based business.qbw.”
  • Finally, transfer your company file from this folder to C: drive. While moving the file, make sure you only transfer the file, not the entire folder.

Stage 2: Establish a Portable File and Recover them to your Server 

  • In the beginning, open the QuickBooks Desktop on the workstation where you have transferred your data file.
  • After this, navigate to Open or restore an existing company and launch the data file you transferred to C: drive.
  • Now, construct a new Portable Company File, which will prepare a portable version of the file that also resets your file location data.
  • You must navigate to the File menu > Quit QuickBooks and then try to open the QuickBooks application once again.
  • Once again, go to the File menu > Open or Restore Company > Restore a Company File > Next. 
  • In the next step, look for the portable company file that you have recently created and then click Open > Next.
  • Subsequently, pick the drive from where you have originally transferred your data file through the restore location. 
  • Soon after this, hit the Save button, and it will move your data file back to the network.
  • Once again, switch to the File menu and hit the Quit QuickBooks option. 

Quick Fix 2: Begin Installing the Latest QuickBooks Desktop Updates

Updating the QuickBooks Desktop to the latest version is another possible solution for troubleshooting QuickBooks Error 6177 0. Follow the steps outlined below to accomplish the desired task. 

  • In the first place, open the QuickBooks Desktop on your computer. 
  • After this, switch to the Help menu and select About QuickBooks Desktop.
  • You should note down the current version and the release number displayed.
  • Once again, move to the Help menu and select Update QuickBooks Desktop.
  • Thereon, from the Update QuickBooks window, pick the Update Now tab.
  • In the next step, choose the Get Updates button to start downloading. Users must ensure that their system is connected to a stable internet connection, which is essential for a smooth download.
  • Once the download is complete, you will receive a notification.
  • After this, you must close and then try to reopen QuickBooks Desktop.
  • You will be prompted to install the update. Later on, select Yes to begin the installation.
  • Afterward, you must follow the on-screen instructions to complete the installation process.
  • Ending the process by restarting your computer after the installation is complete to ensure all changes take effect.

Also See: QuickBooks Error 6150

Quick Fix 3: Fix the Damaged Company File With the QuickBooks File Doctor Tool 

QuickBooks File Doctor is crucial in diagnosing and fixing damaged or corrupted company file issues, including Error 6177. Below, we have provided stepwise instructions for running the tool and repairing the damaged file.

Fix the Damaged Company File With the QuickBooks File Doctor Tool 

Step 1: Get Ready With the Latest QuickBooks Tool Hub Download: 

To get the latest version of QuickBooks Tool Hub download, visit the official Intuit website to download the latest version of QuickBooks Tool Hub. This tool contains various utilities, including QuickBooks File Doctor.

Step 2: Perform the Installation of the Previously Downloaded Tool Hub:

  • In the first stage, open the downloaded file (QuickBooksToolHub.exe).
  • After that, you must follow the on-screen instructions to install the Tool Hub.
  • Once installed, you should open QuickBooks Tool Hub by double-clicking its icon on your desktop.
  • Run the Latest Version of QuickBooks File Doctor Tool:
  • First of all, open the QuickBooks Tool Hub and then select the Company File Issues tab.
  • You are supposed to click on the Run QuickBooks File Doctor button. 
  • Thereon, click the Browse button from the QuickBooks File Doctor to locate and select your company file. Herein, you will observe that the file you see must have a “.QBW” extension.
  • Now that you are done selecting your company file tap the Open button.
  • In the next step, you must select “Check your file” option and then click Continue.
  • If prompted, enter your QuickBooks Admin password and hit the Next button.
  • Consequently, the QuickBooks File Doctor will diagnose the selected company file for issues. This process can take some time, depending on the file size and the nature of the issue.
  • Once the diagnosis is complete, the File Doctor will automatically attempt to repair any issues.
  • If File Doctor finds issues that can be fixed, follow the on-screen instructions to complete the repair process.
  • Once the process of repairing the file is over, open QuickBooks Desktop. 
  • Finally, you must try to open your company file to see if the issue has been resolved.

Quick Fix 4: Try to Repair the Issues With File Path Manually

To configure the damages with the file path, thoroughly implement the steps outlined below. 

Repair the Issues With File Path Manually

Stage 1: Locate and Remove the Network Data File (.ND):- 

The main function of the network data (.ND) file is to search the data file over the network or within the multi-user mode. Therefore, to fix the issue, you need to delete the .ND file with the following instructions.

  • First, launch Windows File Explorer on your server computer and locate the QuickBooks folder.
  • After that, you must search for the data file ending with the ND extension. Ensure the file name is reflected as “ [MyCompanyFileName].qbw.nd.”
  • Once you are all sorted, right-click the .ND file and choose the Delete option.

Stage 2: Utilize the Updated QuickBooks Database Server Manager 

Database Server Manager Error Code 61770

QuickBooks Database Server Manager plays a crucial role as it helps in managing your QuickBooks company files in a multi-user environment. It also helps resolve network-related issues, including QuickBooks Error 6177. Below, we have described the stepwise instructions for using it to fix Error 6177. 

  • In the first stage, visit the official Intuit website and download the QuickBooks Database Server Manager.
  • Soon after this, you need to run the downloaded setup file and follow the on-screen instructions to install the Database Server Manager.
  • Afterward, you must ensure you install it on the server or the computer having your QuickBooks company files.
  • Once you are done with the installation, open the QuickBooks Database Server Manager.
  • Next, you need to verify if any updates are available. If so, download and install the latest updates.
  • Proceed to the Start menu, search for QuickBooks Database Server Manager, and open it.
Scan QuickBooks Database Server Manager 
  • Thereafter, navigate to the Scan Folders tab > Browse button and select the folder containing your QuickBooks company files.
  • In the next step, you must add the folder to the scan list.
  • You should click the Scan button to begin scanning the selected folder.
  • Consequently, the tool will scan the folder and display the company files it finds.
  • Now, switch to the Database Server Manager and go to the Database Server tab.
  • Ensure that the QuickBooksDBXX (where XX represents the version of QuickBooks) service is running.
  • The users must ensure the folder containing your company files has the correct permissions.
  • You must right-click on the folder, select Properties, and go to the Security tab.
  • Moreover, you must ensure that all users who need access have full control over the folder.
  •  Now, you must launch the QuickBooks Desktop on your server and workstations.
  • Finally, you must attempt to open your company file to check if Error 6177 still exists.

Know More: QuickBooks Error 6073-99001

Learn How to Rectify QuickBooks Error 6177 When You have Full Version of QB on the server 

For instance, if you have both QuickBooks Desktop and QuickBooks Database Server Manager installed on the server, use the troubleshooting solutions listed below. 

Quick Fix 1: Configuring the Multi-User Hosting Settings Again 

  1. Primarily, you must launch the QuickBooks Desktop on the server computer and then click the File menu > Utilities. 
  2. After this, you must tap the Stop Hosting Multi-User Access and then click the Yes button to provide the confirmation. 
  3. Once you are all set, hit the File tab again and then the Quit QuickBooks option. With this, you will be able to reset your hosting settings accurately. 
  4. Thereon, you must try again opening the QuickBooks application and avoid opening your data file.
  5. Now, again go to the File menu and tap the Utilities option > Host Multi-User Access, followed by the Yes button for confirmation.
  6. End the entire process by clicking the File menu > Quit QuickBooks option. 

Quick Fix 2: Shift Your Data File to Your Server’s Local Hard Drive 

If you notice that your data file isn’t located on your local server, i.e., C: drive, move it and then prepare the portable data file. 

  1. The first and foremost step is to click the Start menu on the server computer. 
  2. Afterwards, you must enter “File Explorer” into the search panel to open the File Explorer window. 
  3. The users must search for the QuickBooks folder and then hit the F2 key when QB is opened to get the location.
  4. Once the company file (.QBW) is visible, it will be reflected as “[company name].qbw.” 
  5. Now, you must note down the drive’s name and location in a safe place. Later, you will need this location to put the file back.
  6. Next, users must drag their data file from the folder to your server’s C: drive. Herein, you must be attentive that you only shift the file, not the entire folder. 

Quick Fix 3: Establish a Portable Company File 

Go through the steps given above to create a new portable company file. 

Quick Fix 4: Generate a Brand New Folder For QuickBooks 

  1. Launch File Explorer and locate your QuickBooks folder to prepare it. 
  2. You must establish a new folder on the server’s local C: drive and assign a new name to the folder.
  3. Now, you must copy everything to the QuickBooks folder and your portable data file and then paste it into the new folder. 

Quick Fix 5: Try Restarting the QuickBooks Application 

  1. Begin the process by launching the QuickBooks Desktop application. 
  2. After that, tap the Open or restore an existing company instead of selecting a company from the list. 
  3. Following this, go with the Open a company file followed by the Next button.
  4. Presently, launch the portable company file that you have recently transferred to the new folder.
  5. Finally, try to open QuickBooks on all of the computers and see if everything is perfect. 

Drawing to a Conclusion!!

We will ensure you have the essential details to troubleshoot QuickBooks Error 6177 and regain access to your data file. If you need additional assistance, feel free to communicate with our QB professionals for the best results. 

Print W-2 and W-3 Forms in QuickBooks Using These Hassle-Free Processes 

Whenever the tax season approaches, it’s important to ensure accurate processing of W-2 and W-3 forms for small—to medium-scale businesses. The W-2 summarizes all the necessary details regarding the salaries or wages paid by an employer to an employee, while the W-3 is utilized to report employee income. However, the users need to print W-2 and W-3 forms in QuickBooks or can mail them to employees. 

Furthermore, it’s important to file the W-2 and W-3 forms for the IRS and the System Security Administration before the end of January 31st. Continue reading this post for detailed information on printing the W-2 and W-3 forms in QuickBooks smoothly. 

Are you seeking immediate assistance to print W-2 and W-3 forms in QuickBooks? If yes, don’t hesitate to contact certified QB professionals at 1-844-266-9345 for the proper stepwise instructions. 

Basic Requirements Before You Print Your W-2 and W-3 Forms in QuickBooks

To enjoy a hassle-free printing experience, it is crucial to remember certain points before printing W-2 or W-3 forms in QuickBooks. This will allow you to print and file forms on time without further delays. 

  • Ensure the user is ready with the active and valid Quickbooks Payroll subscription to prevent any further discrepancies.
  • Confirm that your QuickBooks payroll is updated according to the latest tax table. This will help you compute the accurate tax amount according to the latest tax rates.
  • Moreover, the users must have a W-2 paper that fits best with the payroll service and the printer. Herein, the users are recommended to go with the pre-printed forms for inkjet printers and black or perforated papers for the laser printers. 
  • Besides all this, verify that you are working on the updated QuickBooks and Windows operating system. 

Also Read: QuickBooks Payroll Update Not Working

Let’s Explore How to Print W-2 and W-3 Forms in QuickBooks Smoothly 

Printing the W-2 form in QuickBooks is mandatory to send the paper copies to your employees. On the other side, printing the W-3 form is crucial for sending them to your accountant to review the books of accounts closely. 

First Phase:-  Purchase the W-2 Paper Ready (If Possible)

You can use plain paper if your employee has lost or hasn’t received their original W-2 form, or you may require a duplicate copy of records. However, the W-2 paper is a must only while printing from QuickBooks and sending official copies to your employees. 

Note: It is always suggested that the W-2 papers must be purchased from the official Intuit website to get a better printing experience. 

  • To begin the process, you must access the QuickBooks Checks & Supplies page using the web browser. 
  • Thereon, choose the highlighted Tax Products option and then go with the Blank W-2 Kits. 
  • After this, you must perform the steps as instructed on the screen to accomplish the order properly. 
  • The users of QuickBooks Online Payroll or QuickBooks Desktop Payroll Enhanced must have at least 3-4 parts of the perforated paper.
  • Conversely, the QuickBooks Desktop Payroll Assistant users need four parts of the perforated paper. 

Read More: QuickBooks Payroll Not Withholding Taxes

Second Phase: Let’s Get Started With the Printing of W-2s and W-3 Forms

Before you print the W-2 and W-3 forms in QuickBooks, it’s crucial to choose the suitable product according to your requirements. 

Printing of the W-2 and W-3 Forms Within QuickBooks Online Payroll

Herein, we have mentioned dates from when you can print their W-2 forms in QuickBooks Online Payroll. 

  • If your automated taxes and forms settings are turned off, users can print it on or after the 1st of January. 
  • Alternatively, if your automated taxes and form settings are enabled, you can print the forms on or after 15th Jan. 

Learn More About Printing Forms of the Present Year or One Year Prior 

  • In the initial stage, go to the Taxes option and hit the Payroll Tax option. 
  • Thereon, choose the Filings > Resources > W-2s form option. 
  • You must go through the list of employees that have been chosen for a printed copy.
    ◦ W-2s won’t print for the employees who have chosen to go paperless. If mandatory, they can print their copy through QuickBooks Workforce. 
  • However, if you see that the automated taxes and forms settings is disabled, you must thoroughly review your Form W-2 print setting. Then, choose the Change Setting option to edit the paper type whenever required. 
  • Afterward, hit the View or Manage on the copy that you require:
    ◦ W-3 Summary Transmittal of Wage and Tax Statements
    ◦ W-2, Copies B, C & 2 (employee)
    ◦ W-2, Copies A & D (employer)
  • In the next step, go with the View and Print option to proceed further. 
  • Later on, choose the Print icon from the Adobe Reader toolbar and tap the Print option. 

Also See: QuickBooks Something’s Not Quite Right

Perform the Steps to Print For the Preceding Year

  • For printing the forms for the previous year, choose the Taxes option followed by Payroll Tax. 
  • After this, navigate to the Filings option, followed by Resources. 
  • Thereon, pick the Archived Forms and Filings option and then proceed further. 
  • You must opt for the appropriate date range or choose the date range according to your preference. 
  • In the next step, hit the View option from the W-2 or W-3 form, whichever you wish to print. 
  • Later on, tap the Print icon from the Reader toolbar. Later, go with the Print option to initiate the process again. 

Discussing how to Print W-2 and W-3 forms in QBDT Payroll Assisted

The users have the option to print their W-2s form in the beginning of the January 10th. For instance, if you opt for the Intuit Print option, you only have to print the W-2 form in case your employer has lost or didn’t receive their original W-2 form. 

  • First of all, you must pick the Employees menu, followed by the Payroll Center option. 
  • After this, choose the highlighted File Forms tab and then go with the View/Print Forms & W-2s. 
  • The users must mention their Payroll PIN accurately in the respective text field and then click the OK button. 
  • You must opt for the W-2s tab and insert the correct year and the individual or all employees. 
  • Proceed further by hitting the Open/Save Selected button. 
  • Furthermore, you must pick a valid reason for printing the W-2s form. 
  • In the end, hit the File menu from the Adobe Reader and then the Print option. 
Print W-2 and W-3 forms in QBDT Payroll Assisted

Simple Process to Print Form in QBDT Payroll Enhanced & Standard Edition 

To print the form in QuickBooks Desktop Payroll Enhanced and Standard Edition, follow the instructions below.

  • Before proceeding further, confirm that you have updated the QuickBooks Desktop to the newly launched release. Also, verify that you are working on the updated payroll tax table. 
  • Afterward, reach the Employees drop-down menu and click on it to pick the Payroll Tax Forms & W-2s > Process Payroll Forms. 
  • In the next step, go to the File Forms tab, scroll to the bottom of the page, and select the Annual Form W-2/W-3—Wage and Tax Statement/Transmittal. 
  • Thereon hit the Create Form and then choose one or all the employees.
  • Furthermore, opt for the Review/Edit option to review all the W-2 forms. Once you have gone through the W-2s form, you must place a checkmark next to the Reviewed column. 
  • In the end, hit the Submit Form button and follow the instructions on the screen to print and file the forms. 

How Can I View and Print W-2 Forms in QuickBooks Online?

If you are looking for the proper stepwise instructions to view and print W-2 forms in QuickBooks Online, you have come to the right place. Below, we have described the proper instructions to achieve the desired outcome.

  • In the first place, click on the Taxes tab and hit the Payroll Tax option. 
  • After that, go to the Forms section and pick the Annual Forms link to proceed further.
  • Soon after this, you must pick the All Employees or a specific name for the employee by clicking on the drop-down menu. 
  • Now, you must hit the W-2, Copies B, C, & 2 link, which will redirect you to the Printable Employee Copies: Form W-2 page.
  • You are supposed to pick the appropriate period and hit the View option to open the Adobe Acrobat Reader in a new window. 
  • Thereon, tap the Print icon from the Reader toolbar and choose the Print option. 

What Steps are involved in Printing the W-2 Form in Adobe Reader?

Here, we have listed the following instructions for printing the W-2 form in Adobe Reader. 

  • To start the process, choose the Payroll Tax Center and hover your cursor over the Payroll Centre. 
  • Afterward, go to the Employees menu and hit the highlighted File Forms option. 
  • Thereon, tap the View/Print Forms > W-2 and then include the accurate Payroll PIN in the respective text fields. 
  • Furthermore, select the OK button and hover your cursor over the View Employee W-2 Forms. 
  • You are supposed to pick the accurate Employee Name and proceed with the printing process. 
Printing the W-2 Form in Adobe Reader
  • Later on, utilize the Adobe Reader and then click the File menu. 
  • End the entire process by hitting the Print option so that you can print the W-2 form seamlessly. 

Learn More About E-Filing W-2 Forms in QuickBooks 

According to the payroll setup, the users can file the W-2 forms automatically or through QuickBooks. Below, we have described the different instances of filing the tax forms. 

Instance 1: Filing Automatically:- 

For instance, if you set QuickBooks to file the W-2 form automatically, you don’t have to do anything. QuickBooks will file the W-2 form independently and send the copies to the employees if they ask for a paper copy. 

Instance 2: Filing Electronically:- 

On the other hand, if you opt to file the W-2  forms electronically, follow the steps illustrated below. 

Instance 3: Filing Through Third-Party Agencies:- 

If you prefer any agency to pay and file the taxes, you must e-file your W-2 form through the following steps. Besides, it won’t allow you to print the employer copies through QuickBooks. You can only print the copies and send them to the employees. 

Steps to E-filing the W-2 form in QuickBooks 

This blog’s section describes the proper stepwise instructions to e-file the W-2 form in QuickBooks.

QuickBooks Online Payroll 

You must go through the following steps to file the W-2s form in the QuickBooks Online Payroll. 

First Step: E-Filing of the W-2 Forms 

  1. Begin the process by logging into the QBO account with the correct sign-in details. 
  2. After this, click the Taxes tab and hit the Payroll Tax > Filings option. 
  3. You are supposed to move to the W-2 copies A & D (employer) section to opt for the File menu.
  4. Following this, navigate to the Annual Forms and choose the W-2 Copies A & D (employer).
  5. Once you are all sorted, hit the Continue button. If asked, you must notify us if one or more employees participated in a retirement plan.
  6. Now, choose the View option to open the Acrobat Reader from the Employee Copies: Form W-2 page.
  7. Furthermore, the users must print Copy D (Employer’s Copy) for your records. 
  8. Later, you must tap the Submit to authorize us the option to file Copy A of Form W-2 electronically for you. 

Once the W-2 filings are processed by QB, you will get a notification in the mail that the filing is done. To check the status of your filings, use the steps instructed below.

  1. The users must choose the taxes and then the Payroll Tax option.
  2. Afterward, pick the Payroll forms or filings and opt for the W-2. 

Second Step:  Printing and Sending W-2 Forms To Your Employees 

  • Launch the QuickBooks Employees menu initially and then hit the Payroll Center option.
  • After this, you must open the QuickBooks Desktop Payroll Setup.
  • Subsequently, navigate to the Payroll Center and opt for the File Forms tab.
  • You should tap on the Change Filing Method option from the Other Activities list at the bottom of the page. 
  • Once you have made the changes, hit the Continue tab and select Federal Form W-2/W-3 from the list of forms. Later, go to the Edit menu to proceed with the ongoing process.
  • Now, you must choose the E-file and then the Finish tab. This will bring up the enrollment-related instructions you can read and print.
  • After that, you must shut down the View Enrollments window and hit the Finish Later option.

QuickBooks Desktop Payroll Assisted

QuickBooks will automatically file the W-2s form for you, so you don’t have to do anything alone. All you can do is choose to print the copies for the employees once they are ready. Otherwise, you can also allow QuickBooks to send copies to employees, but it’s chargeable. 

For the QuickBooks Desktop Payroll Enhanced

Before you e-file the W-2s form in QuickBooks, you should set it up using the steps below. 

Stage 1: Setting Up of W-2 E-Filing 

  1. Initially, open the QuickBooks Employees menu and hit the Payroll Center option. 
  2. After that, the users are required to open the QuickBooks Desktop Payroll Setup. Then, tap the highlighted File Forms tab from the Payroll Center. 
Setting Up of W-2 E-Filing
  1. Now, go with the Change Filing Method from the list of Other Activities and click the Continue button. 
  2. Thereon, choose the Federal Form W-2/W-3 from the options available and tap the Edit menu. 
  3. Furthermore, move to the E-file > Finish option, which will instantly open the enrollment instructions, which you will read and print. 
  4. Shut down the View Enrollments window and then the Finish Later to complete the entire process. 

Stage 2: Establish A New W-2 Form

You can now generate your own W-2 form using the steps below. 

  1. The users must choose the Employees menu and then Payroll Tax Forms and W-2s. 
  2. After that, opt for the Process Payroll Forms and then proceed further. 
  3. Now, you must pick the Annual Form W-2/W-3—Wage and Tax Statement/ Transmittal option from the File Forms section. Later, you must choose the Create Form option to establish a new W-2 form. 

Read About: QuickBooks Unrecoverable Error

Stage 3: Let’s Send Your W-2s Form

You are all set to send the W-2 forms electronically using the process discussed below. 

  • Start by choosing All Employees to file by batch from the Process W-2s page.
  • Thereon, you are required to mention the year of the form when you are filing and then hit the OK button.
  • You are supposed to select the employees to whom you wish to send the W-2 form and hit Mark All to select all employees.
  • Furthermore, the users must go with the E-File Federal Forms option and mention the accurate phone number and email address. 
  • Conclude the entire process by hitting the Submit button.

Stage 4: Printing of the W-2 forms and Sending them to Employees

After creating a W-2 form, you can send it to your employees by the end of January 31st. 

Concluding Words!!

Through this comprehensive post, we hope it becomes much more convenient to print W-2 and W-3 forms in QuickBooks. If you still need help to print the forms, get help from our QB experts. They will look into the matter thoroughly and assist you with some of the best solutions within the shortest possible time. 

What is QuickBooks Error 6150 and Here’s How to Rectify It Instantly?

QuickBooks software has gained immense popularity for delivering top-notch accounting features and functions. Despite this, users sometimes encounter certain technical hiccups, like QuickBooks Error 6150, which disrupts the workflow. This issue might be caused by issues with the company file location or problems with the QuickBooks software. 

If you are also struggling while opening the company file due to the interference of QuickBooks Error Code 6150, you don’t have to worry anymore. You have reached the right spot, as this comprehensive post contains all the useful troubleshooting methods to overcome the error instantly. 

Does QuickBooks Error 6150 bother you from pursuing your ongoing business accounting tasks? Call us at 1-844-266-9345  and directly converse with our QB experts to get instant relief from the issue. 

What Do You Mean By QuickBooks Error 6150 & How Does It Occur? 

Users often encounter QuickBooks Error 6150, which might cause issues when creating, opening, or utilizing the data file. This error mainly reflects a potential data integrity issue caused by damage or corruption in the data file. However, when the error appears, it flashes the following error message: “We’re sorry. QuickBooks couldn’t open your company file.”

Users might encounter the QuickBooks Company File for various reasons. To help you understand all possible causes, go through the pointers below. 

1. Conflicts Due to Interference of the CryptoWall Antivirus:-

In certain instances, the users might receive Error code 6150 QuickBooks when the crypto wall virus or other malicious infection stops the users from launching the QuickBooks application.

2. Inaccurate Installation of QuickBooks:-

An inadequate or missing installation of the QuickBooks Desktop is another possible reason for this error.

3. Data Integrity Issue:-

One of the possible reasons behind the QuickBooks Error Code 6150 is data integrity issues. 

4. Problems Associated With the File Location:-

In certain instances, this error also triggers due to internal (within QuickBooks) or external (file location).

5. Using the Incorrect File Extension:- 

Sometimes, the inappropriate QuickBooks file extension is responsible for the appearance of Error 6150 QuickBooks Desktop. 

Also Read: QuickBooks Error 6177

Warning Signs That You See When Error Code 6150 QuickBooks Occurs

Upon the arrival of Error Code 6150 QuickBooks, you will notice the following warning signs. So, let’s examine all the symptoms carefully to fix the issue efficiently. 

  • Users may notice that Windows starts running slowly or freezes when an error occurs. 
  • You might have difficulty opening or accessing the QuickBooks data file. This may adversely impact productivity and result in data loss. 
  • In certain instances, you may observe that your QuickBooks application began freezing or crashing frequently. 
  • Whenever QuickBooks Error Code 6150 appears, the error message on the screen starts flashing.  

Rectifications Methods to Eradicate Error 6150 in QuickBooks Desktop 

Now that you know the causes and symptoms of Error 6150 in QuickBooks, let’s concentrate on fixing the issue. Below, we have provided effective solutions to get out of the issue and regain access to the company file. Before starting with the troubleshooting steps, check that your QuickBooks is updated and you have generated the backup of the file. 

Solution One:  Retrieving the Backup of the Company File 

A corrupted data file is one reason that might be responsible for error 6150 in QuickBooks Desktop. Therefore, to prevent this issue, you must try recovering the backup of the data file until it does not prevent the issues. 

  • Open the QuickBooks Desktop and go to the File menu > Open or Restore Company File > Restore a Backup Copy > Next option.
Backup of the Company File 
  • After this, place a tick mark next to the Local Backup option to go ahead.
  • Locate the backup of your data file from the available options and click the Open button. 
  • Thereon, tap the Save In drop-down menu arrow and opt for the location to restore the backup of the data file. 
  • You are supposed to mention the file name and choose the Save option from the File Name field. 
  • Afterward, hit the Yes button from the Confirm Save As window. 
  • Ultimately, again, press the Yes option to receive the confirmation from the Delete Entire File window. 

Solution Two: Make Use of the QuickBooks ADR Tool to Restore the Data

As the name “QuickBooks Auto Data Recovery Tool” suggests, it helps restore lost or mistakenly deleted data. Therefore, to run this ADR tool, follow the following step-by-step instructions closely.

  • The users first need to construct a new folder on the desktop and name it QBTEST. 
  • Afterward, look for the.TLG file from the company file folder, copy it and paste it into the newly generated folder (QBTEST).
  • In the next step, launch the QuickBooks Auto Data Recovery folder, copy the .QBW.adr file, and paste it into the new folder.
  • Now, right-click the .QBW.adr file and choose the highlighted Rename option.
  • Thereon, the users must delete the .adr from the end of the file name and open the QuickBooks application.
  • Next, you must try to launch the data file through the QB Test folder, navigate to File menu > Utilities, and then Verify Data.
  • In the end, if you notice that the data file is good, shift it to a distinct location. Later, copy the file from QBTest back to its original location. 

Also See: QuickBooks Error 6147

Solution Three: Search For the Presence of CryptoWall Virus

In some cases, users might encounter Error 6150 in QuickBooks due to the Cryptowall virus and other malicious software preventing them from accessing the QB software. So, to fix the issue, you must check for the presence of the Cryptowall virus by implementing the steps below.

  • Initiate the process by launching the Start menu by hitting the Windows key on your keyboard. 
  • Afterward, insert the File Explorer into the search console, and it will launch the File Explorer window. 
  • Thereon, you must launch the QuickBooks folder on your device. You will mainly find the folder within the C: drive. 
Presence of CryptoWall Virus
  • In the next step, search for the files that include “decrypt” or “instructions”  to proceed.
  • However, if you cannot find files that match this description, your system is fine. On the other hand, if you spot files that match this description, you must go to the antivirus provider for assistance in eradicating the CryptoWall virus. 

Solution Fourth: Use the File Doctor Tool To Repair the Files

Running the QuickBooks File Doctor Tool will help you repair the damage or corruption in the company file. So, to run this tool to overcome the QuickBooks Error Code 6150, implement the following instructions in the same manner as given below.

  • Get ready with the updated version of QuickBooks Tool Hub to run the File Doctor tool. 
  • Once you have installed the updated QB Tool Hub using the on-screen instructions, open it to proceed. 
  • After this, hit the QuickBooks Tool Hub tab and Company File Issues. 
  • In the next step, you must locate and choose your data file from the available options. If you face difficulty getting the file, go with the Browse option and then look for it. 
  • Once you spot the data file, tap the Check Your File and then the Continue option. 
  • You are supposed to insert the accurate QuickBooks admin password into the respective text fields and then the Next button. 
  • In the end, try to open the QuickBooks data file to spot whether the issue is resolved. 

Solution Fifth: Perform the Latest Update of QuickBooks Desktop 

Accessing the updated version of the QuickBooks Desktop might prevent users from facing issues while accessing the data file. Therefore, it will help fix the error 6150 QuickBooks. So, to install the most recently launched version of the QuickBooks desktop, follow the steps given below.

  • To commence with, log in to the QuickBooks Desktop application by entering the appropriate admin credentials. 
  • Afterwards, navigate to the Help menu > Update QuickBooks Desktop option. 
Latest Update of QuickBooks Desktop 
  • Thereon, you must go with the Update Now and then the Get Updates option. 
  • Once you have installed the relevant updates, tap the Install Updates option to end the process. 

Read More: Update QuickBooks Desktop to the Latest Release

Solution Sixth: Run the Clean Installation Tool In QuickBooks Desktop

  • Initially, go to the Start menu > Control Panel > Uninstall a Program option. 
  • Afterward, choose the QuickBooks application and right-click on it to opt for the Uninstall/Change option. This will remove the QuickBooks application version that has already been installed on your device. 
  • In the next step, hit the Uninstall option and perform the steps visible on the screen to remove the application. 
  • You must download and run the updated version of the QuickBooks Clean Install Tool. 
  • The users must also verify that the “I accept and continue” checkbox is marked. 
  • Now, opt for the relevant QuickBooks version and tap the Continue option. 
  • Ultimately, hit the OK tab and install the latest QuickBooks Desktop to verify if the error persists. 

Solution Seventh: Cross-Examining the File Extension of the Data File 

There are certain instances when the users end up with QuickBooks Error 6150, 1006 while using the incorrect company file extension. So, it is mandatory to ensure that you are using the correct extension with the help of the steps below. 

  1. In the first place, you must go to the location where you have stored your QuickBooks company file. 
  2. After this, right-click the company file from the list of options available and then hit the Rename option. 
  3. Presently, verify that the file extension is “.qbw” and proceed further.
  4. If the file extension is inadequate, modify it as “.qbw.” 
  5. Finally, you must try opening the company file again and see if QuickBooks Error 6150 persists. 

Summarizing the Above!!

After performing the above-listed solutions, we hope you can now easily troubleshoot QuickBooks Error 6150. This will also help you access the company file to complete your delayed accounting task. If this issue is still creating problems, talk to our QB experts, who will assist you in the best possible way. 

QuickBooks Database Server Manager Stopped – How To Fix It?

QuickBooks Database Server Manager keeps stopping or not working is a perplexing issue in the program. This important utility helps in setting up multi-user mode in the program. When the error occurs, you won’t be able to switch to the multi-user mode. This issue can also block your access to the QuickBooks company file over the network.

It can be distressing for users to lose access to their financial information. Therefore, you need to address this technical issue immediately. In this post, we will discuss the potential reasons behind QBDBMgrN not running on this computer issue along with their respective troubleshooting solutions.

Need expert help to fix your QuickBooks Database Server Manager Stopped error? If so, contact our dedicated technical support team at 1-844-266-9345 for prompt and reliable assistance. We are just a call away, ready to swiftly troubleshoot such errors. 

What Is The Function of QuickBooks Database Server Manager?

QuickBooks Database Server Manager is an important utility in the program, which allows users to host their company files over the network. Besides, it also hosts the multi-user network in QuickBooks. QBDGMgrN allows users to configure the network and access the company file over it.

QuickBooks Database Server Manager creates a network data (.ND) file that can accessed over the network. The file is hosted on a central computer, also known as the server or host computer. The other computers in the network, known as the workstations access the network data file from the server computer with the help of the Internet. However, to run the multi-user arrangement, it is crucial to ensure that QuickBooks Database Server Manager is running.

Possible Reasons For QuickBooks Database Server Manager Has Stopped Working

There can be multiple reasons why the QuickBooks Database Server Manager not working. Some of the most prominent reasons are stated in the below-given pointers:

QuickBooks database server manager keeps stopping
  • When you are not using the most recent version of the QBDBMgrN service.
  • Inappropriate firewall settings interfere with the service.
  • Third-party applications are running in the background, preventing QuickBooks from accessing the server.
  • Disabled QuickBooks Database service.
  • The multi-user mode is turned off.
  • Internet connectivity problem is also one of the most apparent reasons behind this error.
  • A damaged or corrupt network data file can also contribute to the QuickBooks Database Server Manager starts then stopping the error.
  • Inability to start the QBDGMgrN service.
  • Compatibility issues with the program can also result in this error.
  • Permissions must be enabled in order to run the service. If not, you may end up getting an error.

Also Read: QuickBooks Tool Hub

How To Resolve The QuickBooks Database Server Manager Status Stopped Issue?

If your QuickBooks Database Server Manager is not working, you can implement the following troubleshooting solutions:

1stSolution: Update Your Windows Firewall

An outdated version of the Windows Firewall can make it prone to various errors. When you update it to the latest release, it doesn’t prevent QuickBooks from accessing the company file. Below are the steps:

  • In the beginning, you need to open the Run window (Windows + R).
  • When the box opens, type Control Panel and hit the OK button.
  • Thereafter, you need to click the System and Security option within the Control Panel window.
  • An alternate way to access the Firewall is by typing “firewall.cpl” in the search bar and hitting the Enter button.
  • When in the Windows Firewall settings section, click the Check for Updates option.
  • If an update is available, click Update Now and select the option labeled Use Recommended Settings.
  • You will now have the Firewall update installed on your system.
  • After finishing the procedure, restart your system and check if the error is resolved or not.

2ndSolution: Restart The QBDBMgrN Service

Check if restarting the QuickBooks Database Server Manager service can resolve the error by implementing these steps:

  • Open the Run window by pressing the Windows + R keys simultaneously.
  • Next, type “services.msc” in the Run area and hit OK.
services.msc
  • When the list of the services appears, locate the QuickBooks Database Server Manager Service option.
  • Once you see it, right-click and select the Restart option from the drop-down list.
  • Open QuickBooks and check if the QuickBooks Database Server Manager doesn’t work. The issue is resolved. If not, move to the next troubleshooting solution.

Read More: QBCFMonitorService Not Running

3rdSolution: Repair QuickBooks Desktop Installation

Repair QuickBooks Desktop Installation

A partial or damaged installation of the QuickBooks software can also evoke an error with the database manager service. Therefore, you need to repair the QuickBooks installation by running these steps:

  • First things first, close all the applications running in the background and restart your system.
  • Thereafter, a backup of the QuickBooks company file will be created to prevent data loss during the program repair process.
  • Now, in the Start menu, type Control Panel and click the Enter button.
  • When in the Control Panel, choose the Programs and Features option.
  • Moving ahead, select Uninstall a program option.
  • When the list of the program shows up, choose Uninstall/Change and then hit Continue.
  • Thereon hit Next, and it will take you further in this post.
  • Here, you are supposed to choose the Repair option.
  • Again, click Next and then select Finish to conclude this procedure.
  • Restart your system and check the status for the error resolution.

If the QuickBooks Database Server Manager installation stops, try the next method to override this problem.

4th Solution: Disable Windows Firewall To Run The Service

Windows Firewall perceives QuickBooks or its related processes as a security threat and, therefore, prevents it from accessing the Internet. It gives rise to the QBDBMgrN service that keeps stopping issues. To prevent this error, you can temporarily disable your Firewall by using these steps:

  • First of all, you need to click the Windows taskbar icon, then right-click on your firewall icon.
  • Thereafter, you need to choose a suitable option to disable it temporarily.
  • Here, you may also select a duration for the same, preferably 15-20 minutes.
  • After disabling the Firewall, try to open the company file on the server again.

If you can access the company file on the server, which means your Firewall is causing this error. You can add QuickBooks-related processes as an exception and it won’t block them even after enabling them.

Also See: QuickBooks Something’s Not Quite Right

Ending Note!

QuickBooks Database Server Manager stopped working is a distressing technical issue. This post elaborates on the solutions that can resolve the potential reasons behind this error. You need to implement the troubleshooting procedures cautiously. However, if you find it perplexing to implement the technical procedures, contacting QB Help Desk can offer you the desired help.

The Best Ways To Fix QuickBooks Company File Needs To be Updated

QuickBooks Company file is an important asset of the organization as it stores all the company’s essential financial records. Considering its importance, no company can imagine putting it at risk as it may disrupt the workflow. But sometimes, users encounter a QuickBooks company file that needs to be updated issue while trying to access the data file right after updating the QuickBooks Desktop application. 

Getting rid of the “this company file needs to be updated QuickBooks 2023” issue is important so that you can regain access to the data file. So, you must read this detailed post attentively and find the right troubleshooting methods to fix the issue quickly. 

Are you stressed due to continuously receiving the QuickBooks company file that needs not to be updated issue? Dial 1-844-266-9345  and get a one-to-one consultation with our QB professionals to eliminate the issue. 

How Will You Describe QuickBooks the Company File Need to Be Updated?

Most often, users might receive QuickBooks, but the company file needs to be updated issue whenever they attempt to update the data file and fail to do so. Every time the user comes across this error, they will be presented with the following error message: “This company file needs to be updated. Please ask your QuickBooks Administrator to update the file warning.”

The message mainly recommends updating the data file to match the current QuickBooks version installed on the system. 

Also Read: Update QuickBooks Desktop to 2024

Factors That Might Lead to Company File Needs to be Updated QuickBooks Issue 

Herein, we have discussed the possible factors that might be responsible for the appearance of the Company file that needs to be updated QuickBooks issue. 

Invalid Symbols in Company File:- 

You might have entered the wrong symbols in the company file name or included more space before the extension. As a result, this might prevent users from opening the company file in QuickBooks.

Lack of User Account Control Permissions:-

You may need more administrative permissions to access the QuickBooks company file. This might prevent users from opening the file, resulting in QuickBooks Desktop needing to update your company file. 

Presence of Corrupt or Damaged File:-

Another reason behind the issue is that you are trying to access the company file, which is either corrupt or damaged due to the system’s improper shutdown. 

Choose the Incorrect way to open the File:- 

In other cases, the company file needs to be updated QuickBooks issue while opening the data file using the incorrect method. 

Working on an Outdated QuickBooks Desktop:- 

Sometimes, the users might get stuck with this error while operating an incompatible version of the QuickBooks Desktop. 

Data File Is Already Used Over the Network:- 

Sometimes, users may also confront this issue when the company file is already in use over the network, creating problems while opening it. 

Read More: QuickBooks Can’t Find Company File

Preventive Measures Before Updating QB Company File to Latest Version 

Updating QB Company File to Latest Version 

We have listed some pre-considerations you must remember before updating the QB company file to the latest version. 

  1. The users must verify that they are accessing the right file extensions i.e, (.QBW) to open the company file.
  2. Another important thing is that you have enough admin credentials to sign into the QuickBooks application. 
  3. Moreover, you must also verify that the data file is not used by multiple users.
  4. You must always get a backup of the QuickBooks company file to safeguard your data from loss or unauthorized access. 
  5. The users must cross-check that the data file is stored on the system rather than on another PC. 

Know More: Update QuickBooks Desktop to the Latest Release

How to Rectify “This company file needs to be updated QuickBooks 2023” Issue Quickly?

Once you understand the possible causes of the “This company file needs to be updated QuickBooks 2023” issue, you can easily fix it by implementing the solutions listed below. 

Solution 1: Launch the Data File in the Updated Version of QuickBooks 

Updated Version of QuickBooks 
  1. First, open the QuickBooks application, navigate to the File menu, and select the Open or Restore Company option. 
  2. You are supposed to hit the Open the Company File option and then the Next option.
  3. Now, you must review the instructions on the screen within the section to update the data file. Later on, give your consent by selecting the checkbox and hitting the Update Now button. 
  4. Soon after this, you will instantly receive a pop-up message on the screen regarding the final confirmation for launching the data file in the new version of QuickBooks. Later on, go with the Yes option to conclude the process. 

Solution 2: Try Registering the Reboot.bat File Once Again 

In QuickBooks, the reboot.bat file is used to register the QB files, including.OCX or .DLL. But, if these files fail to run accurately on the system, users might result in QuickBooks need to update your company file issue. So, to fix the issue, it is important to register the reboot.bat file by following the steps below. 

  1. Before proceeding further, shut down the QuickBooks and other applications running in the background.
  2. After this, hit the Windows + R keys together and insert “CMD” into the search panel. 
  3. With this, it will launch the Command Prompt Window wherein you must add the location i.e, “cd C: >> Program Files (x86) >> Common Files >> Intuit >> QuickBooks (without quotes)”  and then hit the Enter key. 
  4. Once you are all sorted, close the Command Prompt window and launch the QuickBooks application to verify if the issue persists. 

Also See: Upgrade QuickBooks Desktop to 2024

Solution 3: Configure the Damaged QuickBooks Application 

Users might encounter this issue because of internal issues or a damaged installation. So, to repair the damage to the QuickBooks application, you need to perform the steps listed below.

  1. In the first place, press the Windows key and write Control Panel into the search console. 
  2. Consequently, this will take you to the Control Panel window, where you must choose the Programs and Features or “Add or Remove Programs” option, depending on the version of your Windows OS. 
  3. You are supposed to launch the QuickBooks application from the installed applications. Later, right-click the QuickBooks application and select the Change or Repair option.
  4. In the next step, follow the instructions on the screen to complete the process. 
  5. At last, relaunch your computer and open QuickBooks to check the error status. 

Solution 4: Change the Name of the Data File After Switching Its Location 

Sometimes, users might confront issues if the data file they are trying to launch was created with a newer version of QuickBooks or if they try to run an older version of a company file on a new QuickBooks version. So, it is important to confirm that the data file belongs to the same QB version to prevent further discrepancies accessing the data. This situation generally occurs when QB fails to link with the data file due to the presence of invalid characters in the file name. 

  1. In the first step, navigate to the company file folder on the explorer. 
  2. Soon after this, you must right-click the data file and choose the highlighted Rename option.
  3. You should remove the special characters included in the file, such as “< , > , & , $,” before saving the file. 
  4. Thereon, right-click the QuickBooks data file again and choose the Copy option. 
  5. In the next step, browse to the following location i.e, “C: >> Users >> Public >> Documents >> PublicDocuments >> Intuit >> QuickBooks20XX >> CompanyFiles.” 
  6. Now, hit the Ctrl + V keys together within the folder to paste the file you copied earlier. Later, you must try to open the QuickBooks application again from its default location to verify the issue. 

Solution 5: Perform the Re-Installation of QuickBooks in Selective Startup Mode 

Even if the above resolution methods fail to rectify the issue, you must try to reinstalling QuickBooks in selective startup mode by implementing the steps below. 

  1. To proceed further, close all the active running programs on your device. 
  2. Afterward, launch the Run Command Prompt window and insert “msconfig” into the search column. 
  3. As a result, it will take you to the System Configuration window.
  4. You should choose the Selective Startup option below the General tab. 
  5. Thereon, you must confirm that the “Load Startup Items” checkbox is not marked below the Selective Startup option. 
  6. Following this, opt for the Services tab and mark the “Hide All Microsoft Services” checkbox. 
  7. In the next step, pick the Disable All option to turn off all the non-Microsoft services. 
  8. Subsequently, hit the Apply button and OK to restore the necessary changes and close down the System Configuration Utility. 
  9. Now, you must get the latest version of the QuickBooks installation file from the Intuit website and place it in a safe location.
  10. Next, right-click the downloaded setup file for QuickBooks and Run it as Administrator. 
  11. Furthermore, go through the instructions on the screen to install QuickBooks successfully. 
  12. Launch the application to verify its functioning once you are all sorted with the QuickBooks installation. 
  13. Later, try to turn on the startup items and services you previously disabled by moving back to the System Configuration Utility. Then, select Normal Startup beneath the General tab and click the Apply > OK button.
  14. Once you are all sorted, relaunch your PC and test whether you still receive the “company file needs to be updated QuickBooks” issue.

Read About: QuickBooks Install Diagnostic Tool

Solution 6: Shift the Location of the QuickBooks Company File 

  1. To begin with, access the QuickBooks folder and then launch the data file that is creating the issue. 
  2. Once you find the file having issues, right-click on it to opt for the Copy option.
  3. Soon after, you must go to your desktop and establish a new folder. 
  4. Now, right-click the folder and select the Paste option for the data file you wish to copy. 
  5. Afterward, launch the QuickBooks application and try to open the data file to verify if the issue is still resolved. 

Summarizing the Above!!

Using the solutions explained above, we hope you can easily deal with the QuickBooks Company File Needs To be Updated issue without any hassle. However, if you still have trouble accessing the data file, consult our QB professionals for immediate resolution. 

How to Eradicate QuickBooks Payroll Error PS038 Seamlessly?

With the QuickBooks Desktop Payroll, it has become much more convenient for organizations to process and manage the employee’s payroll. However, keeping the QuickBooks payroll updated is important to enjoy the seamless payroll processing experience. But, sometimes while installing the latest payroll updates users might discover QuickBooks Payroll Error PS038 which might disrupt the ongoing payroll processes. 

Unfortunately, the Payroll Error PS038 in QuickBooks not only restrains you from accessing the latest payroll features but also leads to delays in processing payroll. So, getting it fixed as soon as possible is important using the correct troubleshooting techniques explained in this post. 

Wondering how to eliminate the QuickBooks Payroll Error PS038 and process your payroll seamlessly without any issues? Ring us at 1-844-266-9345 and have a one-to-one consultation with our QB professionals for a quick resolution. 

Let’s Understand Payroll Error PS038 in QuickBooks Desktop 

At times, the users may confront Payroll Error PS038 in QuickBooks Desktop while trying to update the payroll or tax table update to the latest version. Whenever the error pops up, it flashes the following error message on the screen stating:

However, the issue may also arise when the paychecks get stuck from “Online to Send ”. Therefore, it is necessary to troubleshoot the issue quickly so that you can continue your ongoing business smoothly. 

Also Read: QuickBooks Error PS032

What Are the Factors That Trigger QuickBooks Payroll Update Error PS038? 

The users might end up with QuickBooks Payroll Update Error PS038 due to the root causes given below. So, let’s study all of them carefully and get a better understanding of them in detail. 

Accessing the Older QuickBooks Version:- 

At times, the users might come across the QuickBooks Error PS038 while working on an outdated or older QuickBooks version which might prevent you from getting the payroll updates. 

Inappropriate Billing Details:- 

Another reason behind the issue is that the QuickBooks Payroll subscription details are either outdated or wrong due to which it is creating issues while installing the latest payroll updates. 

Unstable or Misconfigured Internet Connection:- 

If your internet connection is improper or not connected with a stable internet connection then you might result in QuickBooks Payroll Error PS038. 

Conflicts Due to Interruption of Windows Firewall:- 

Sometimes, the issue may happen when the Windows Firewall or the antivirus software is blocking access to QuickBooks. As a result, there is a high possibility that it might end up with Error Code PS038 in QuickBooks. 

Damage or Corrupt .ND and .TLG Files:- 

It could be possible that the issue may arise due to the damage or corruption in the network data (.ND) and transaction log (.TLG) files. 

Problems to Meet the System Requirements:- 

In other cases, the users might receive Payroll Error PS038 in QuickBooks Desktop if the system fails to meet the basic specifications required to run the application. 

Invalid Payroll Service Subscription:- 

In other cases, the users might encounter QuickBooks Payroll Error PS038 when they find that the payroll service subscription they are using is either invalid or not in use anymore. 

Know More: QuickBooks Error PS077

Advisory Tips You Must Know Before Fixing QuickBooks Error PS038 

Here we have listed a few of the important tips that you must know to resolve the QuickBooks Payroll Error PS038. 

  1. One of the most important activities is to get the latest version of the QuickBooks Desktop to run the application easily. 
  2. Another important point is that it is important to download the latest payroll tax table update. Conducting this update is important so that your can compute and process the payroll hassle-free according to the latest tax table laws. 
  3. Moreover, you must verify that you are well-connected with a stable and high-speed internet connection. 

What Should You Do to Rectify Payroll Error PS038 in QuickBooks Desktop? 

In this blog’s section, we have elaborated on the tried and tested solutions to overcome Payroll Error PS038 in QuickBooks Desktop. 

Solution 1: Install the Latest Update of QuickBooks and Back Up Your Data

  1. To get the latest update, launch the QuickBooks application as a Windows admin user. 
  2. Soon after this, navigate to the Help menu > Update QuickBooks Desktop
Install the Latest Update of QuickBooks and Back Up Your Data
  1. Afterward, go with the Update Now option followed by the Get Update QuickBooks option.
  2. Thereon, you have to wait for some while until the latest QuickBooks Desktop updates get downloaded on the device. 
  3. End the process by re-opening the QuickBooks Desktop and assigning the relevant permissions to install the recently downloaded updates.

After this, to generate the backup of the QuickBooks company file to safeguard your data from getting into the wrong hands you must perform the steps outlined below. 

  1. In the first place, shut down the QuickBooks in the single-user mode.
  2. After this, browse to the QuickBooks File menu and then choose the Backup Your File followed by the Create Local Backup option. 
  3. Now, you must tap the Browse option and opt for the suitable directory for saving up the backup file.
  4. Thereon, from the Online and Local Backup options, you must run a test to analyze the data.
  5. End the entire procedure by clicking on the Save It Now option. 

Also See: Update QuickBooks Desktop to the Latest Release

Solution 2: Try Sending Your Usage Data or Payroll Data:- 

  1. To begin the process, move to the QuickBooks Employees menu and then hit the My Payroll Service option. Later on, go with the Send Usage Data option. However, if you are unable to find this option, then go to the next step. 
Usage data or Payroll data
  1. Thereon, choose the Employees menu and then hit the Send Payroll Data option. 
  2. From the Send/Receive Payroll Data window, opt for the Send All option. Later on, you must insert the accurate Payroll Service PIN if required. 
  3. However, if you see that you are able to send the payroll successfully then opt for the Send All option. Later on, mention the accurate payroll service pin if required. 
  4. On the other side, if you find that the send is unsuccessful, then you must try to install the latest payroll updates.

Read More: QuickBooks Payroll Update Not Working

Solution 3: Verify the Paychecks that are Being Stuck in the Middle 

Verify the Paychecks that are Being Stuck
  1. In the initial stage, move to the QuickBooks Edit menu and choose the Find option from the extended list of options.
  2. After that, go with the highlighted Advanced tab to proceed further.
  3. Once again, you are supposed to click the Advanced tab.
  4. Thereon, you must browse to the Choose Filter section, and from the Filter List you must click the Online Status option. 
  5. In the next step, hover your cursor over the Summary Only and return back to the Filter list. Later on, scroll down to opt for the Online Status and then the Online to Send option.
  6. Afterwards, opt for the Find option and it will present you with all the paychecks that weren’t sent to Intuit earlier. Herein, you must note down the “Number of matches” from the Find window and then move to another solution.  

Solution 4: Take Advantage of the Verify and Rebuild Data Utility 

Verify and Rebuild Data Utility 

The users are required to run the Verify and Rebuild data tool to repair the damaged or corrupted company file data. So, to fix the issue, you need to run the tool by performing the steps outlined below. 

  1. First of all, you must launch the QuickBooks application and then go to the File menu > Utilities > Verify Data option. 
  2. Eventually, you will receive a pop-up message stating “Do you want to continue?” and then hit the OK button. 
  3. Soon after this, you will notice that the Verify Data Tool will immediately start scanning the file. If the file spots any issues in the file, then you will get a pop-up message reflecting that there are issues with the data file.
  4. On the other end, if it doesn’t find any issues then you won’t have to run the Rebuild Data Tool. 
  5. If the file is having issues, then return to Utilities > Rebuild Data and it will ask you to back up your data file. 
  6. Furthermore, you will receive the option to pick either an online backup or a local backup. Herein, you have to make a suitable choice which is best according to the requirements. 
  7. Following this, you are supposed to make a decision on how often you wish to schedule the backup of the data- daily, weekly, or monthly. 
  8. Afterwards, you will be prompted “Do you want to save the backup now or schedule it for later?”, pick the suitable option and hit the Next button. 
  9. You must start running the Rebuild Data Utility and it will represent a window that will represent its progress. 
  10. Once you are all sorted, open the QuickBooks application again and try to download the latest payroll updates to verify if the issue is resolved.

Solution 5: Conduct a Thorough Inspection of Unsent Paychecks 

The users are required to remove the unsent paychecks from QuickBooks to prevent any further discrepancies. But, before deleting them you must verify that they are not mentioned in a scheduled payroll run. As a result, it would help the employees to overcome the issues associated with employee pay and tax calculations. 

  1. In the initial stage, look for the paychecks that are stuck in the middle using the steps listed in Solution 3. 
  2. After this, you need to verify the first paycheck that is stuck and then hit the Detail Paychecks option.
  3. With this, it will open up a Review Paycheck window on your computer screen. Herein, below the Earnings section, you need to insert the same earnings as the final earning item. 
  4. Once you add a new item along with the earnings list it will open up a [Net Pay Locked] window on the screen. Herein, hit the No option and then move on to the next step.
  5. You are supposed to confirm that no changes are made to the [NET Pay] and [tax amounts] and then hit the OK button.
  6. When you see the Past Transaction pop-up message, tap the Yes button. 
  7. Furthermore, opt for the Save & Close option to shut down the paycheck and then hit the Yes button from the Recording Transaction Warning message. 
  8. Later on, try to open the paychecks once again and tap the Paychecks Details button.
  9. Subsequently, you must remove the earnings items that you have recently added to the Earnings section.
  10. Afterward, you must confirm that there are no changes made to the tax amounts and net pay.
  11. In the next step, you must use the same steps again for every paycheck that is stuck in step 2. 
  12. Once you are all sorted, try updating the QuickBooks and download the latest tax table again. 

Drawing to a Conclusion!!

Through this comprehensive post, we hope that the solutions explained above will help you troubleshoot QuickBooks Payroll Error PS038. If you are still receiving the error, then you can communicate with our QB professionals for quick resolution. 

QuickBooks Error 15240 Payroll Update Fail! Learn How to Fix

QuickBooks Error 15240 is a common issue encountered by users when updating their QuickBooks software or payroll services. This error can be frustrating, as it prevents the software from functioning properly. In this blog, we will discuss the causes, symptoms, consequences, and solutions to fix this error 15240 in QuickBooks, ensuring you have all the information you need to resolve this payroll update issues and get back to effectively managing your business finances.

Are you facing payroll update failure with error 15240 in QuickBooks? If so, don’t panic! We’re here to guide and help you troubleshoot this issue. You can call at 1-844-266-9345

What Does the QuickBooks Error 15240 Mean?

Typically, QuickBooks Error 15240 takes place during the payroll update process of QuickBooks Desktop. While trying to update payroll service, QuickBooks users get the following error messages: 

  • “Error 15240: The payroll update was not completed successfully. The file specified cannot be opened.”
  • “Error 15240: The payroll update was not completed successfully. The file exists.”
  • “Error 15240: The update of QuickBooks failed.”
  • “Error 15240: Internet connection error: unknown error.”
  • “Error 15240: The update did not complete successfully. QuickBooks cannot verify the digital signature of the update file.”

This problem can arise due to multiple reasons, including incorrect settings, internet connectivity issues, or administrative privileges about which we will discuss in the next section. Certainly, understanding these root causes will help you troubleshoot the error with the most appropriate method. 

Also Read: QuickBooks Error PS077

What Triggers the Error 15240 QuickBooks Desktop?

As noted above, there are multiple reasons for facing error 15240 QuickBooks Desktop. Below, we have listed and explained the most common ones: 

Internet Explorer Settings

For web-based functionalities, QuickBooks uses Internet Explorer. Make sure these settings are correct and you’re using the latest versions of Internet Explorer. Else, the incorrect settings and an outdated Internet Explorer version can significantly trigger this error.

Firewall and Internet Security Settings

Sometimes, firewalls or security software block QuickBooks and its related service updates like payroll for Windows security purposes. As a result, it may bring error 15240 QuickBooks Desktop while trying to update the payroll service.

Incorrect Date and Time Settings

If your computer system’s date and time settings are incorrect, it can lead to issues with verifying security certificates. These security certificates are essential while updating QuickBooks or its services like payroll. Thus, the incorrect date and time settings can also bring error 15240. 

Corrupted QuickBooks Installation

Also, in some cases, a corrupted or incomplete installation of QuickBooks can lead to this error during payroll updates.

Administrative Privileges

Make sure your QuickBooks application is running with administrative privileges and rights. If a user is not running QuickBooks with all these required rights, the software may not be able to access necessary files and services, causing error 15240 QuickBooks Desktop payroll update errors. 

Read More: QuickBooks Error 6177

Signs to Catch QuickBooks Update Error 15240

Identifying the signs of the update error 15240 in QuickBooks Desktop can help users diagnose the issue and choose the most appropriate method to fix it. Let’s have a quick look at the signs given below:

  • Error Message 15240 

One of the most obvious symptoms a user can encounter is the QuickBooks error message 15240. Usually, users get a message reading, “Error 15240: The payroll update did not complete successfully.”

  • Update Failure 

Due to the occurrence of the QuickBooks 15240 error, users are unable to download the latest updates of their QuickBooks payroll service. 

  • Unexpected Freezing of Software

Another sign a user can notice with QuickBooks update error 15240 is the unexpected freezing of the running Windows programs, including QuickBooks. 

  • Message for Digital Signature 

When a user fails to update QuickBooks payroll service due to the error 15240, they may get messages related to the Digital Signature verification. 

  • Slow Performance of QuickBooks 

Technical problems like payroll update error 15240 can significantly affect the performance of the QuickBooks software. As a result, a user might face slow performance, crashes, or unresponsiveness of QuickBooks. 

Also Know: QuickBooks Error Code 80070057

How Does the QuickBooks Update Error 15240 Hamper User’s Workflow?

The QuickBooks update error 15240 can significantly disrupt a user’s workflow by hindering essential operations within the software. Take a look at the below consequences to see how this error can impact productivity and day-to-day tasks:

  1. Interruption in QuickBooks Payroll Updates 

QuickBooks updates are crucial for accessing new features, implementing bug fixes, and incorporating security patches. When error 15240 occurs, it holds the update process, leaving the software outdated. Eventually, it can prevent users from accessing the latest tools and improvements, potentially leading to further bugs and security vulnerabilities.

  1. Causes Software Instability

Also, the QuickBooks update error 15240 makes QuickBooks unstable or prone to crashing due to the missing updates. This instability can cause frequent disruptions, requiring users to restart the software repeatedly. Certainly, such interruptions can be time-consuming and frustrating, decreasing overall productivity.

  1. Hampers Payroll Processing

For businesses relying on QuickBooks for payroll, error 15240 can be a major disruption. The error can prevent payroll updates from being downloaded and applied, which means payroll calculations may be incorrect. As a result, it can lead to issues such as incorrect tax calculations, delayed paychecks, and compliance problems with tax authorities.

  1. Delays Financial Reporting

Undoubtedly, QuickBooks is a vital tool for financial reporting and analysis. But, the QuickBooks error 15240 can delay the update process, which may include important patches for report generation features. Eventually, users might face difficulties in generating accurate financial reports, affecting decision-making and financial planning.

  1. No Access to the Improvised or Latest Features 

As noted above, QuickBooks updates often include new features designed to enhance user experience and efficiency. The error 15240 prevents these updates from being installed, meaning users miss out on potentially beneficial functionalities. However, it can result in a less efficient workflow and reliance on outdated methods.

How to Fix QuickBooks Error 15240? Expert Solutions! 

Resolving the payroll QuickBooks Error 15240 involves several troubleshooting steps. Below, we have explained the expert solution methods to help you. Follow these solutions to fix the error and restore normal payroll functionality to your QuickBooks software. 

Solution Method 1 – Verify the Correct Date and Time Settings

Verify the correct date and time settings

As has been noted, the incorrect date and time settings can majorly cause issues with security certificate verification, leading to payroll update error 15240 in QuickBooks. To verify and correct these settings:

  1. Firstly, right-click on the clock in the system tray (bottom-right corner of the screen). Next, select “Adjust date/time.”
  2. Following this, you need to make sure that the date and time are correct. If not, click on “Change date and time” and set the correct values.
  3. Now, choose the “Internet Time” tab, and click the change settings option. Afterward, select the box for “Synchronize with an Internet time server” and choose a server from the drop-down menu.
  4. Finally, you must choose the Update Now option, and then the OK button. Once you’ve corrected the date and time settings, now check the QuickBooks update error 15240. If the error 15249 still remains, move on with the next method. 

Solution Method 2 – Check your Internet Explorer Settings

Internet explorer settings

It’s essential to run an updated Internet Explorer version with its correct configuration and settings. Else, while trying to update the QuickBooks payroll service, users may face issues related to the web-based functionalities leading to the error 15240. Therefore, perform the given method and check these aspects: 

  1. Firstly, click on the Start menu or the search bar. Now, enter “Internet Explorer” and directly choose it from the appearing search results to open the browser.
  2. Next, choose and hit the gear icon (Tools) available in the upper-right corner of the Internet Explorer window.
  3. In this step, select “Internet options” from the dropdown menu, and then from the Internet Options window, move to the Security tab.
  4. Here, you need to ensure that the security level for the Internet zone is set to “Medium-high.” If it’s not, adjust the slider to set it to “Medium-high.”
  5. Following this, select the “Apply” button, and then hit the “OK” option. Afterward, you need to check the Advanced settings
  6. Click the Advanced tab by navigating to the Internet Options window. Here, keep scrolling down and then select the Security section. 
  7. Following this, you need to confirm that the boxes for Use TLS 1.0, Use TLS 1.1, and Use TLS 1.2 are tick-marked. If not, tick-mark the boxes. 
  8. Finally, you need to clear the SSL state, and hit the Apply and OK buttons. 

Solution Method 3 – Configure Firewall and Internet Security Settings

Configure firewall and internet security settings

If the above method hasn’t worked to troubleshoot the QuickBooks update error 15240, let’s try configuring the Firewall and Internet security settings. For this, you must carefully perform the steps below: 

  1. Initially, you need to add QuickBooks to the Firewall Exceptions list. For this, open the Run box (Windows + R), type control Panel, and hit the Enter option. 
  2. Next, go to the system and security tab, click the Windows Defender Firewall. Here, in this window, click on “Allow an app or feature through Windows Defender Firewall” on the left pane.
  3. Now, choose the Change settings option, and search for QuickBooks in the list of allowed apps and features. If you can’t find QuickBooks, you must click the “Allow another app…” option given at the bottom.
  4. Following this, click “Browse,” navigate to the QuickBooks installation folder, and select the QuickBooks executable file (QBW32.exe)
  5. Next, click the “Add” option, and make sure that both “Private” and “Public” checkboxes are checked for QuickBooks.
  6. After this, hit the OK option to save the changes. 
  7. Coming to the next step, now go to the Windows Defender Firewall window and click the Advanced settings on the left pane.
  8. Here, choose the Inbound Rules, and then click the New Rule. Following this, choose Port and then click the Next option. 
  9. Afterward, select TCP, and choose the Specific local ports
  10. Done? Now, carefully enter the port numbers for your version of QuickBooks, and choose the Next option. 
  11. Finally, allow the connection, name the new rule, and repeat all the above steps for Outbound Rules
  12. Once done, check for the QuickBooks error 15240 while updating payroll service. If you again see the same error message, let the following solution help you fix it. 

Solution Method 4 – Repair the QuickBooks Installation (If Corrupted)

Did you check your QuickBooks installation? As we have already explained, the corrupted installation can bring update issues like error 15240 in QuickBooks. Check the steps below to repair the QuickBooks installation (if required). 

  1. Firstly, we suggest you create an essential backup file for your QuickBooks data. 
  2. Once you have created the backup file, now restart your computer and close all the running Windows programs. 
  3. Next, open the Run box, type control panel, and directly tap the Enter key. Afterward, from the Control Panel, choose the Programs, and then the Programs and Features tab. 
  4. Right after this, search for QuickBooks Desktop from the list of all the installed programs on your computer system. 
  5. In the next step, once you find QuickBooks, click the same, select it, and choose the Uninstall/Change button. 
  6. Further, click the Repair alternative, and start the repairing process by choosing the Next option. 
  7. Following this, perform the prompts provided by the QuickBooks Installer. Next, once the repair process is complete, click “Finish.”
  8. Finally, restart your computer system, and check for the occurrence of error 15240 QuickBooks Desktop while updating the QuickBooks payroll service

Solution Method 5 –  Verify QuickBooks Payroll Subscription

A lapse or issue with your QuickBooks Payroll subscription can also cause Error 15240. To verify and rectify this:

  1. Initially, you must launch your QuickBooks Desktop application ensuring no other Windows applications are running in the background.
  2. In the next step, you must move to the “Employees” menu, and continue choosing the “My Payroll Service” option. 
  3. Now, click the “Account/Billing Information,” and make sure that your payroll subscription is active.
  4. However, if it’s not, follow the prompts to renew your subscription.
  5. Afterward, once you have successfully verified the payroll subscription, now you must try updating your QuickBooks payroll service.

Also See: QuickBooks Error PS032

Preventive Measures to Avoid QuickBooks Error 15240 in the Future 

To prevent future occurrences of QuickBooks Error 15240, consider implementing the following best practices:

  • Ensure that you regularly update your QuickBooks Desktop software and payroll services to the latest versions.
  • Always keep your computer system’s date and time settings accurate.
  • Use stable and secure internet connections when updating QuickBooks or related services such as payroll.
  • It’s essential to properly configure your firewall and security software to allow QuickBooks payroll service updates.
  • Always try to run QuickBooks with administrative privileges and rights to avoid access-related issues.
  • It’s a must to regularly check and verify your QuickBooks Payroll subscriptions to avoid any expiration that could cause payroll update errors.
  • You must regularly backup the QuickBooks company data to prevent data loss during QuickBooks service updates or troubleshooting processes.

Ask Our Expert Support Team for More..! 

So, here we end this blog! QuickBooks Error 15240 can prevent users from maintaining smooth financial operations. By understanding the causes, symptoms, and trying solutions for this error given above, you can effectively troubleshoot and resolve it. But, if you continue to face payroll update issues with this error 15240, you must contact our QuickBooks support team for further professional assistance via our available Live Chat Support option. 

Facing QuickBooks Error PS077? Here’s What To Do Next

Intuit’s QuickBooks program is a vividly used accounting software that helps businesses efficiently manage their finances. Despite its popularity and robustness, users may encounter various errors while using the software. One such error is QuickBooks Error PS077. This error typically occurs during the payroll update process and can be quite frustrating for users. In this comprehensive guide, we will delve into the causes, symptoms, and solutions for these problematic payroll issues. 

Hey, wait! You can contact our QuickBooks expert team at 1-844-266-9345  for immediate and professional support. 

What Does the QuickBooks Error PS077 Mean? 

QuickBooks Error PS077 is the most common error that occurs when users attempt to download or install the latest payroll updates in QuickBooks. This error reflects issues related to payroll subscription validation, incorrect service keys, or problems with the QuickBooks installation. 

QuickBooks Error PS077 is an error code that appears when users attempt to download or install payroll updates. This error can prevent users from accessing the latest payroll updates, which are essential for accurate tax calculations and compliance with current regulations.

Also, users typically get an error message that reads something like:

Or

This error message indicates that there is an issue with downloading or installing the payroll updates in QuickBooks. 

What Triggers the PS077 Error in QuickBooks Desktop?

Multiple factors can contribute to the occurrence of PS077 error in QuickBooks Desktop. By understanding these causes, users can more easily fix this error and avoid its occurrence in the future. Below we have listed the common causes including,

  • Invalid Payroll Subscription: Make sure your payroll subscription is active. The inactive, expired, or subscription with internal issues can trigger the error PS077.
  • Incorrect Billing Information: Mismatched or incorrect billing information associated with your payroll subscription can also trigger issues when downloading payroll updates.
  • Outdated QuickBooks Version: Using an outdated version of the QuickBooks software that is not compatible with the latest payroll updates can result in payroll update issues like error code PS077.
  • User Account Control (UAC) Issues: Check the issues with User Account Control settings in Windows. Certainly, any problem with UAC settings can interfere with the payroll update process and trigger the PS077.
  • Corrupted or Damaged Company File: Any corruption or damage in the QuickBooks company file or payroll-related files can lead to the PS077 error in QuickBooks Desktop.
  • Inadequate Administrative Privileges: If you miss the required administrative privileges, you may meet such payroll update errors. Always run the QuickBooks software with sufficient and required administrative privileges to prevent issues like PS077 while completing updates successfully. 
  • Damaged Payroll Tax Table File: Even the corrupted or damaged payroll tax table file can prevent payroll updates from being installed properly. If so, make sure to fix these payroll tax tables first and then try updating the QuickBooks payroll service. 
  • Partial or Incomplete Installation of QuickBooks: One of the main reasons for facing PS077 error in QuickBooks Desktop is the incomplete or partial QuickBooks installation. If the program has not been installed correctly or is missing important components, it can lead to errors during payroll updates.
  • Internet Connectivity Issues: A strong internet connection is the need of the hour while downloading updates related to QuickBooks services like payroll. However, if there is any problem with your internet connection, it can interrupt the download or installation of payroll updates, resulting in payroll update error PS077.
  • Third-Party Software Interference: Additionally, the security software or other third-party programs can also interfere with QuickBooks operations and services. As a result, it can cause payroll update errors like PS077 during the update process.

Also Read: QuickBooks Payroll Error PS038

How Does a User Notice the QuickBooks Error PS077 Windows 11?

By understanding the symptoms of QuickBooks Error PS077 Windows 11 can help users identify the issue quickly and take appropriate action. For your help, we have listed the common symptoms include:

  1. Error Message: A pop-up error message that reads, “QuickBooks has encountered a problem and needs to close. We are sorry for the inconvenience.” or “Error PS077: QuickBooks is having trouble installing payroll tax table update.”
  1. Update Failure: A user who faces error PS077, can also encounter an inability to download or install the latest payroll updates.
  1. Performance Issues: Additionally, the slow performance of QuickBooks or frequent freezing during payroll update operations can be seen with the error PS077.
  1. Data File Issues: Problems opening company files or specific payroll-related files are also related to the QuickBooks error PS077 Windows 11

Read More: QuickBooks Error PS032

Consequences of QuickBooks Error PS077 Windows 11 and 10

The error PS077 in QuickBooks can have several consequences for users operating on Windows 11 and 10. These consequences can impact the functionality and efficiency of the software, as well as the overall workflow of the business. Let’s have a quick look at some potential consequences given below:

Inability to Download Payroll Updates

  • Impact: Users may not be able to download and install the latest payroll updates.
  • Consequence: This can lead to outdated tax tables and calculations, which might result in inaccurate payroll processing.

Disrupted Payroll Processing

  • Impact: Due to the occurrence of QuickBooks error PS077 Windows 11 and 10, the payroll operations may be halted or disrupted.
  • Consequence: Employees might not receive their paychecks on time, leading to dissatisfaction and potential legal issues.

Compliance Issues

  • Impact: Without the latest updates, payroll calculations might not comply with current tax regulations.
  • Consequence: This can result in fines, penalties, and audits from tax authorities.

Data Corruption

  • Impact: Attempting to update payroll with an error present can lead to data corruption.
  • Consequence: Also, the QuickBooks error PS077 windows 10 and 11 can bring corrupted payroll data to the users. As a result, it can cause further errors and issues within QuickBooks, complicating the resolution process.

Performance Degradation

  • Impact: QuickBooks may run slowly or become unresponsive.
  • Consequence: This can hinder productivity and cause frustration among users trying to manage other accounting tasks.

Increased Downtime

  • Impact: Resolving Error PS077 can take time, especially if extensive troubleshooting is required.
  • Consequence: This downtime can disrupt business operations and delay critical financial tasks.

Loss of Data Integrity

  • Impact: Persistent errors and unsuccessful updates can affect the integrity of payroll data.
  • Consequence: This might lead to incorrect financial reporting and decision-making based on inaccurate data.

Additional Costs

  • Impact: Fixing the error might require professional assistance or extended support.
  • Consequence: This can result in additional expenses for the business, including potential fees for technical support or services.

Employee Morale

  • Impact: Delays in payroll processing and payment errors can affect employee morale.
  • Consequence: Dissatisfied employees may have reduced productivity and could potentially seek employment elsewhere.

Security Risks

  • Impact: Failing to keep payroll systems updated due to QuickBooks error PS077 can expose vulnerabilities.
  • Consequence: This can increase the risk of security breaches and data loss, impacting sensitive employee information.

How to Fix QuickBooks Error Code PS077?

Fixing QuickBooks Error PS077 involves several troubleshooting steps. Follow these solutions in sequence to resolve the error effectively:

Troubleshooting Approach 1 – Verify your Payroll Active Subscription

Verify your payroll active subscription

Verifying your payroll subscription in QuickBooks is an essential step to ensure that your payroll updates and services function correctly. Here are the steps to verify your payroll subscription:

  1. Begin by first opening your QuickBooks application. Now, sign in to your company file with your administrator credentials.
  2. Right after this,  from the top menu bar, you must click the “Employees” tab, and go to the dropdown menu to select “My Payroll Service.”
  3. Next, from the “My Payroll Service” submenu, click on “Account/Billing Information.” By this, a new window will open on your screen where you can manage your payroll subscription details.
  4. Following this, enter your Intuit account credentials (the same you use for payroll services) and sign in once you are prompted to sign in to your Intuit account. 
  5. Here, once signed in, you will see your payroll service details. Now, start looking for the status of your payroll subscription. It should show as “Active.”
  6. Now, you must verify the expiration date to ensure your subscription is current and not about to expire.
  7. Also, here you must check the billing information to ensure it is accurate and up-to-date.
  8. If you find any discrepancies or outdated information, click on the “Edit” button to update your billing details.
  9. After updating any necessary information, you must review your changes and confirm them.
  10. Finally, click the “Save” or “Update” button to make sure your new details are successfully recorded.

Learn More: Upgrade QuickBooks Desktop to 2024

Troubleshooting Approach 2 – Run QuickBooks as Administrator with Authentic Credentials 

Running QuickBooks as an administrator can help resolve various issues, including those related to permissions and updates like QuickBooks error PS077. Check the below steps to run QuickBooks as an administrator:

  1. Before you begin, make sure QuickBooks is not currently running. If it is, close the application.
  2. In the next step, you must locate the QuickBooks icon on your desktop or in the Start menu.
  3. Afterward, right-click the QuickBooks icon to open the context menu. 
  4. From the context menu, select “Run as Administrator.” By this, a new window will display on your screen where you need to open QuickBooks with administrative privileges.
  5. If prompted by the User Account Control (UAC), click “Yes” to allow QuickBooks to make changes to your computer system.
  6. Finally, once your QuickBooks opens, you must log in to your company file using your administrator credentials. 
  7. Also, check whether you are now able to update the QuickBooks payroll or not. If not, let’s implement the next troubleshooting method. 

Troubleshooting Approach 3 – Reinstall your QuickBooks Desktop Using Clean Install Tool

Reinstall your QuickBooks Desktop Using Clean Install Tool

Reinstalling QuickBooks using a clean install involves uninstalling the software, renaming the installation files, and then reinstalling QuickBooks. This process can help resolve issues caused by corrupted files or other software-related problems. Follow these steps to start performing the clean install of your QuickBooks program:

  1. Firstly open the Control Panel. For this, specifically follow the instructions below for Windows 10 and 11:
    • On Windows 10: Click on the Start menu and type “Control Panel” in the search box, then select it from the results.
    • On Windows 11: Click on the Start button, type “Control Panel” in the search bar, and select it from the list.
  2. Next, from the Control Panel, you must select “Programs and Features.” Continue to scroll through the list of installed programs to find your version of QuickBooks.
  3. Following this, choose the QuickBooks program from the list and click on “Uninstall.” Now, strat performing the on-screen instructions to complete the uninstallation process.
  4. In the next step, you must move to the official Intuit website and download the QuickBooks Clean Install Tool.
  5. Afterward, locate the downloaded file (usually in your Downloads folder) and double-click to run it.
  6. Here, you will see some mandatory on-screen instructions, and perform them to proceed with the clean install process.
  7. Now, select your QuickBooks version and click the “Continue” option.
  8. By doing so, the Clean Install Tool will automatically rename your old installation folders to allow QuickBooks to create new ones during reinstallation.
  9. If you don’t have the QuickBooks installer, you can also download it from the official Intuit website. But, make sure you download the version that matches your product and license.
  10. Double-click the downloaded installer file to start the installation process, and follow the on-screen instructions to proceed with the installation.
  11. When prompted, enter your QuickBooks license and product numbers. You can typically find them in the confirmation email you received when you have purchased QuickBooks or on the original packaging.
  12. Select the type of installation you prefer: “Express” (recommended) or “Custom and Network Options” (for advanced users).
  13. Finally, you must follow the remaining prompts to complete the QuickBooks installation process. This may take several minutes. Finally, you must activate the QuickBooks software product

Troubleshooting Approach 4 – Repair your QuickBooks Program Installation

QuickBooks Program Installation

Repairing the QuickBooks installation can help resolve issues like QuickBooks error code PS077 caused by corrupted or damaged files. Let’s have a quick check at the below steps to repair your QuickBooks installation on Windows 10 and 11:

  1. Firstly, before starting the repair process, you must ensure to back up your QuickBooks company file to avoid any data loss.
  2. Next, ensure that QuickBooks is closed before proceeding with the repair. On Windows 10, you need to click on the Start menu, type “Control Panel” in the search box, and select it from the results. However, on Windows 11, click the Start button, type “Control Panel” in the search bar, and select it from the list.
  3. In the Control Panel, you’re required to select “Programs and Features” or hit the “Uninstall a program” button under the category of Programs.
  4. Following this, continue to scroll through the list of installed programs to find your version of QuickBooks.
  5. Further, hit the QuickBooks to select it and then continue clicking the “Uninstall/Change” (or “Change”) at the top of the list. By this, the QuickBooks installation window will open on your screen.
  6. Here, in the installation window, choose the “Repair” option and start the repair process.
  7. Now, you must follow the prompts provided by the QuickBooks installation wizard to complete the repair. This process may take several minutes, so wait accordingly. 
  8. Finally, successfully complete the repair process by restarting your computer. 

Know More: QuickBooks Error H202

Troubleshooting Approach 5 – Update your QuickBooks to the Latest Version

Update your QuickBooks to the Latest Version

Updating QuickBooks to the latest version ensures you have the most recent features, security updates, and fixes. Also, it will help you avoid facing issues like QuickBooks error code PS077 Have a look at the steps below to update QuickBooks Desktop to the latest release:

  1. Initially, to start this update process, you need to open your QuickBooks Desktop program on your computer.
  2. Next, in QuickBooks, you need to go to the top menu bar and click the “Help” option.
  3. Following this, you must come to the appearing dropdown menu to choose the “Update QuickBooks Desktop” tab.
  4. Afterward, in the Update QuickBooks window, move to the “Update Now” tab.
  5. Now, you must clear all previous update downloads, for this, you must put a check in the “Reset Update” box.
  6. Now, click the “Get Updates” option and start the download process of available updates.
  7. Once the download is complete, restart QuickBooks. You will be prompted to install the updates. Click “Yes” to install the updates.
  8. After the updates are installed, restart QuickBooks to ensure that the updates take effect.

You can also opt for the automatic update method. For this, carry out the following steps below: 

  1. In your QuickBooks application, visit the “Help” menu and further select the “Update QuickBooks Desktop” tab.
  2. In the Update QuickBooks window, go to the “Options” tab.
  3. To turn on automatic updates, select “Yes” for the option “Automatic Update.”
  4. Click “Close” to save your changes. 
  5. Now, retry downloading the QuickBooks Payroll updates. But, if you still notice the QuickBooks error PS077 Windows 10 or 11 messages, let’s check the UAC settings.

Troubleshooting Approach 6 – Check User Account Control (UAC) Settings

As noted above, the settings of User Account Control can prominently sometimes disturb the QuickBooks operations. But, the below steps can help you. You must follow this given method to adjust UAC settings:

  1. Firstly, if you are using Windows 10 and 11, you need to hit the Start menu and enter “Control Panel” in the Search Programs and files box, then continue to select it from the appeared results.
  2. Afterward, within the Control Panel, continue choosing “User Accounts.” Here, click on “Change User Account Control settings,” and it will bring the UAC settings window.
  3. You will see a vertical slider with four levels of security. The default setting is usually one level below the top, which notifies you only when apps try to make changes to your computer.
  4. Now, to reduce the number of prompts or to troubleshoot QuickBooks installation and update issues, you can move the slider down to “Never notify.”
  5. If you are increasing security, you can move it up to “Always notify.” Following this, you must continue adjusting the slider to your desired level, and click “OK.”
  6. If prompted by the UAC to confirm the changes, click “Yes” to proceed.
  7. Finally, for seamless completion of the entire process, ensure the changes take effect, and restart your computer.

Troubleshooting Approach 7 – Check your Billing Information

In case the above methods haven’t resolved the PS077 error in QuickBooks Desktop, check your billing information. Sometimes, the incorrect details can trouble users updating their payroll service. The below instructions will help you to check the billing details: 

  1. Log in to your Intuit account through the QuickBooks software.
  2. Next, move to Billing Information and verify all details.
  3. Update any incorrect information and save changes.

Also See: QuickBooks Error Code 12000

For Further Help, Ask Our Professional Team! 

QuickBooks Error PS077 is undoubtedly a significant hurdle, but with the right troubleshooting steps as given above, it can be resolved efficiently. But, if you continue to experience issues, consider reaching out to our QuickBooks technical support team for further assistance via Live Chat Support.