
 Accounting
A firewall is found to be one of the most important parts of network security, which blocks inbound access for harmful programs and applications for security reasons. Similarly, there are certain instances when a Windows firewall is blocking QuickBooks, which prevents you from opening the company file. Thus, it not only disturbs the ongoing business process but leads to delays in ongoing tasks. Therefore, it is necessary to assign proper permissions to the Windows firewall for the smooth running of the QB program.
In this write-up, we have described all the possible causes along with simple troubleshooting methods to overcome QuickBooks Windows Firewall blocking issues. Thus, it would help you accomplish financial tasks easily with QuickBooks without interruption from the Firewall.
Is the Windows Firewall blocking QuickBooks and you cannot proceed with your accounting tasks? Ring us at+1-866-408-0444 and address the issue quickly by reaching our highly-certified QB professionals.
What Could be the Reasons That Triggers QuickBooks Windows Firewall is Blocking Issue?
If you ever encounter the QuickBooks Windows Firewall blocking issue, it could happen for multiple reasons. So, it is essential to understand the possible causes, which will eventually help you find the right solution for the issue. Below, we have provided you with all the possible causes that might be hampering your smooth running of QuickBooks.
- Misconfigured Settings of the Windows Firewall are one of the reasons that might prevent you from accessing the QuickBooks application.
- You might receive the Windows Firewall blocking QuickBooks issue when the QuickBooks version you are using isn’t supported on your Windows operating system.
- Sometimes, the Windows firewall blocks QuickBooks, interrupting the users when the port utilized by QuickBooks to run webpages isn’t set appropriately.
- In some cases, the Windows Firewall blocks access to the Internet, which prevents users from using the QuickBooks application.
- The users might encounter this issue when the third-party security applications create a security wall preventing users from using the QuickBooks program smoothly.
Preliminary Precautions Before Fixing QuickBooks Database Server Manager Windows Firewall is Blocking Issue
You must keep certain key crucial points in consideration before troubleshooting QuickBooks Database Server Manager Windows Firewall is Blocking issue.
- The first thing you must remember is to ensure the QuickBooks Desktop version you are presently using is the latest one.
- Another crucial point is to test whether your internet connection is set properly.
- Moreover, it would help if you see that the ports in the Windows Firewall are set properly.
Here’s How to fix QuickBooks Database Server Manager Windows firewall is blocking QuickBooks Issue
Once you’ve grasped the possible causes, you can explore the most efficient ways to tackle with QuickBooks Database Server Manager Windows firewall blocking QuickBooks issue. So, let’s have a quick overview of all the possible solutions described below to fix the issue effortlessly.
Fixation Way 1: Adjusting the Firewall Permissions Manually To Fix the Issue
Users working on multiple versions of QuickBooks Desktop on one computer need to set up firewall permissions manually. In that scenario, you need to implement the basic steps provided below.
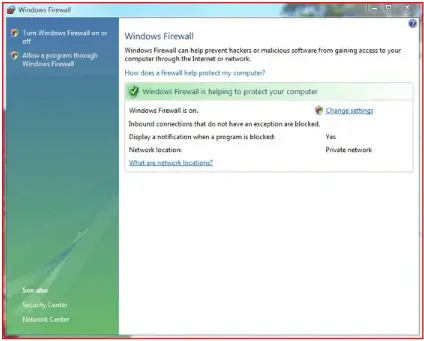
- Primarily, you must launch the Start menu and input “Windows Firewall” in the search panel in the middle of the screen.
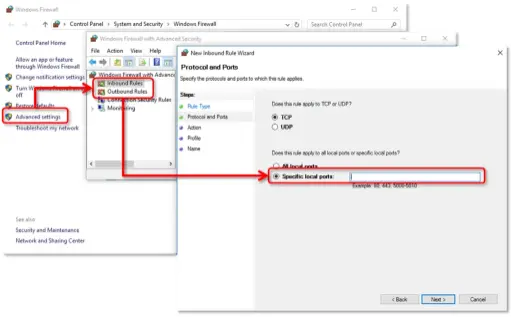
- After this, choose the “Windows Firewall” option to open a new window, from which you can click the Advanced Settings tab.
- Thereon, right-click on the Inbound Rules option and choose the New Rule option > Port > Next.
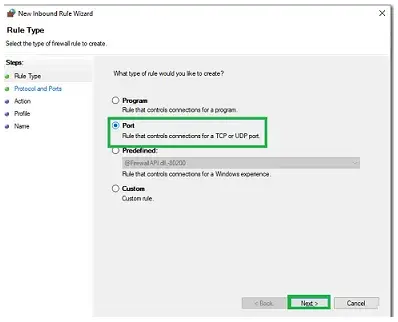
- If you are done with the steps now, check that the checkbox beside the “TCP” is chosen.
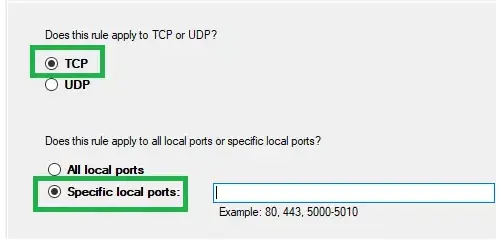
- Furthermore, you must head to the Specific Local Ports field and input the ports associated with your QuickBooks version.
- QuickBooks Desktop 2020 and later: 8019, XXXXX.
- QuickBooks Desktop 2019: 8019, XXXXX.
- QuickBooks Desktop 2018: 8019, 56728, 55378-55382.
- QuickBooks Desktop 2017: 8019, 56727, 55373-55377
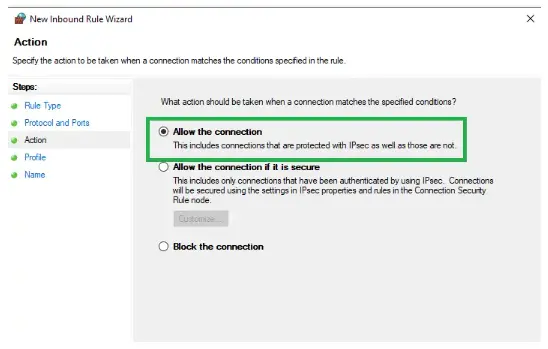
- Once the port number is added, you need to choose the Allow the Connection option and go ahead.
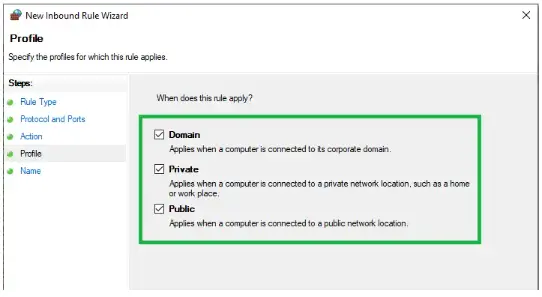
- Now, you must ensure that you have chosen all the profiles and click the Next tab.
- In the next step, you must generate a new rule named “QBPorts(year).”
- Now, choose the Finish tab when you have completed the above steps.
- At last, the users must apply the same steps to the Outbound Rules and then resolve the issue.
Fixation Way 2: Consider Setting up QB as Exception in Windows Firewall
Setting up QuickBooks as an exception in Windows Firewall will let you run the application smoothly without the interruption of security programs. Use the steps outlined below to accurately set up QuickBooks as an exception.
- Primarily, open the Start menu, input “Windows Firewall” in the search panel, and hit the Enter key.
- Secondly, you will discover the Windows Firewall screen, from which you must head to the Advanced Settings option.
- Then after this, start looking for the Inbound Rules, right-click on it, and then move to the New Rule option.
- Done till now, you must proceed to the Program option and then click This Program Path followed by the Browse tab.
- Subsequently, you must locate any one of the executable files through the table illustrated below. Once the above steps are over, then click the Next tab.
- QuickBooks Desktop 2020 and later: 8019, XXXXX.
- QuickBooks Desktop 2019: 8019, XXXXX.
- QuickBooks Desktop 2018: 8019, 56728, 55378-55382.
- QuickBooks Desktop 2017: 8019, 56727, 55373-55377
- As soon you add the port number, choose the Allow the Connection option.
- Now, you must ensure that you have chosen all the profiles and click the Next tab.
- In the proceeding step, you must generate a new rule and name it “QBPorts(year)”.
- Finally, choose the Finish tab, and then you must apply the same steps for the Outbound Rule after winding up the steps.
Fixation Way 3: Ensure Setting up Windows Firewall Exceptions in QuickBooks Program
For setting up Windows Firewall as an exception in QuickBooks program will let you run the application smoothly without the interruption of the security programs. Use the steps outlined below for the accurate setting up of QuickBooks as exception.
- Primarily, you must open the Start menu, input “Windows Firewall” in the search panel, and then hit the Enter key.
- Secondly, you will discover the Windows Firewall screen from where you must head to the Advanced Settings option.
- Then after this, start looking for the Inbound Rules, right-click on it, and choose the New Rule option.
- Done till now, you must proceed to the Program option and then the This Program Path followed by the Browse tab.
- In the next step, what you need is to locate any one of the executable files through the table illustrated below and then click the Next tab.
| AutoBackupExe.exe | C: >> Program Files >> Intuit >> QUICKBOOKS YEAR |
| Dbmlsync.exe | C: >> Program Files >> Intuit >> QUICKBOOKS YEAR |
| DBManagerExe.exe | C: >> Program Files >> Intuit >> QUICKBOOKS YEAR |
| FileManagement.exe | C: >> Program Files >> Intuit >> QUICKBOOKS YEAR |
| File MovementExe.exe | C: >> Program Files >> Intuit >> QUICKBOOKS YEAR |
| QuickBooksMessaging.exe | C: >> Program Files >> Intuit >> QUICKBOOKS YEAR |
| QBW32.exe | C: >> Program Files >> Intuit >> QUICKBOOKS YEAR |
| QBDBMgrN.exe | C: >> Program Files >> Intuit >> QUICKBOOKS YEAR |
| QBServerUtilityMgr.exe | C: >> Program Files >> Common Files >> Intuit >> QuickBooks |
| QBCFMonitorService.exe | C: >> Program Files >> Common Files >> Intuit >> QuickBooks |
| QBLaunch.exe | C: >> Program Files >> Common Files >> Intuit >> QuickBooks |
| QBUpdate.exe | C: >> Program Files >> Common Files >> Intuit >> QuickBooks >> QBUpdate |
| IntuitSyncManager.exe | C: >> Program Files >> Common Files >> Intuit >> Sync |
| OnlineBackup.exe | C: >> Program Files >> QuickBooks Online Backup |
Once again, after adding the ports, you must choose the Allow the Connection option and then move to the Next step.
- If asked, verify that all the profiles are chosen appropriately soon after this and then move ahead.
- Thereafter, it is mandatory to generate a new rule and name it “QBPorts (year).”
- When you are done naming the rule, you must hit the Finish tab, and then you can implement the same rules for Outbound Rules.
Fixation Way 4: Do the Necessary Changes to the Antivirus Software Settings
- In the beginning, you must launch the Start menu and then move to the Settings option.
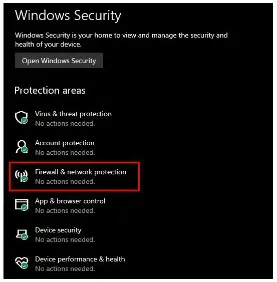
- When you reach the Settings window, you must opt for the Update and Security option and then the Windows Security.

- Thereon, simply browse to the Virus and Protection and access the Manage Settings option to move further.
- Soon after, you need to head towards the Exclusions field and click the Add or Remove Exclusions.
- Finally, you must browse to the QuickBooks option, and you will see that the Windows firewall will not block access to QuickBooks.
Fixation Way 5: Take Help To Resolve the Issue Through the QuickBooks File Doctor Tool
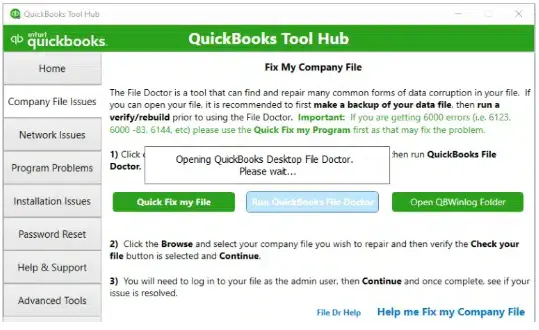
- Before proceeding, you must download and install the most updated version of the QuickBooks Tool Hub on their devices.
- When you have completed the proper setup of the QuickBooks Tool Hub, you must launch it.
- Afterward, you need to choose the QuickBooks File Doctor tab. Then, you must start searching for the company file that is having issues. To locate your data file, click on the drop-down menu and then pick the one to proceed with the procedure.
- Done till now, you must hit the Check your file and network option followed by the Continue tab.
- As soon you click the Continue tab, it will prompt you to mention the admin password properly, and then hit the Next tab.
- Soon after this, you need to hold for a few minutes until you finish the scanning process.
- Finally, you will discover that the “Unsuccessful scan” message will emerge on the screen.
Need More Professional Assistance? Directly Connect With Our QB Professionals
Through this comprehensive guide, we hope you have learned all the possible causes and simple techniques to configure Windows Firewall is blocking QuickBooks issues. If the Firewall is still disturbing you while running QuickBooks, then stop hesitating and immediately communicate with our QB experts at +1-866-408-0444 for quick resolution.
